How to Set Door Access Schedule for Users
- Select the door passage schedule
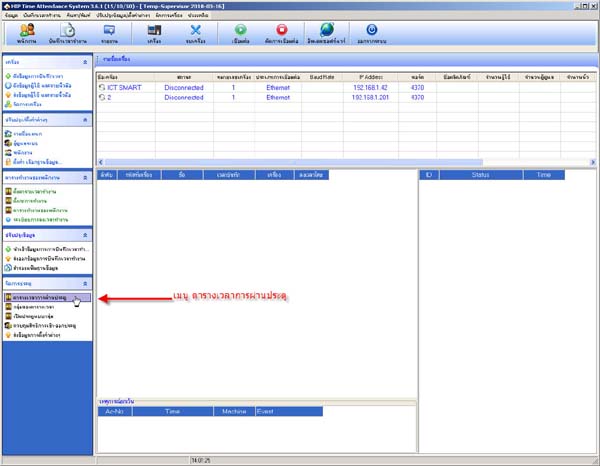
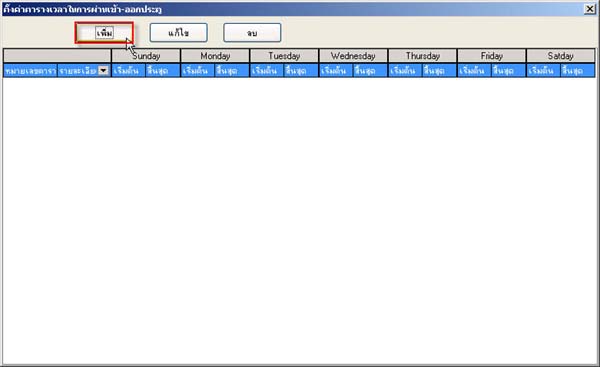
- Click the Add button to add a Time Zone for the user's door entry and exit, specifying what time or day the user
can access the door
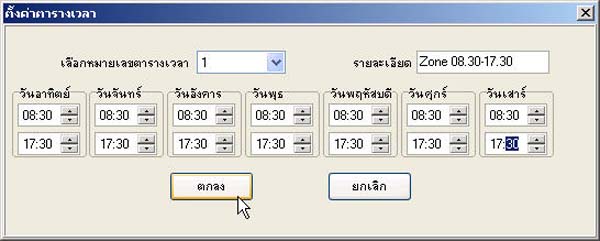
- In this window, specify what time or day the user can pass through the door
(If you want the user to have access at all times, set the time to 00.00-23.59)
(Or if you want the user to have no access at all, set it to 00.00-00.00)
- After that, enter the name of the Time Zone and click the OK button
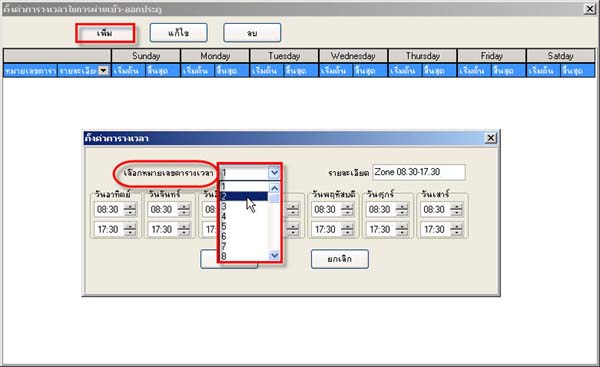
- If you want to add another Time Zone, click the Add button and in the Select schedule number field,
select the next number after the first one - After clicking the OK button, if you want to edit, click the Edit button or if you want to delete, click the Delete button
- Then go to the Schedule Group menu
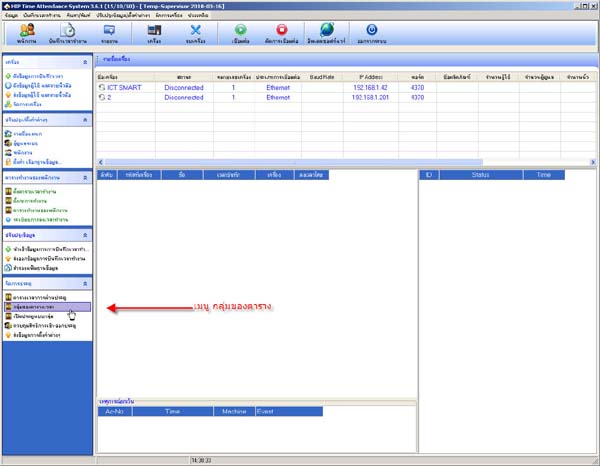
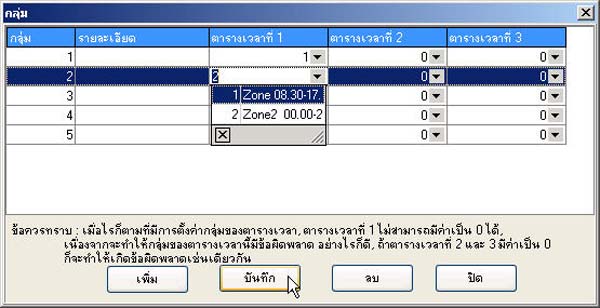
- In this window, for each group, select which Time Zone you want to be in the group, then click Save
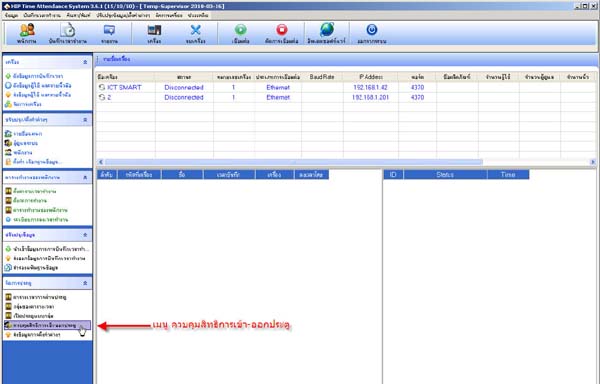
- Then go to the Door Access Control menu
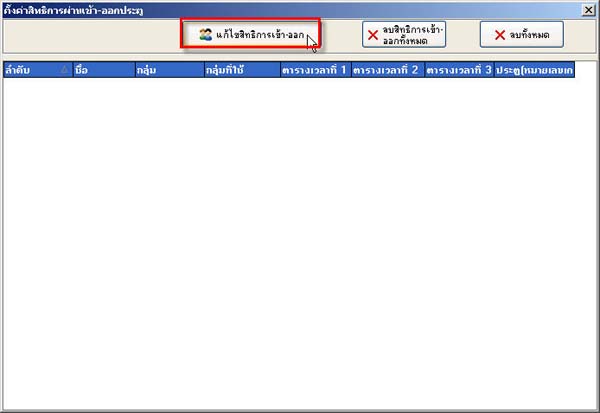
- Click the Edit Access Rights button
- Select the user you want to assign a Time Zone to, then move the user name to the right side
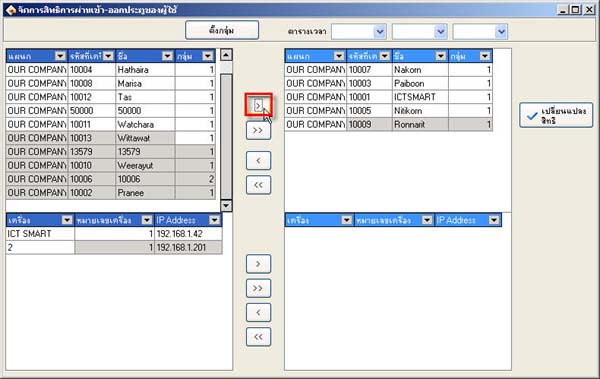
- Select the Time Zone for the user, then move the scanner device names that need to send the Time Zone value to the right window
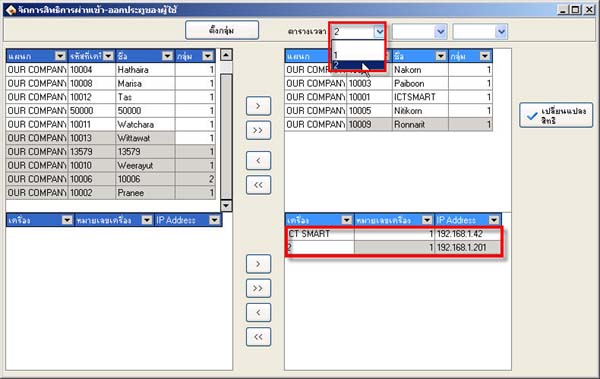
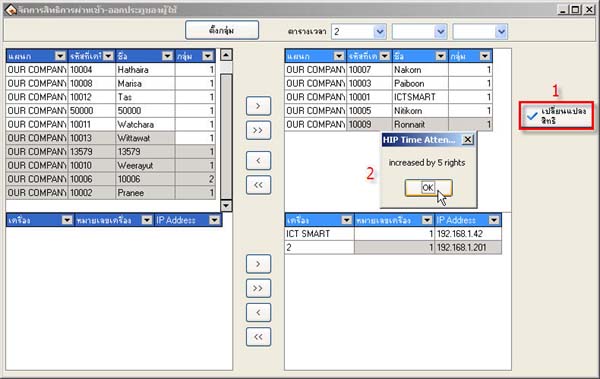
- Click the Change Rights button, then click the OK button and close this window
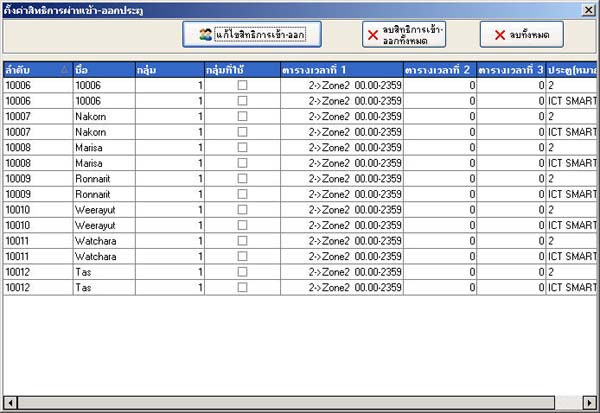
- The information about the creation of the door entry and exit schedule for the user is displayed in this window
(If you want to delete the door access rights, click the Delete All Access Rights button)
(Or if you want to delete all the door entry and exit schedule settings, click the Delete All button)
- Then close this window
- Then connect the scanner device to send the door access rights to the scanner
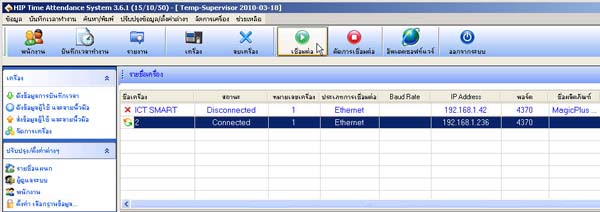
- Then go to the Send Settings menu
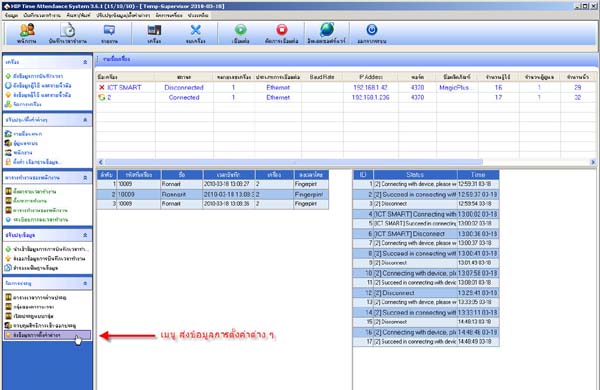
- A message will appear. Check the boxes next to Device Settings and User Settings, then click the OK button
