ZK Attendance Management V.3.6.2 Usage Guide
Search
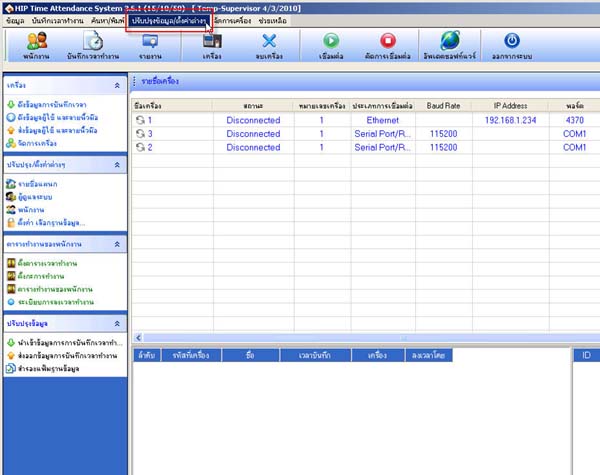
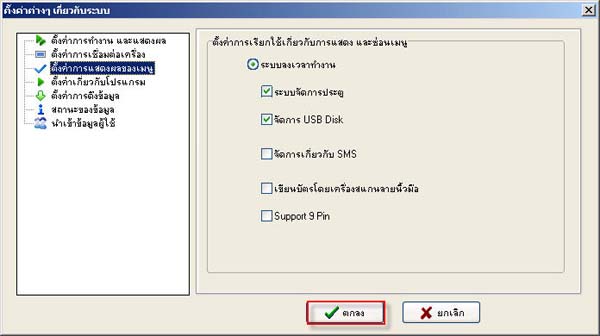
- Go to the menu Update information/Various settings
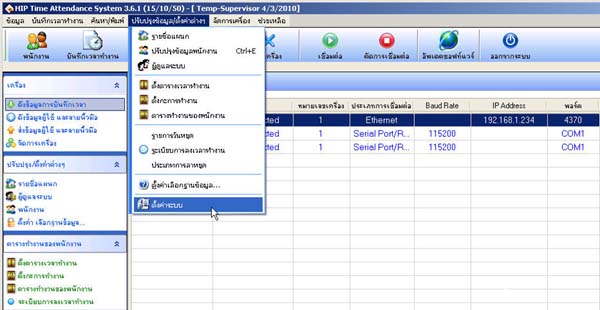
- Select System Settings
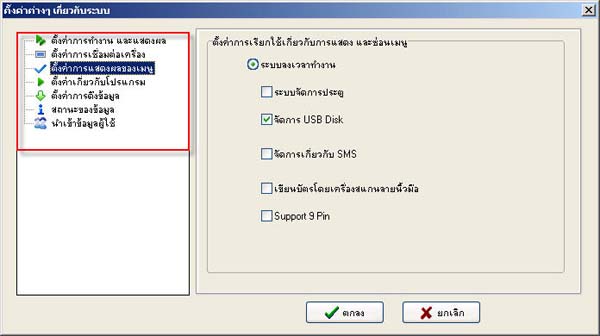
- Select the topic Menu Display Settings
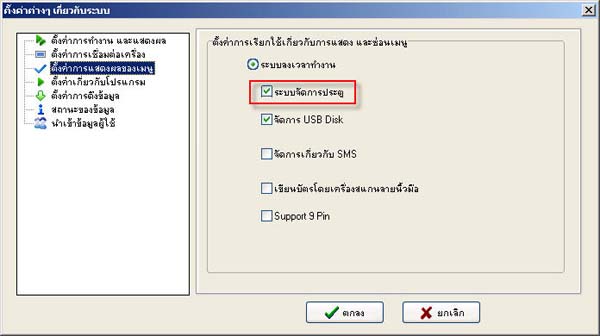
- Check the checkmark in front of the topic Door Management System
- When finished, click the OK button
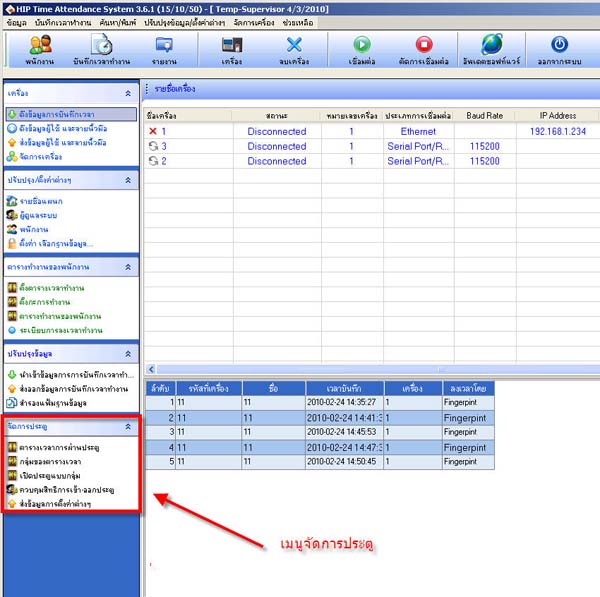
- Then the menu will appear on the left side of the program
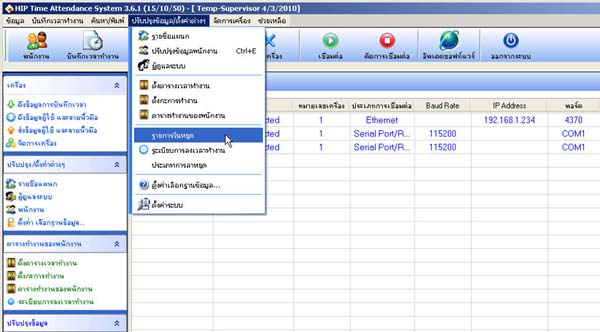
- Go to Update Information/Settings
- Select Holiday List
- In the Holiday List field, enter what type of day the holiday is for
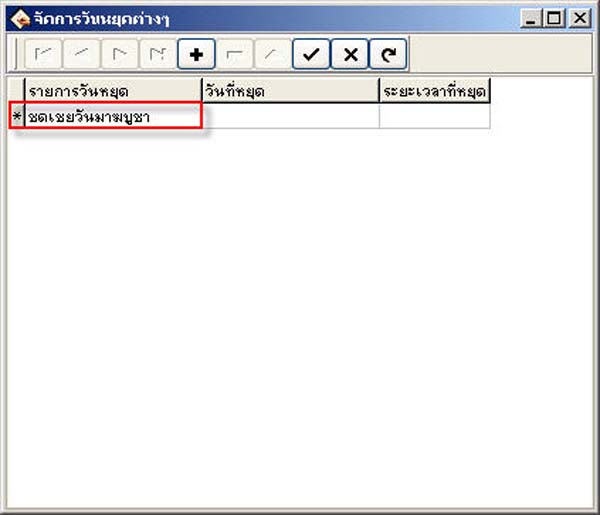
- In the Holiday Date field, enter the day, month, and year
(Must be entered according to the date format set on your computer)
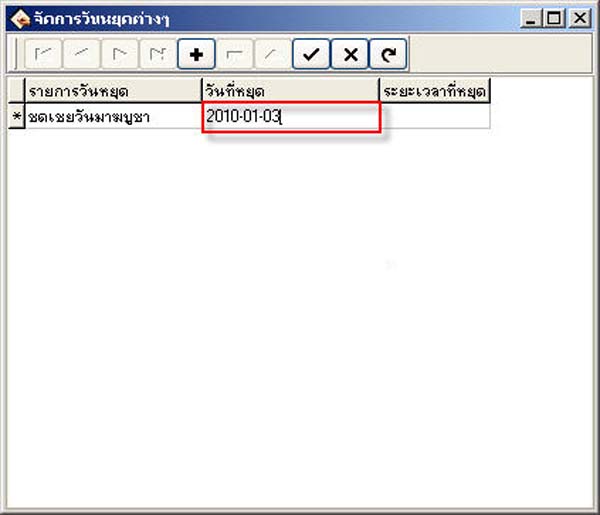
- In the Holiday Duration field, enter the number of days you want to set as a holiday
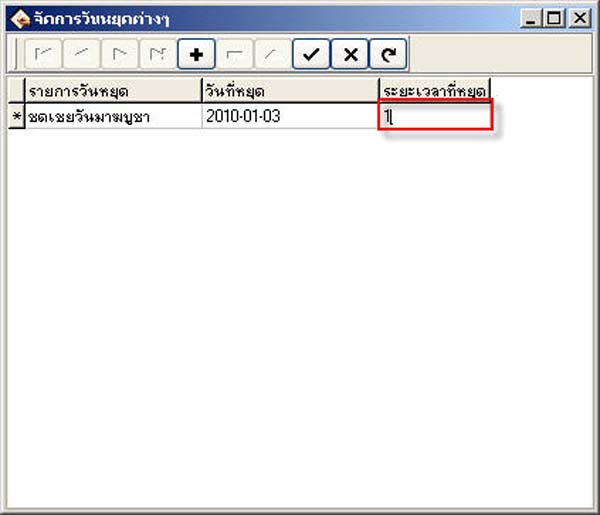
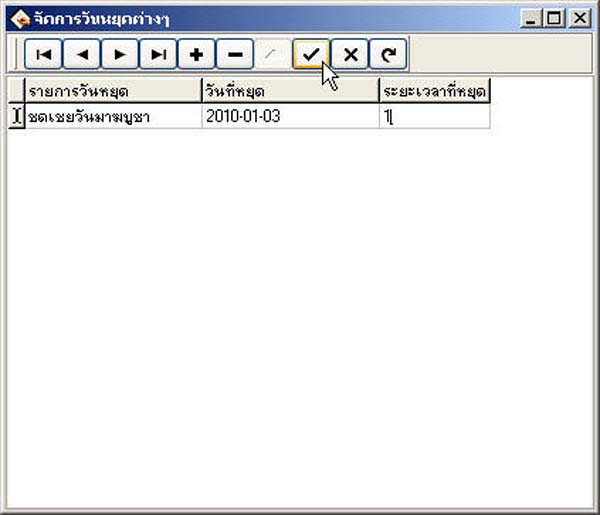
- Then click the checkmark button to save
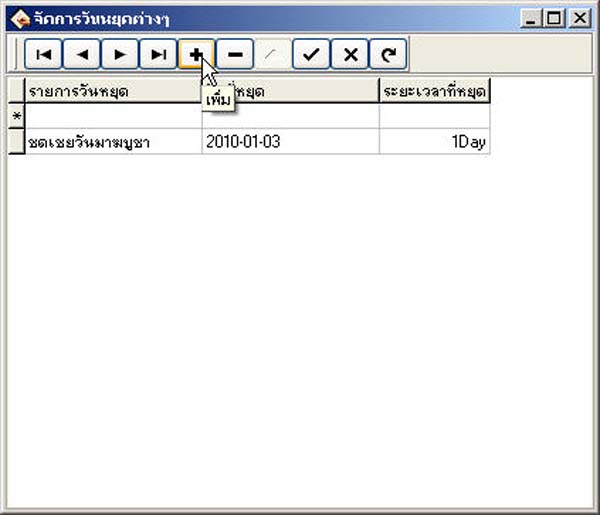
- To add more, click the plus button and enter the desired holiday dates
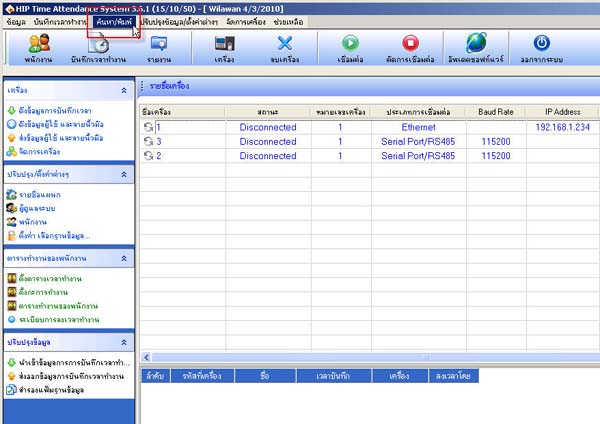
- Go to the Search/Type menu
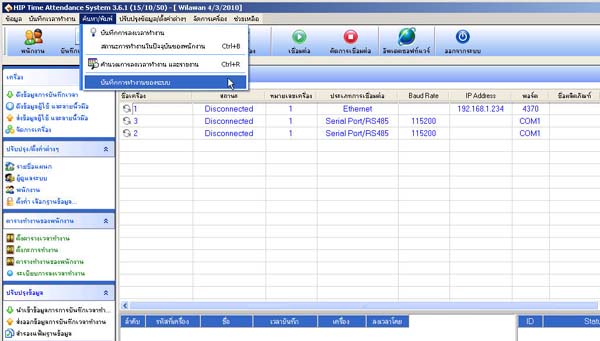
- Select System Activity Log
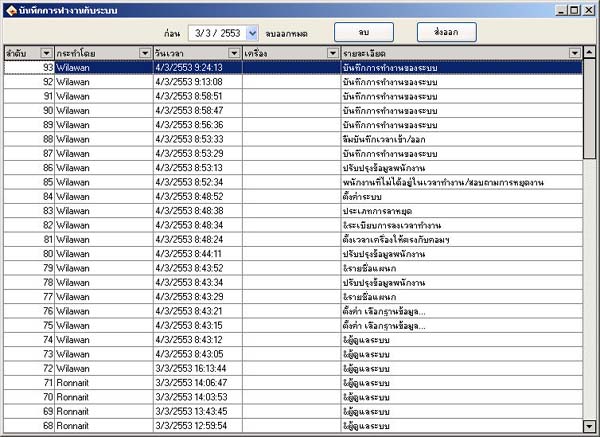
- Then the system activity log window will appear
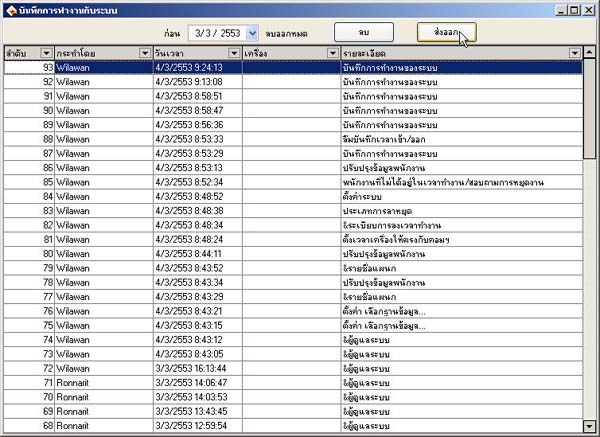
- If you want to export the data, click the Export button
- Then select the topics you want to display (if you don't want any topic to display, uncheck that topic)
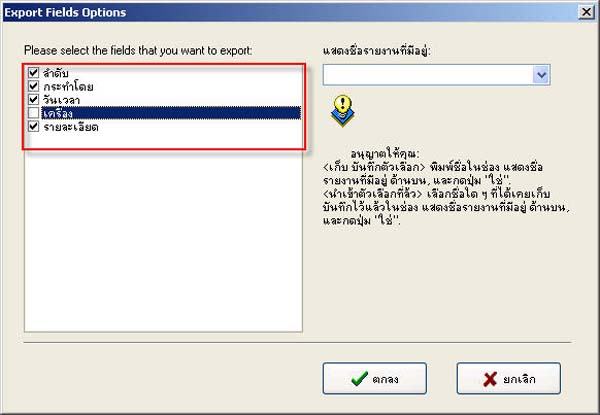
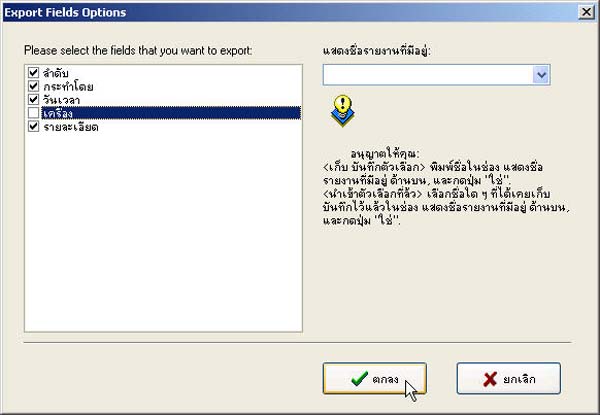
- Click the OK button
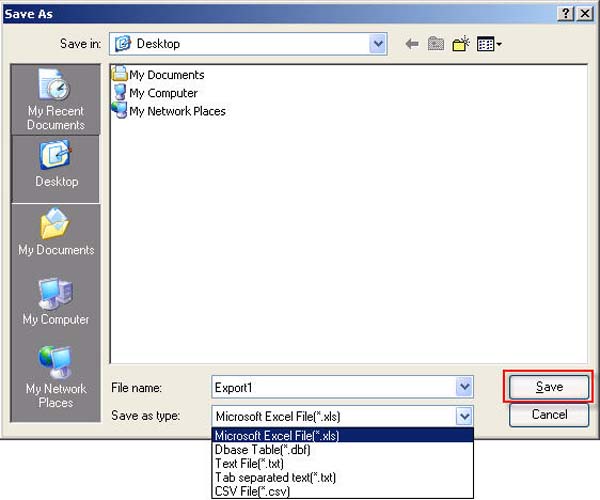
- Done. Name the file and select the file extension, then click the Save button
- Go to the Administrator menu

- Click the Administrator button

- Select the highest level administrator (this selection is recommended)

- Select Department (if the department has not been set up yet, select OUR COMPANY to display the user list)

- Select the user you want to set as system administrator

- Click the OK button

- Then a message box will appear, click the OK button

- Select the various items that can be authorized to use (if you want to select all, click the green checkmark)

- Then click the OK button

- The system administrator list will be displayed

- Click the Change Password button

- In the Old Password field, enter the old password (which is the password in the Machine Code field)

- In the New Password field, let the user set a new password

- Click the OK button

- Close the program and open it again
- Then in the Username field, enter the user's ID number

- In the Password field, enter the password number that you just set

- Done, click the Login button

- Go to the Employee menu
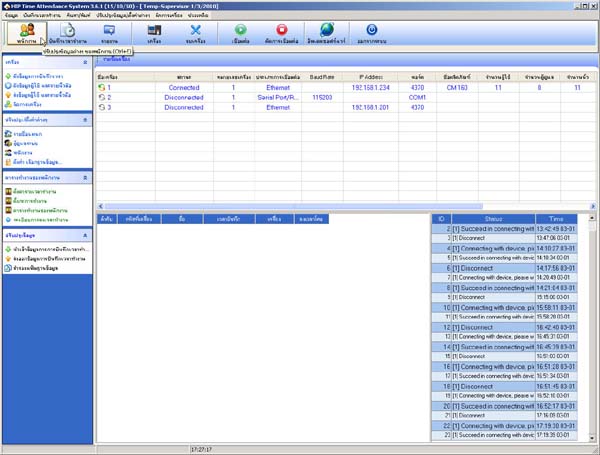
- Select the department (if there is no department yet, select OUR COMPANY)

- Click the Add button

- Enter the user's ID in the Scanner ID field

- Enter the user's name in the Name field

- In this section, enter the user's information (optional)

- In the Permission field, set it to User

- Enter the card number in the Card Number field (for example: 0001126587 017,19555 enter only the numbers after the space)

- In the Image field, you can upload a photo for the user

- When finished, click the Save button

- Then send the user list to the scanner
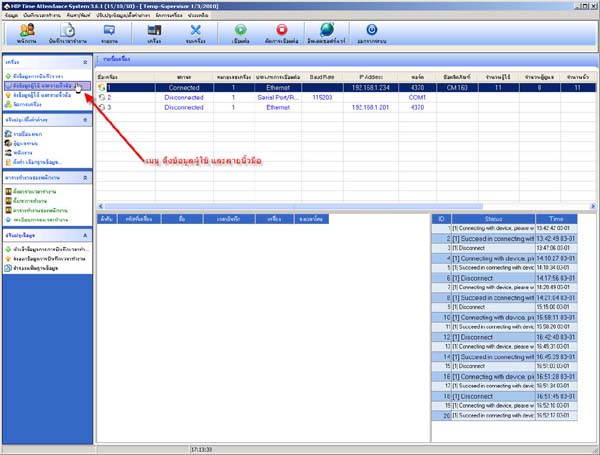
- Right-click to connect the scanner
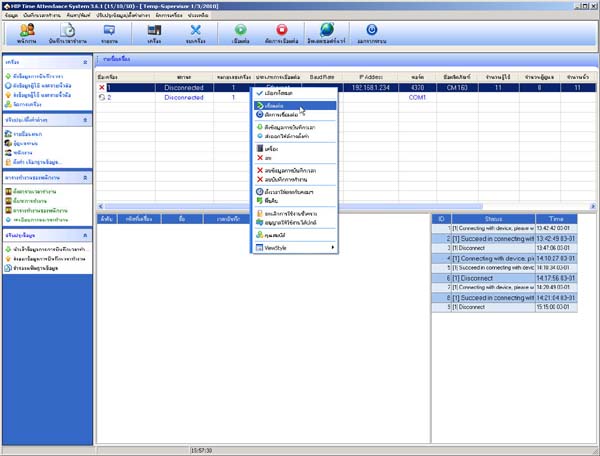
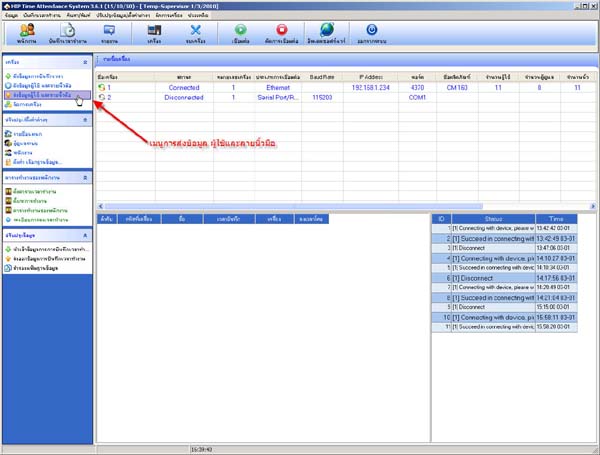
- Select the Send User and Fingerprint Data menu
- Select the department list
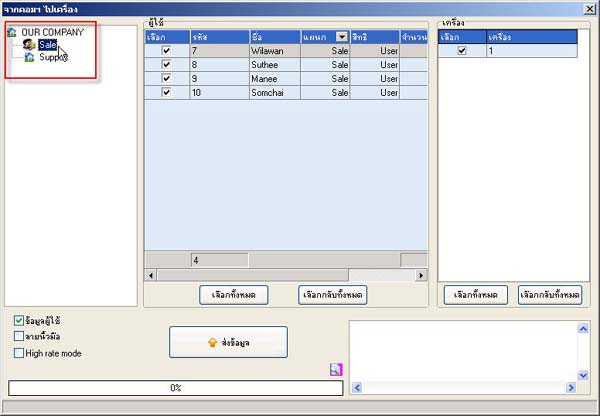
- Click the Select All button

- Check the box next to the user names you want to send to the scanner only
- Click the Send Data button

- Right-click on the scanner device list
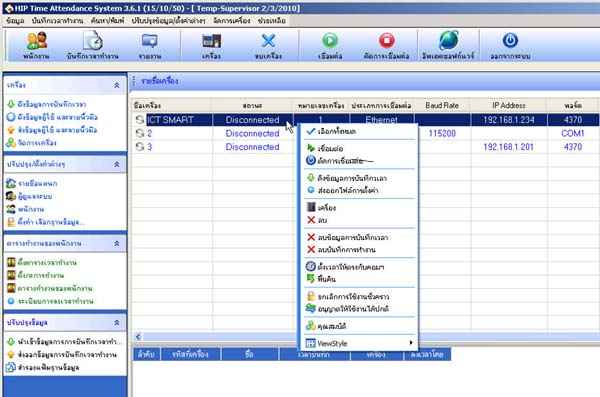
- Select Connect
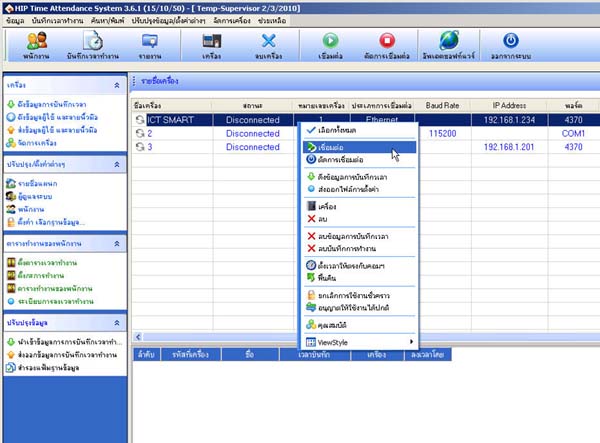
- Then select Pull time record data to retrieve the entry-exit scan times and store them in the database first
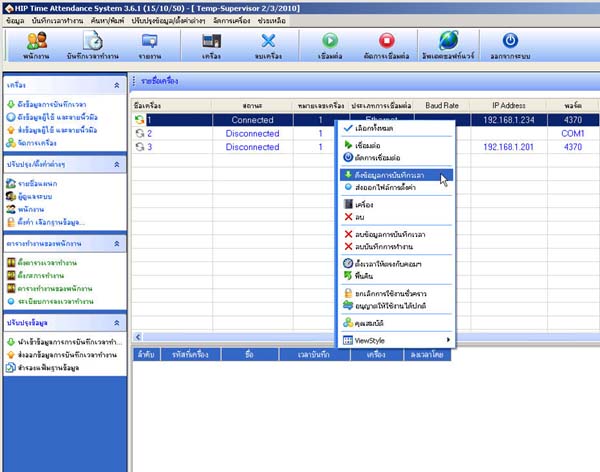
- Then right-click on the device list again and select Delete time record data
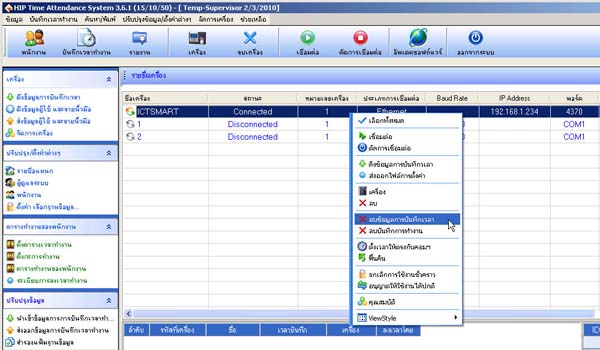
- The entry-exit times on the scanner device will be completely deleted
- Right-click on the scanner device list
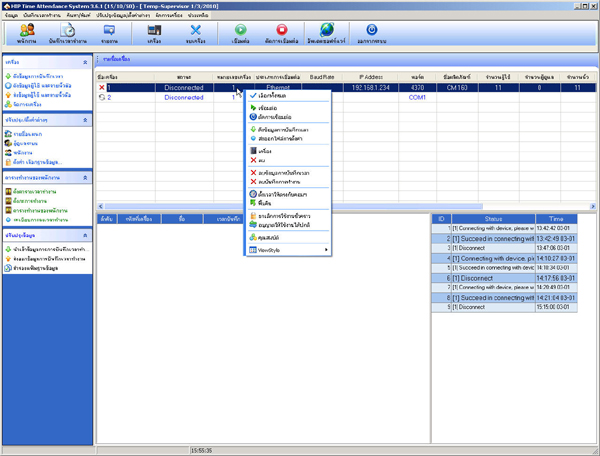
- Select Connect
- The status of the arrow next to the device list will turn green - orange
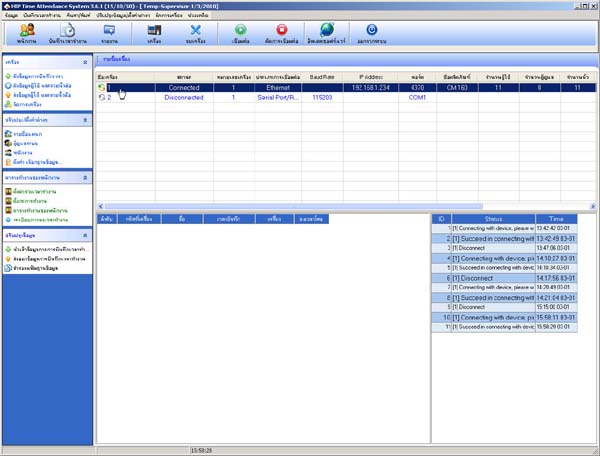
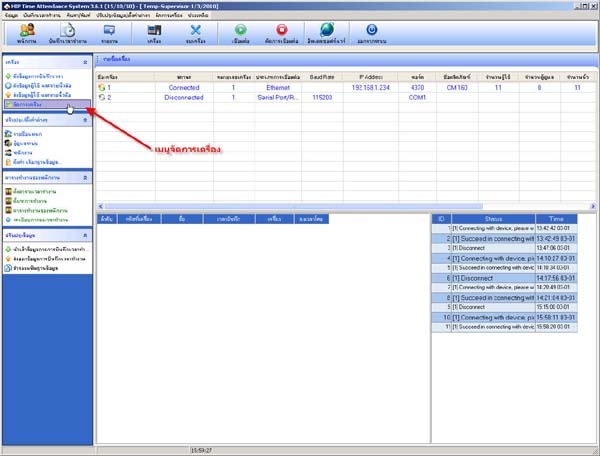
- Go to the device management menu
- Go to the Device Information section
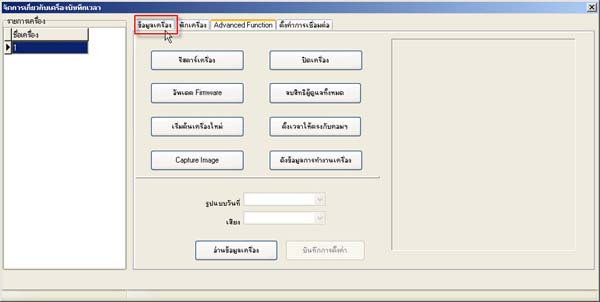
- Then press the Read Device Information button
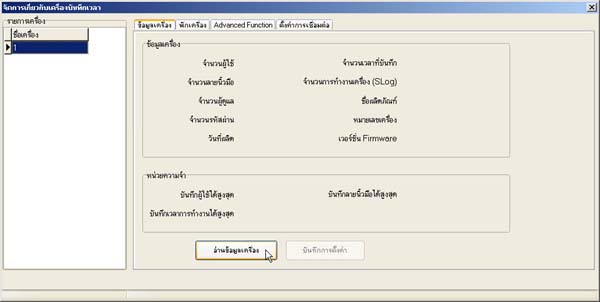
- Then you will see the scanner device information
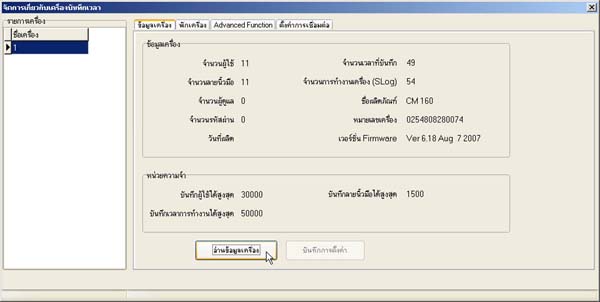
- Right-click on the scanner device list
- Select Connect
- The status arrow in front of the scanner device list will change color to green-orange
- Go to the Device Management menu
- Click the Set Time to Match Computer button
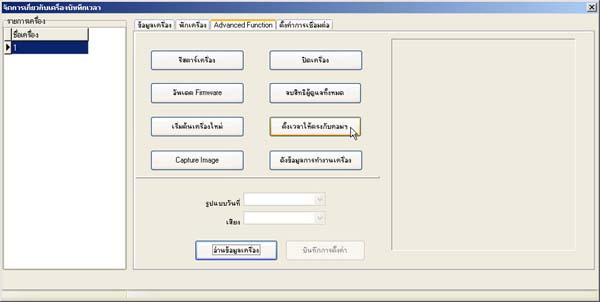
- Then the time on the scanner will match the computer device
- Right-click on the device list that you want to send data to
- Select Connect
- Go to the menu Send User Data and Fingerprints
- Select the department that you want to send data to the scanner (if you want to send all user data, select OUR COMPANY)
- Check the checkbox next to the Fingerprints heading
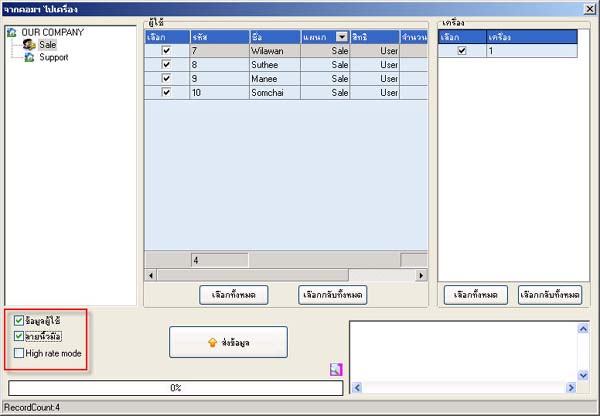
- Click the Send Data button
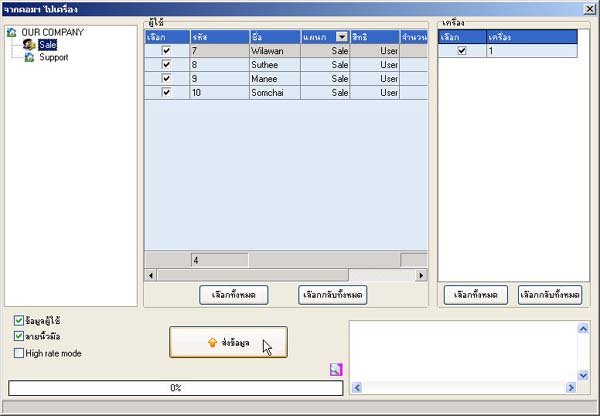
- After that, the program will send the user data to the scanner
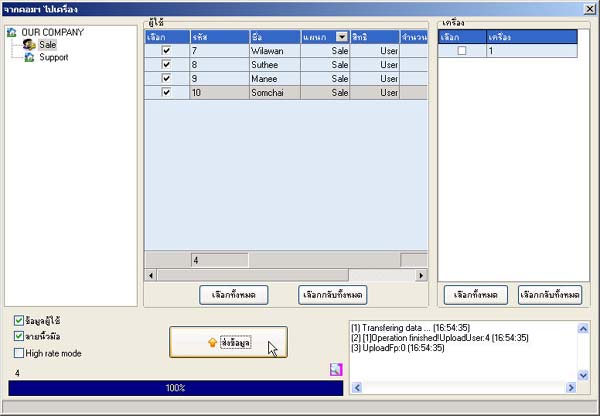
- Right-click on the scanner device list
- Select Connect
- Go to the menu Pull user data and fingerprints
- Press the View users in device button
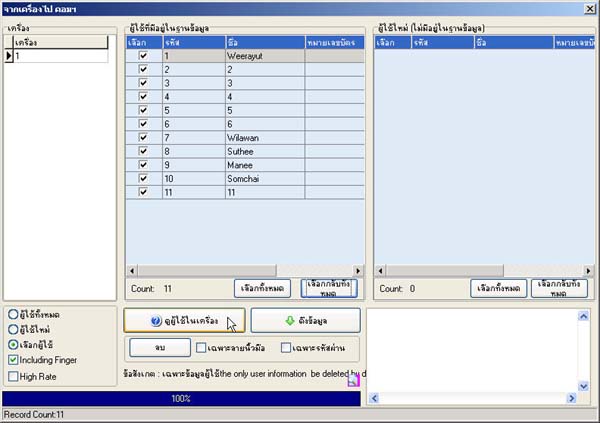
- Then check the All users section
- Check the All users section
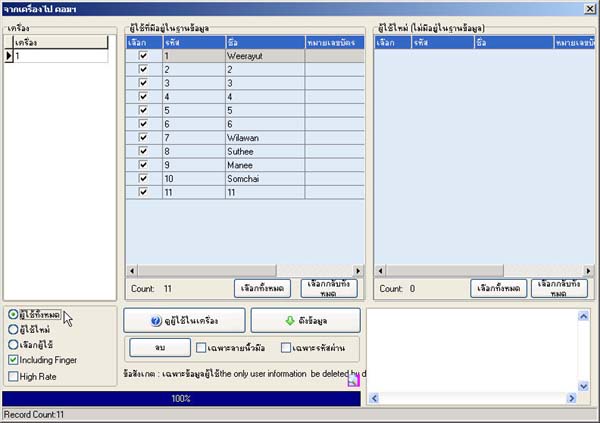
- If you want to pull data individually, click the Deselect all button
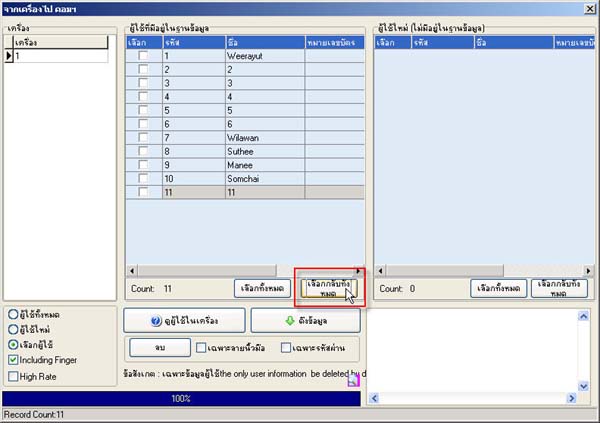
- Then select only individuals
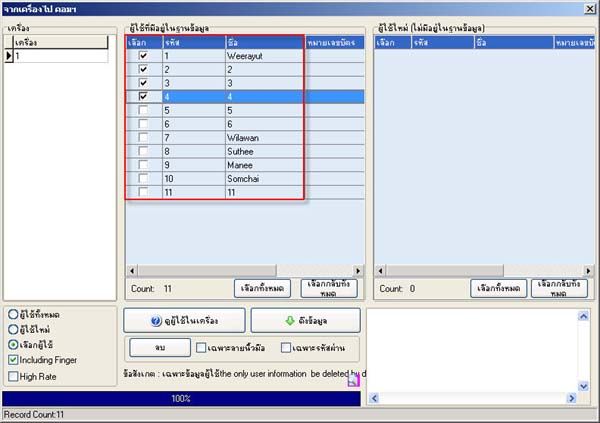
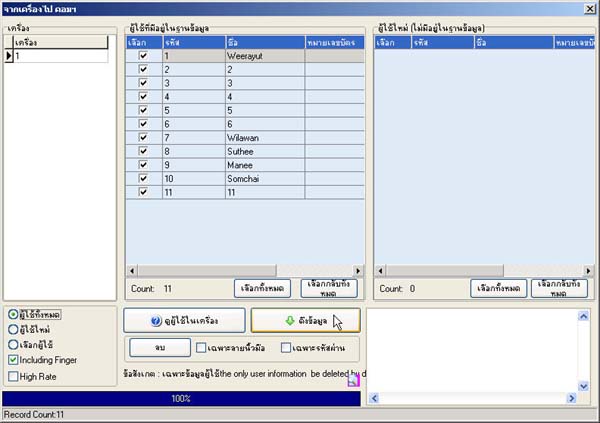
- Once finished, press the Pull data button
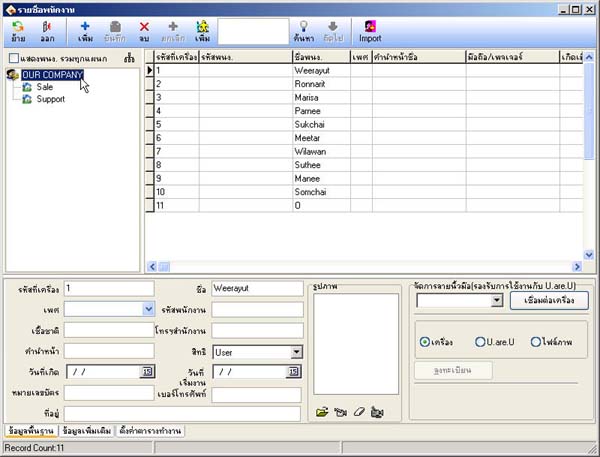
- Verify the user list in the Employees menu
- Select Our Company and the user list will be displayed
- Click the Save Work Hours button
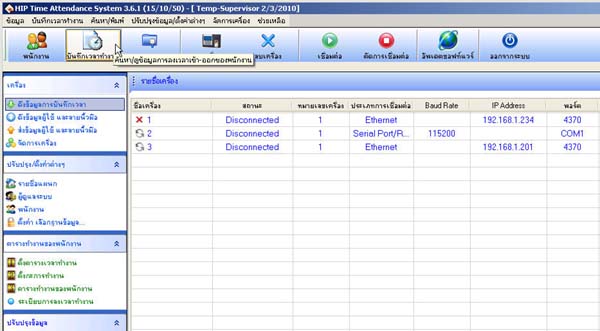
- Select department, username, and date/time you want to view (if you want to see all users, select OUR COMPANY for the department)
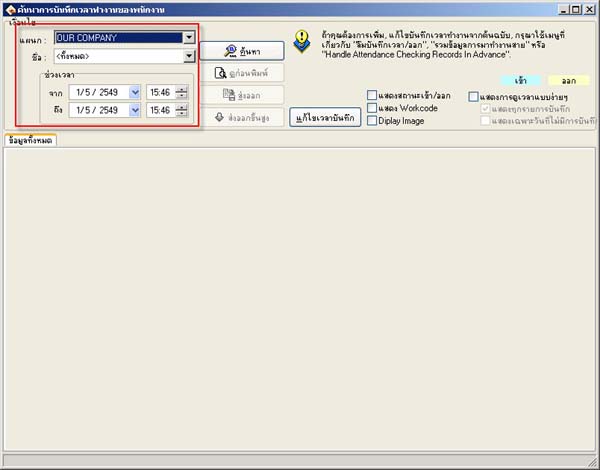
- Then click the Search button
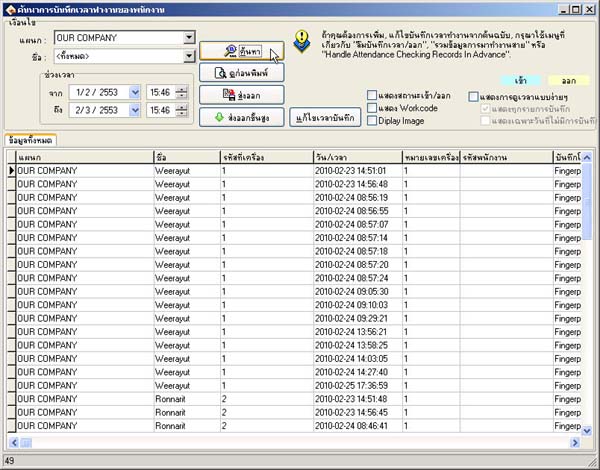
- The scan in/out times of the user will be displayed
- Click on the list of scanners you want to extract data from
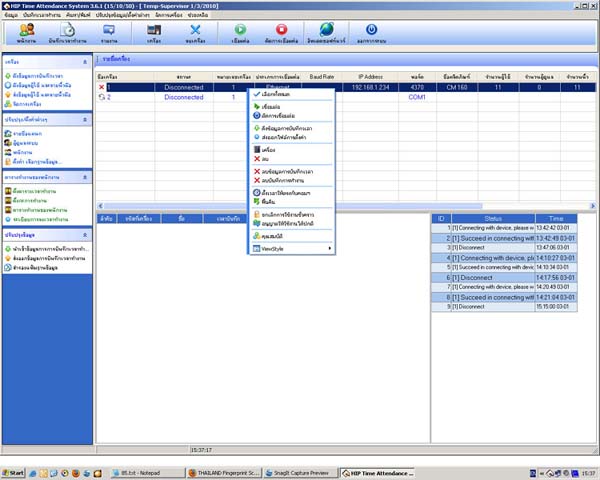
- Select Connect
- Then right-click again to select Extract time recording data
- After that, the program will extract the data successfully
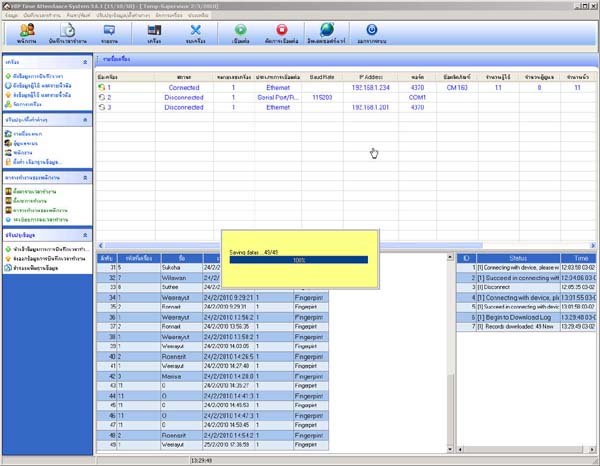
- Right-click on the scanner device list
- Select Connect
- Then the status arrow in front of the device list will change to green-orange
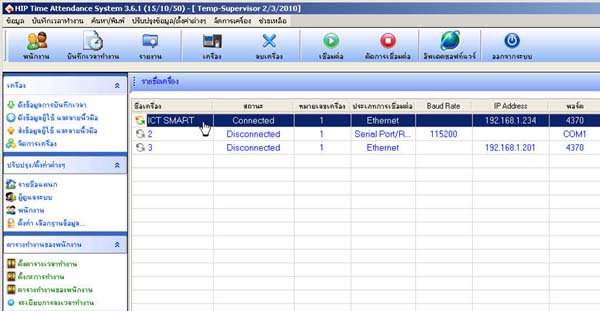
- The scanner and computer can now be connected
- Click on the Device button

- In the Name field, enter the name you want to give to the scanner device

- In the Connection Type field, select Ethernet

- In the IP Address field, enter the IP number of the scanner device

- In the Connection Password field, do not enter any number

- In the Enter Device Number field, enter the device number in order (in case there are more than 1 device)

- In the Port field, the program default is already set to 4370

- If you want to add another device, click the Add button to add the next device

- Then click the Save button to save the device

- The device list will be displayed on this page
