How to Use WarpXClient and WarpServer Applications
Search
Go to Device Management menu
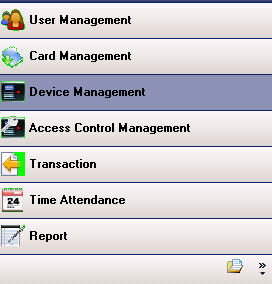
Select Door Lock/Unlock menu
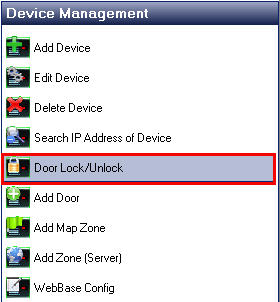
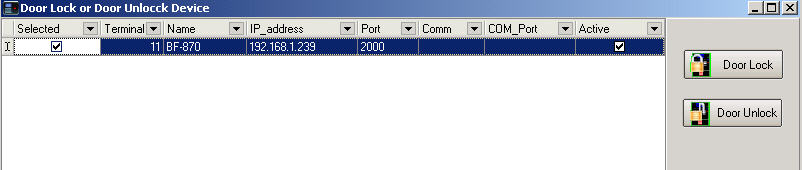
Then check the checkbox next to the scanning device name
If you want to unlock the door, press the Door Unlock button
Or if you want to lock the door, press the Door Lock button
Go to Device Management menu
Then you will see a list of scanner devices. Right-click on the scanner device name
and select Syn Clock To PC to synchronize the scanner's time with the PC
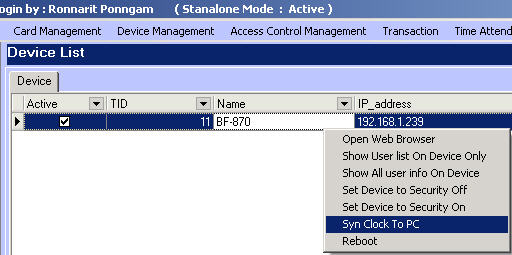
You can also configure other settings such as
Open Wab Browser = used to open the web-based interface of the scanner
Show User Lst on Device Only = view the list of users in the scanner
Set Device to Security Off = command to unlock the door lock
Set Device to Security on = command to lock the door lock
Reboot = command to turn off and restart the scanner
Go to the Report menu
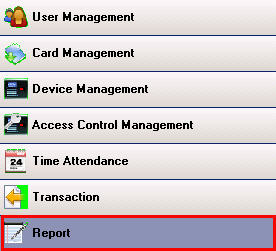
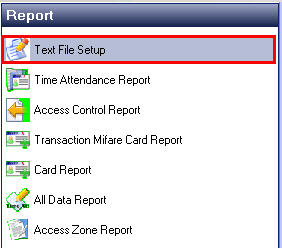
Select the Text File Setup menu
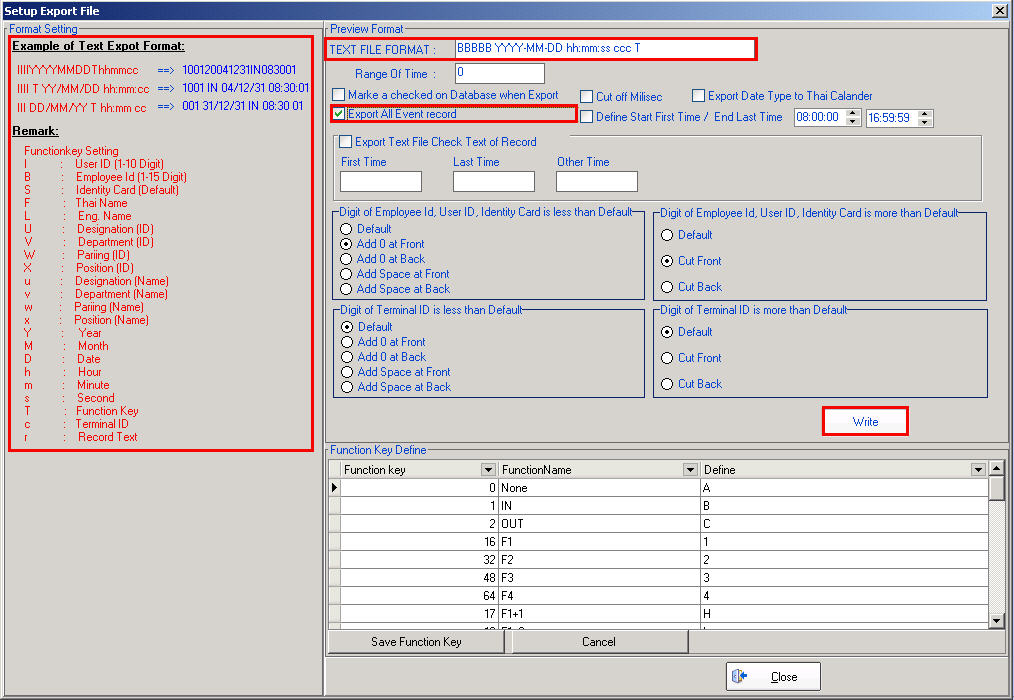
The window on the left side will explain the meaning of various characters
what this character represents
In the Text File Format field, set the format for how you want the Text file
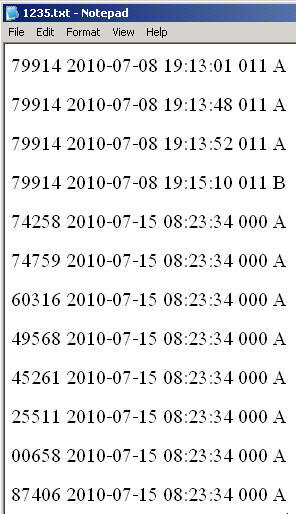
Then you will get a Text File according to the format you set
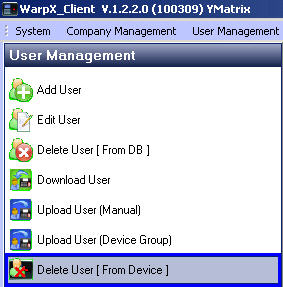
Go to User Management menu
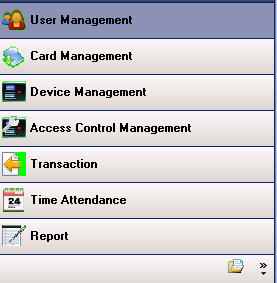
Select Delete User ( From Device )
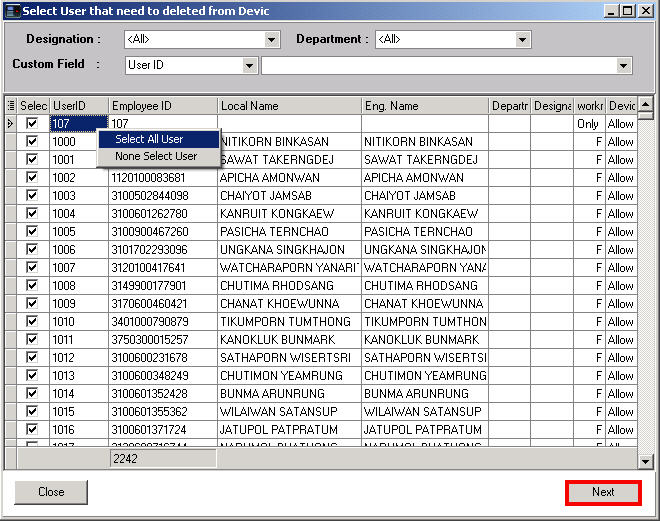
Select the user you want to delete from the device. If you want to delete all, right-click
then select Select All User and press the Next button
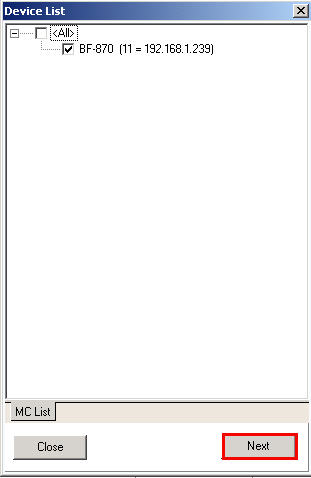
Select the device you want to delete the user from, then press the Next button
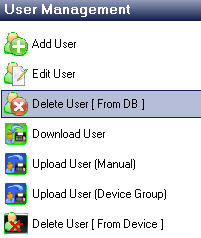
Select Delete User ( From DB )
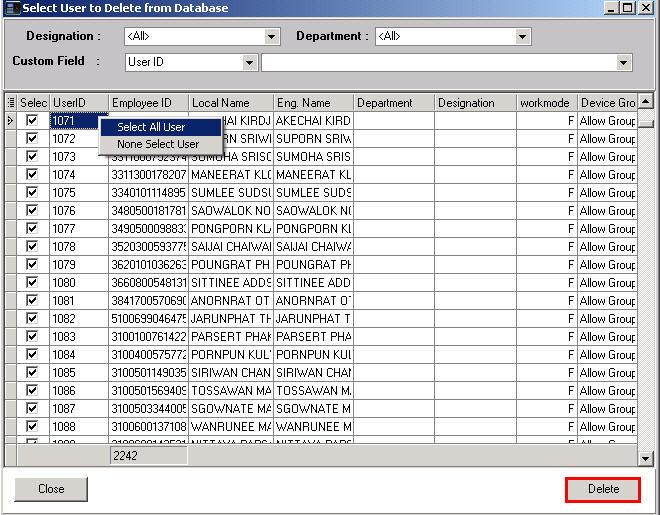
Select the user you want to delete from the database. If you want to delete all, right-click and select
Select All User because it will select all then press the Delete button
Open the program and go to the Administrator menu
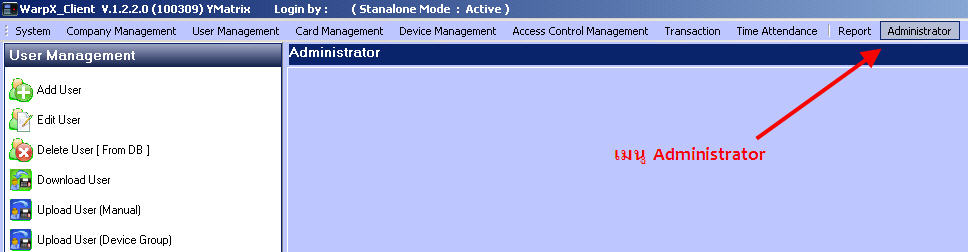
Select Set Administrator

Then click the Add button
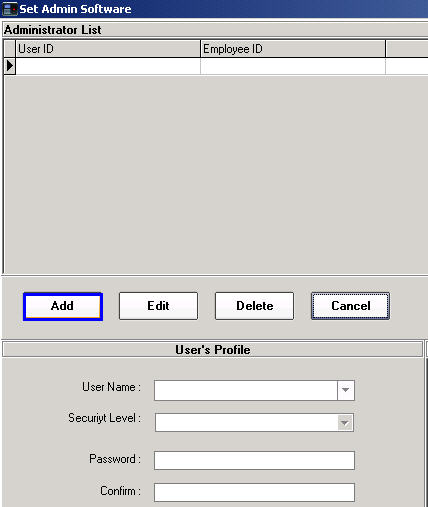
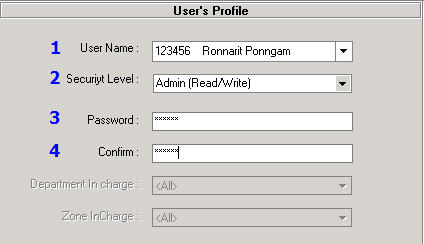
1. Select the UserName that will have permission to manage the program
2. Then select the Security Level for the administrator level
3. Enter the Password to access the program
4. Confirm Password again
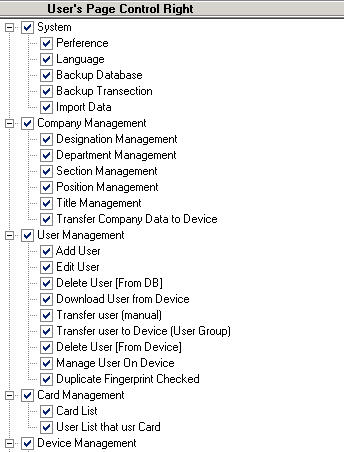
Then specify which menus this administrator is allowed to manage
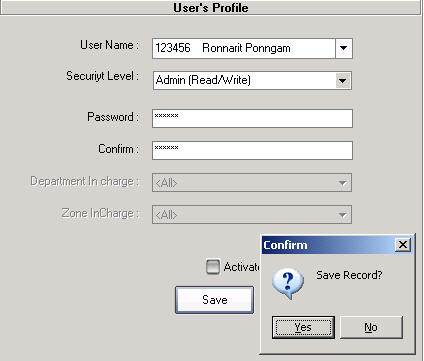
Then click the Save button and the system will ask to Save Record, click the Yes button.
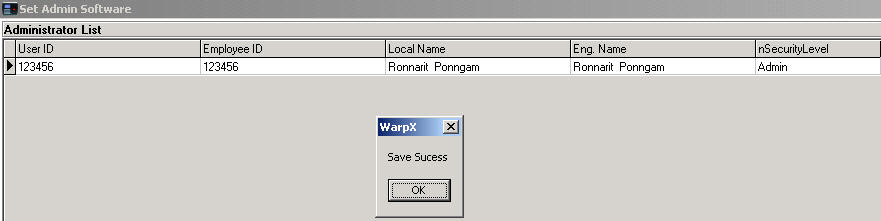
Then click the Ok button again and you will see the User ID that was set as administrator appear
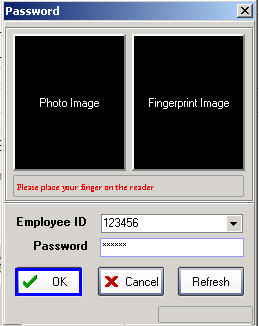
Then close the program and open it again and enter the administrator's User Name and Password
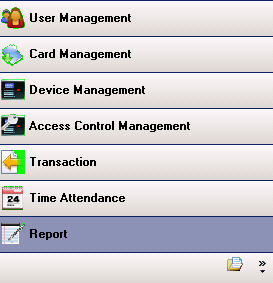
Open the program and select the Report menu
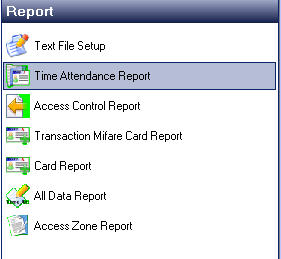
Then select the Time Attendance Report menu
If you want to view by department or by individual, select each department or person one by one
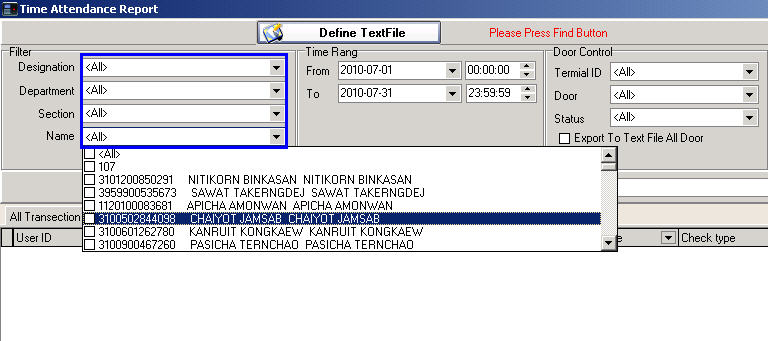
Then select the time period you want to view
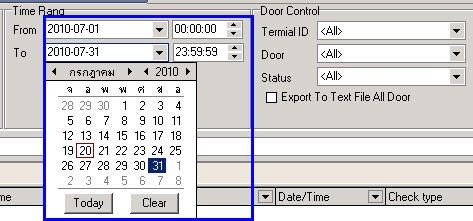
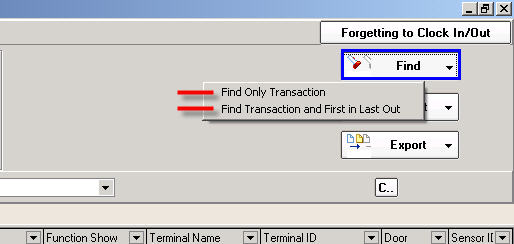
Click the Find button
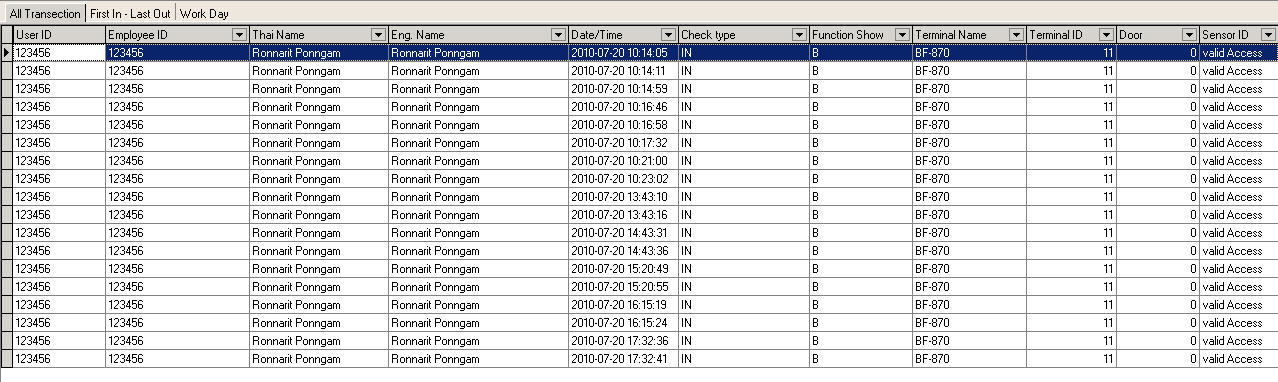
- If you want to view all time records, select Find Only Transaction
- Or if you want to view only the first and last time, select Find Transaction and First in Last Out
The schedule you selected will be displayed (Format: Find Only Transaction)
(Format: Find Transaction and First in Last Out)

Then Export the Report by clicking the Export button and select the format to export the data
as Text file or Excel
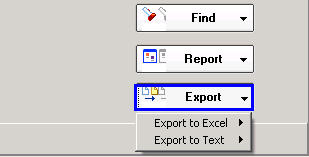
Select All Transaction format
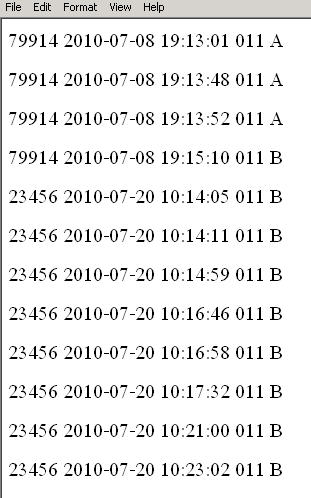
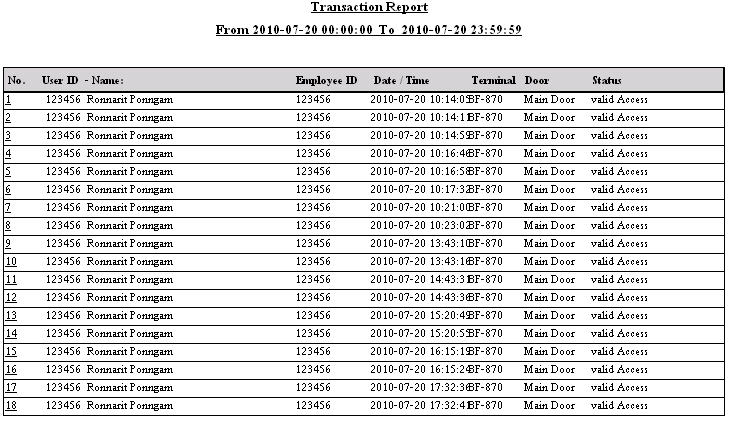
If you want to view a pre-formatted Report, click the Report button and select the format you want

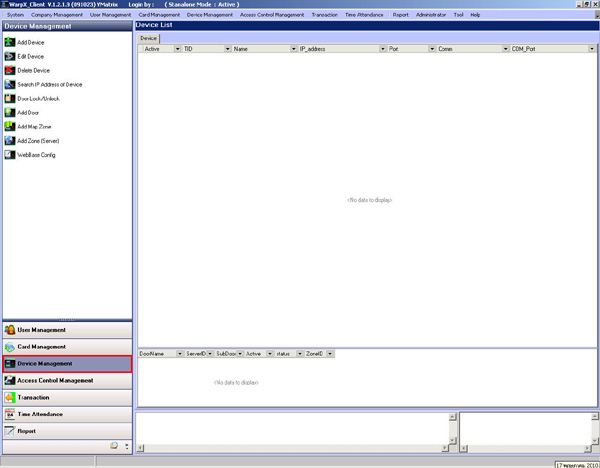
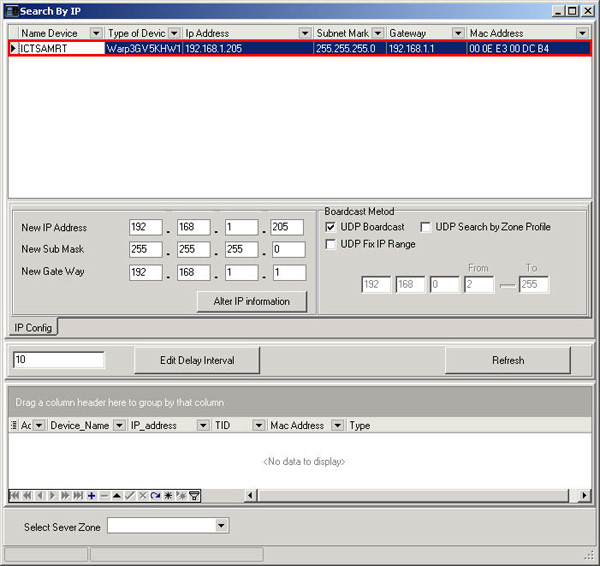
Go to Device Managment menu
Then select the Seach IP Addess of Device menu
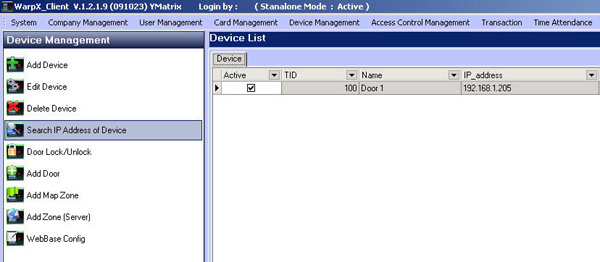
After that, the IP Addess number will be displayed in this window. In this window, you can double-click on the scanner device name line to access the Webbase page
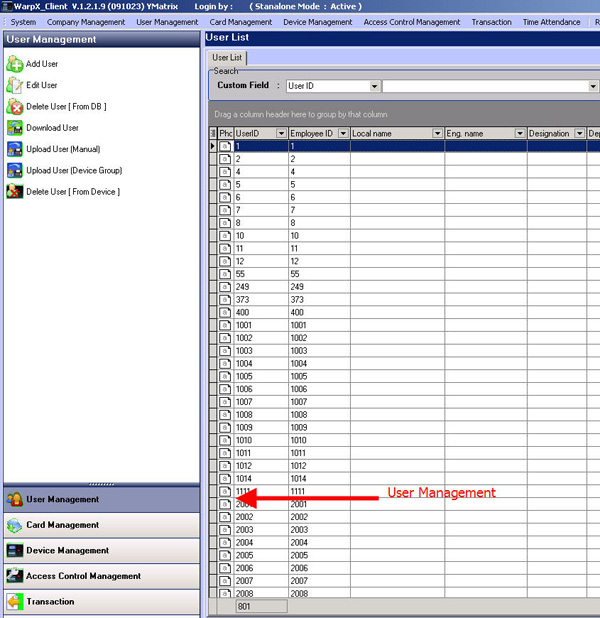
Go to User Management menu
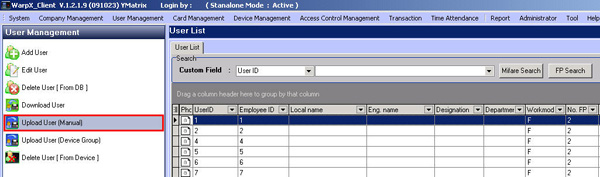
Then select Upload User (Manual) menu
Then select the users you want to send. If you want to select all, right-click and select Select All User
To select only some users, select None Select User and then check the checkmark next to the user list
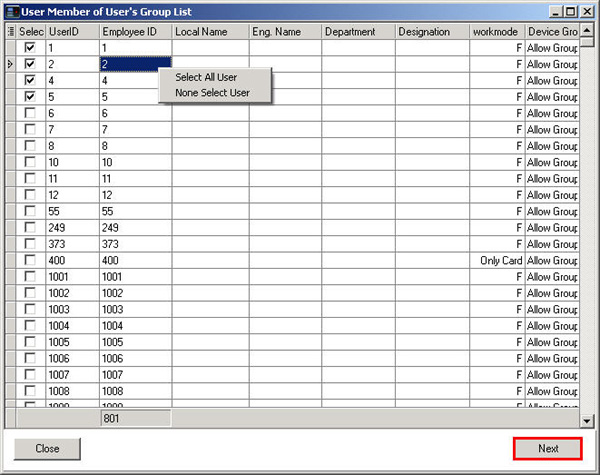
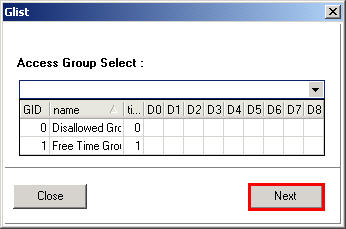
Select the Group you set up and click the Next button
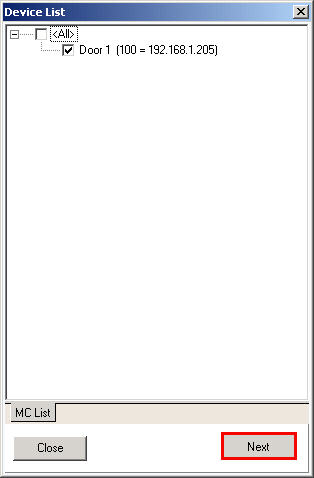
Then select the scanner device you want to send
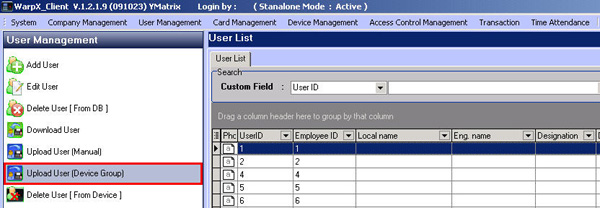
Go to User Management menu
Select Upload User (Device Group) menu
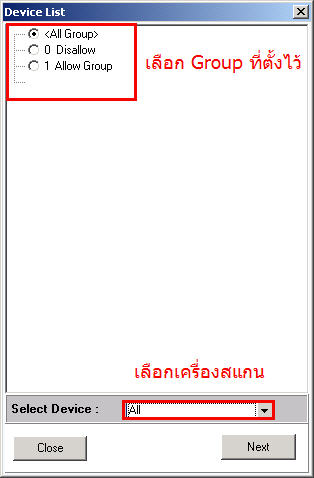
Select the Group for scanning entry and exit through the door
Then select the device you want to send to and click the Next button
Then select the user you want to send. If you want to select all, right-click and select Select All User
To select specific people, select None Select User and then check the checkmark next to the user name, then click the Next button
Go to the Trasaction menu

This menu allows you to select the format in which you want to retrieve data. It is not recommended to use the Download All logs and Delete menu
But here we select the Download All Logs menu

Select the scanner device you want to retrieve data from
Then the time that was retrieved will be displayed in this window

Go to the User Management menu
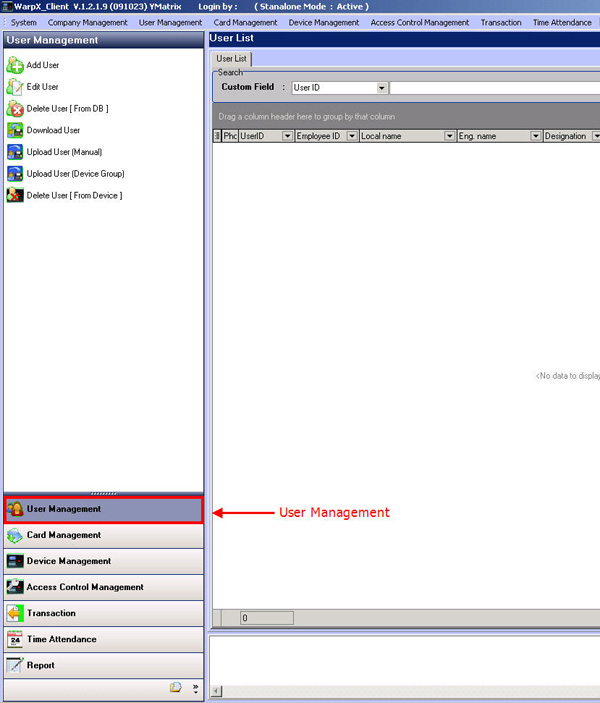
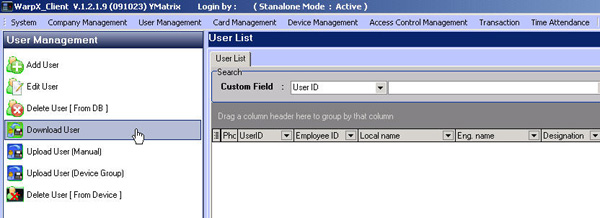
Then select Download User
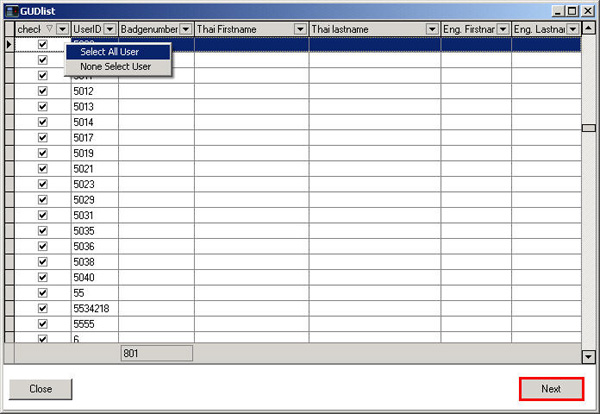
Then check the checkmark next to the scanner device list from which you want to retrieve user data
If you want to select all users, right-click on the list field and select Select All User
Or if you want to select only some users, select None Select User
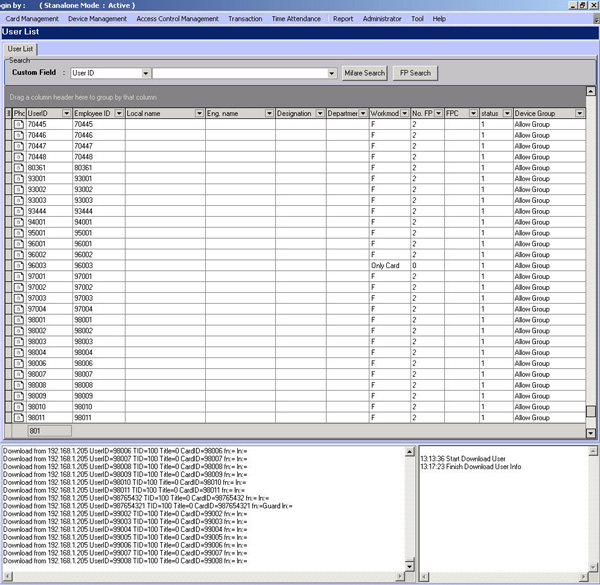
Then you will see the list of users displayed on this page
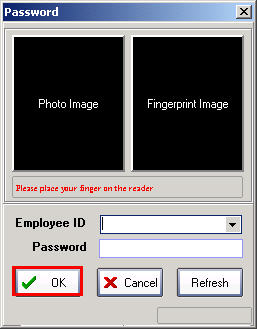
Double-click on Icon WarpX Client and enter User and Password
If you don't have one, just click the OK button to enter the program
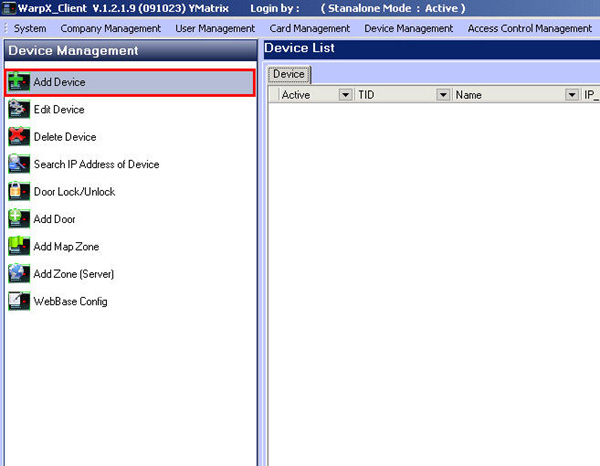
Go to the Device Management menu
Then select Add Device
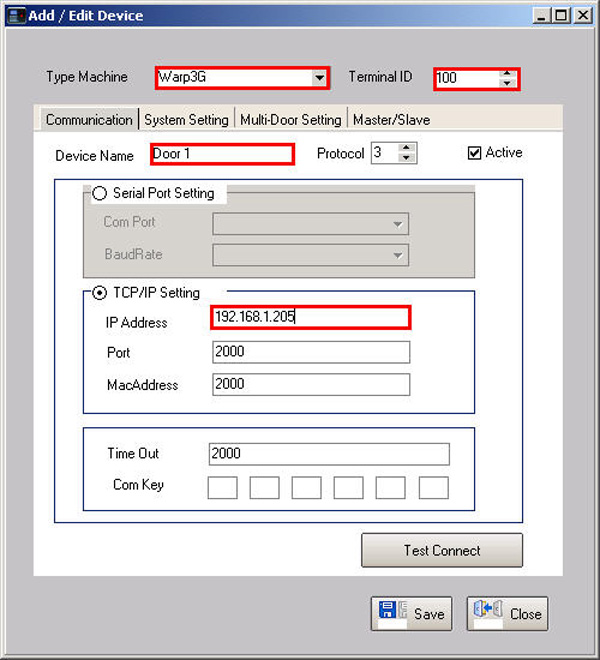
Select the model of the scanner
Select Terminal ID
Set the name of that scanner device
Then check the TCP/IP Setting section and enter the IP address of the scanner
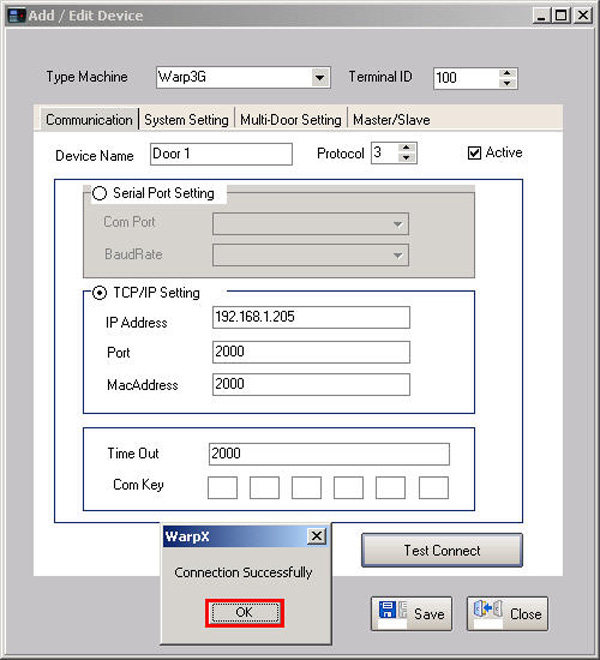
Click the Test Connection button and a message will appear saying Connection Successfully, click the OK button
Then click the Save button
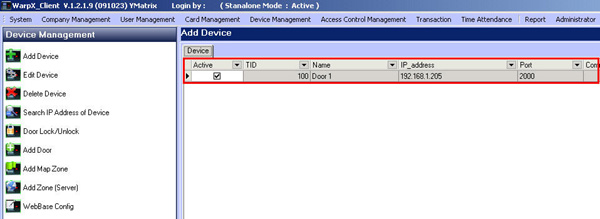
Then the list of scanners will be displayed in this window
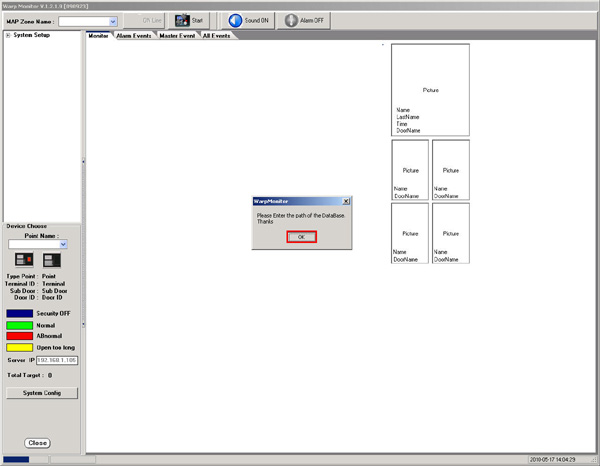
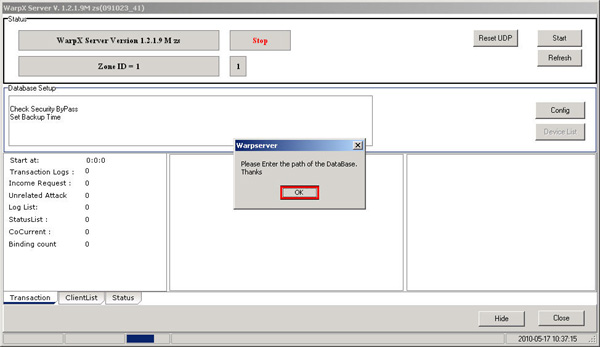
Double-click on the Icon Warp Monitor and a message will appear for you to configure the Database, then click the OK button
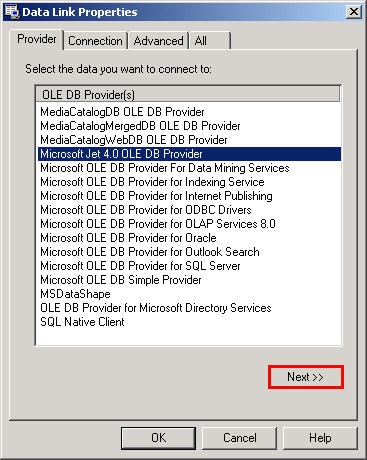
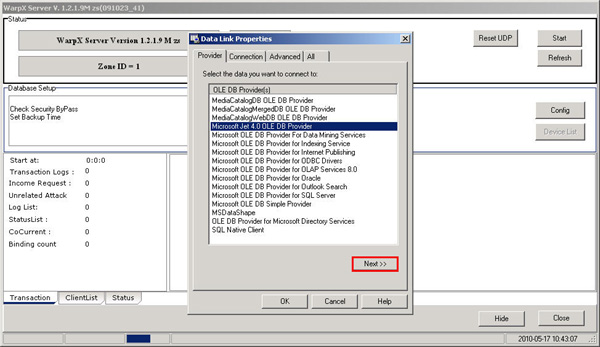
Select the Microsoft Jet 4.0 OLE DB Provider option
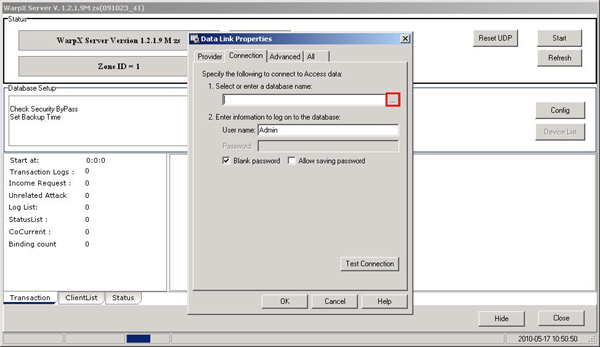
Click on the square button under the Select or enter a database name heading
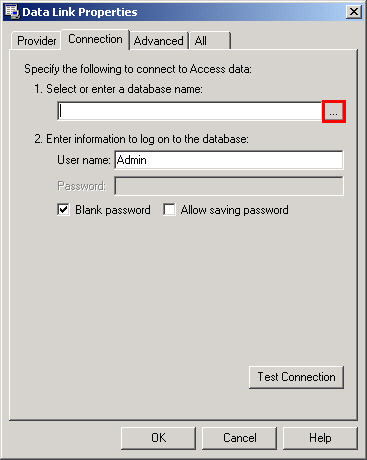
Go to C:\Program Files\WarpServer, select Warp2009.MDB and click the Open button
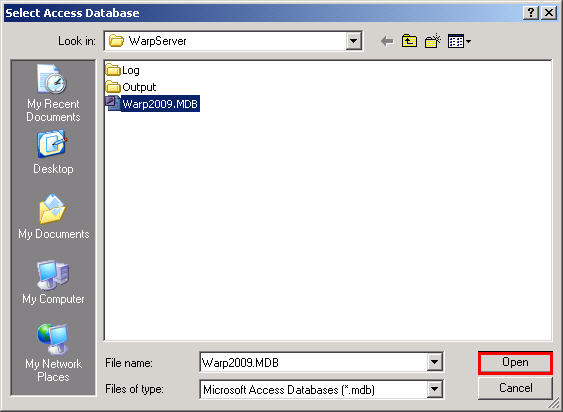
Click the Test Connection button
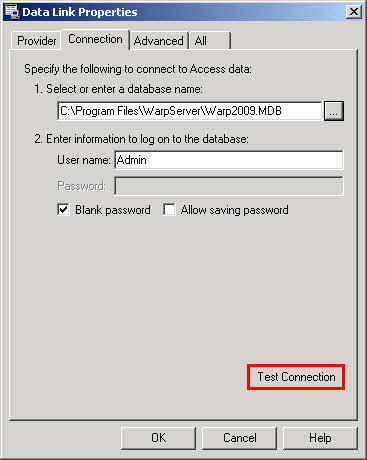
Then a message will appear saying Test Connection succeeded.
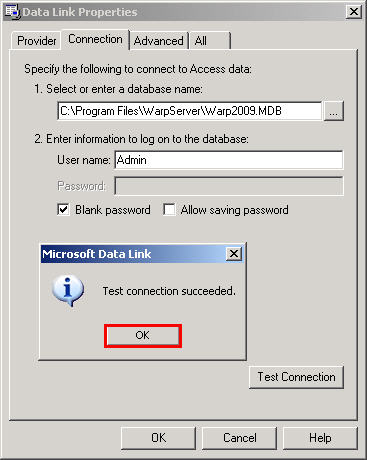
Then click the OK button
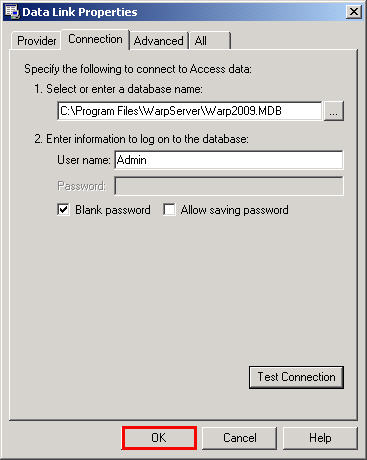
Double-click on the WarpX Client Icon to open it
Then the program will display a message to configure the Database, click the OK button
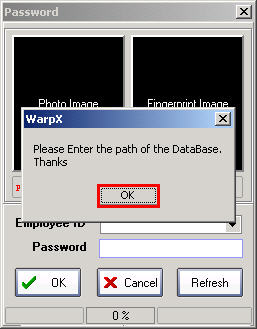
Select the Microsoft Jet 4.0 OLE DB Provider option and click the Next button
Click the square button next to the "Select or enter a database name" field
Then navigate to C:\Program Files\WarpServer to select the Warp2009.MDB Database and click the Open button
Then click the Test Connection button
A message will appear stating "Test Connection succeeded" which indicates that the Database is working properly
Then click the OK button
Click the OK button again
Double-click on the Warp Server icon
Then the program will ask for a Database, click the OK button
Select the Microsoft Jet 4.0 OLE DB Provider line and click the Next button
Click the button next to the Select or enter a database name field
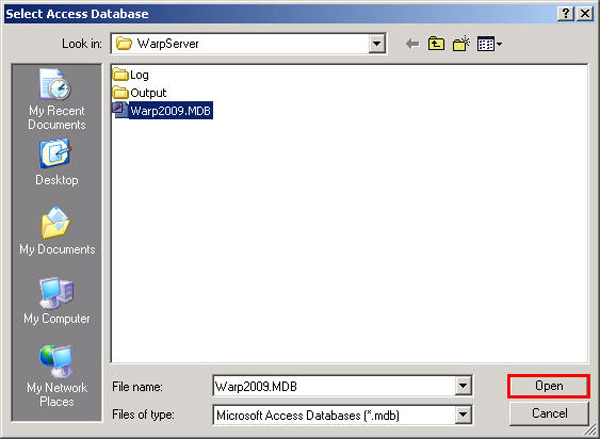
Navigate to C:\Program Files\WarpServer and select Warp2009.MDB then click the Open button
Click the Test Connection button
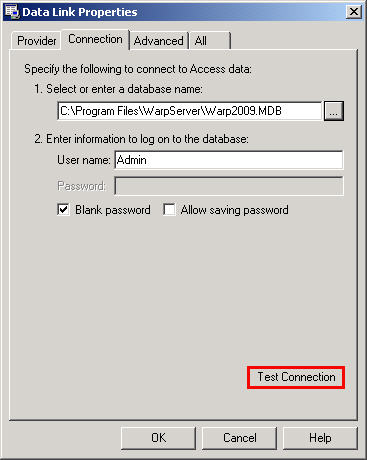
After clicking, a message will appear saying Test connection succeeded. This indicates that
the Database is working properly, then click the OK button
Then click the Ok button again
The Database configuration setup is now complete