AccessControl Ver.U.S.A Program Usage
Search
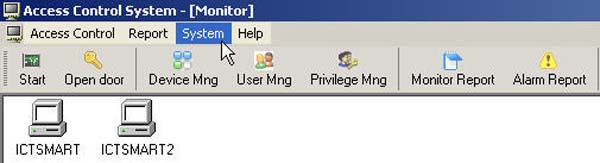
- Go to select the System menu
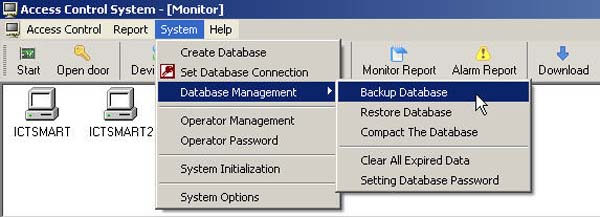
- Then go to select Database Management and select Backup Database
- Select the location where you want to store the data
- Then click the Backup button
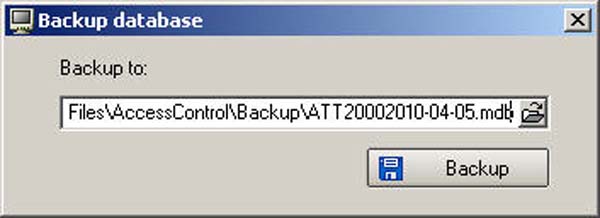
- The database that has been backed up will be output in the Access00 file

- Go to User Mng menu
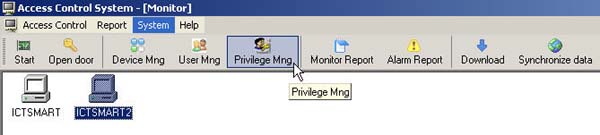
- Delete the fingerprint of the user with the problem from the scanner device first
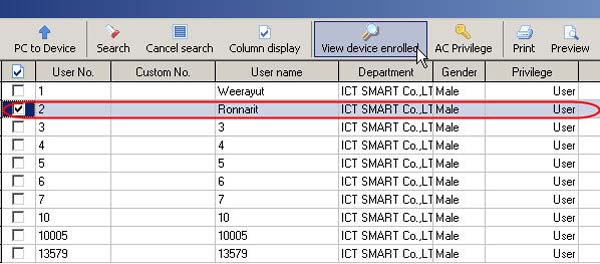
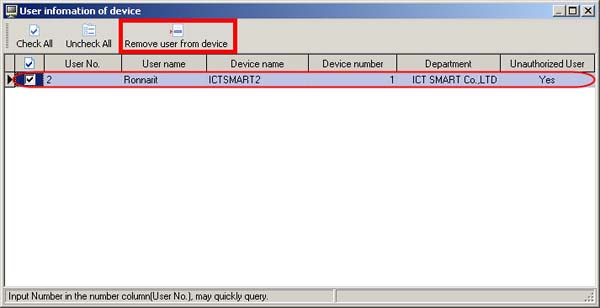
- Check the checkmark next to the user you want to delete, then click Remove user from device. The user data will be deleted from the scanner
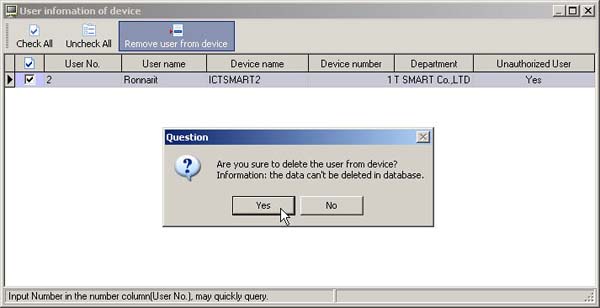
- The program will then ask if you want to delete the user. Click Yes to proceed with deletion
- Then store the new fingerprint in the scanner using the same user ID number or ID
- After storing the fingerprint for the user in the scanner, then retrieve the newly recorded fingerprint data
from the scanner to the computer with the following steps
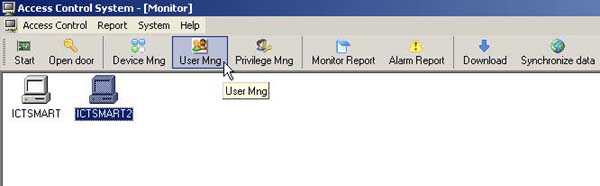
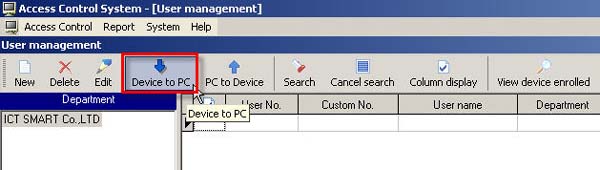
- Then select Device to PC menu
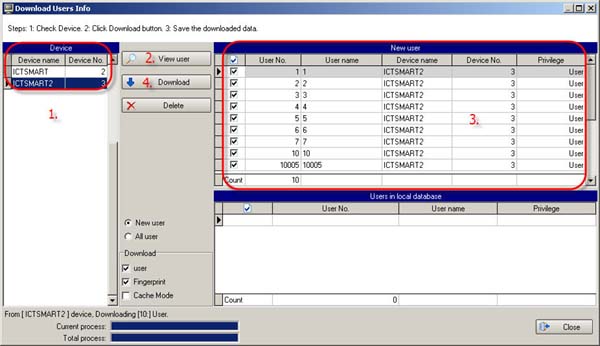
1. Select the scanner device you want to retrieve data from
2. Click View User button to view the list of users on the scanner
3. Check the checkmark next to the user whose data you want to retrieve from the scanner
4. Then click Download button
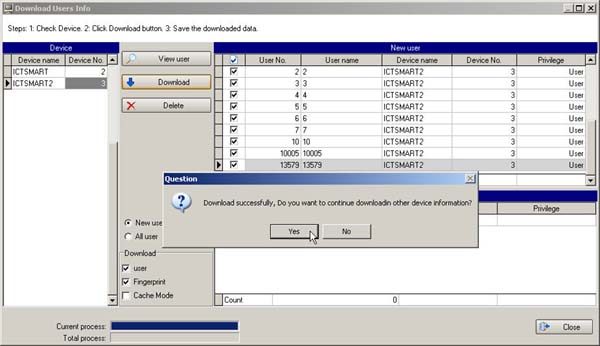
- A message will then appear asking if the data has been successfully retrieved from the scanner and what you want to do next
If you want to continue, click Yes. If you don't want to continue, click No to close this window
After retrieving the newly stored fingerprint data to the computer, the next step is to send the new
fingerprint data to other scanner devices (if there is more than 1 device)
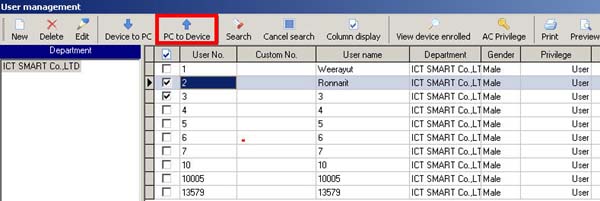
Select the user and click PC to Device menu
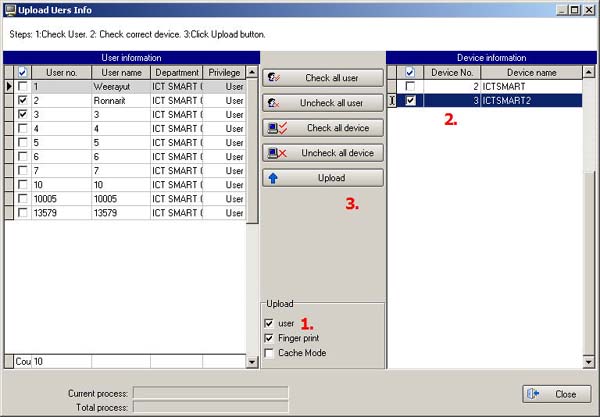
1. Check the checkmark next to the Finger print header
2. Check the checkmark next to the scanner device list
3. Click Upload button
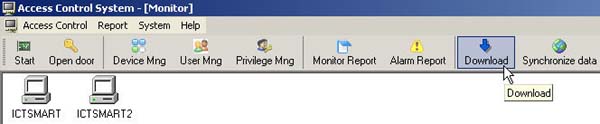
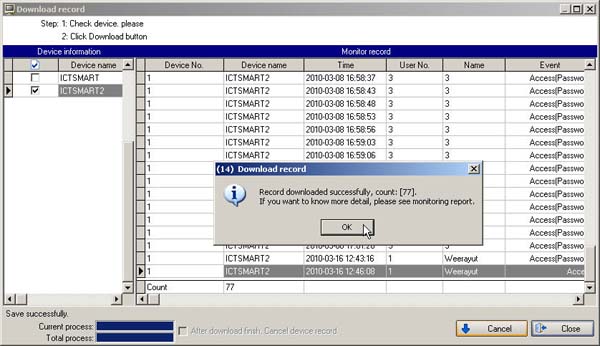
- Select the Download menu
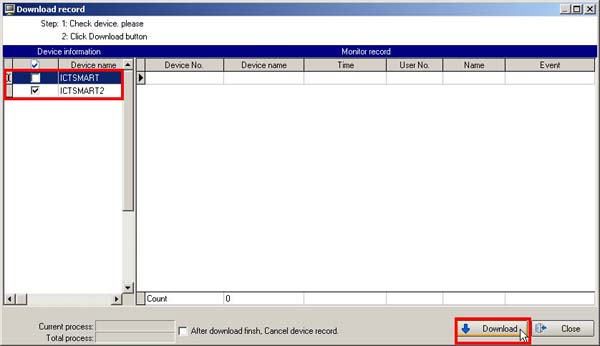
- Select the scanner device you want to retrieve data from
- Then click the Download button
- Then a message will appear showing the status of how much data has been retrieved, click the OK button
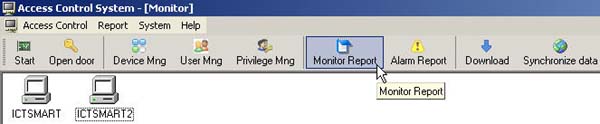
- Go to select the Monitor Report menu
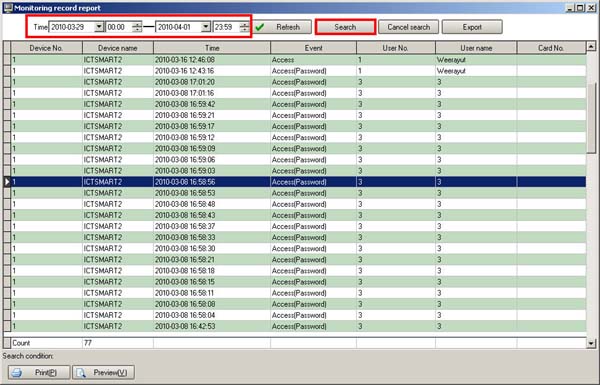
- Select the time period you want to view
- Then click the Search button
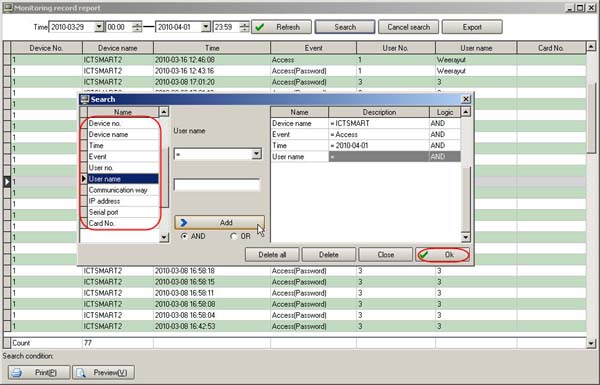
- Then select the topics on the left side, which topics you want to view
- Click the Add button
- Then click the OK button
- Select from User Mng menu
- Check the checkmark next to the user you want to delete
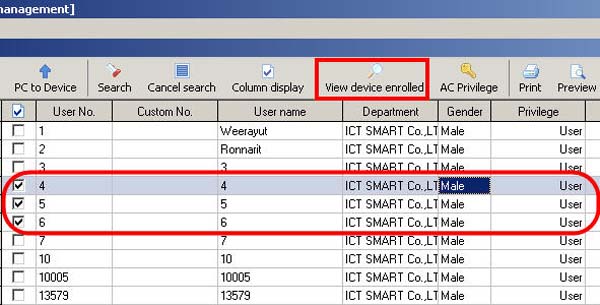
- Check the checkmark next to the user you want to remove from the scanner device
- Then select Remove user from device to delete the user from the scanner device
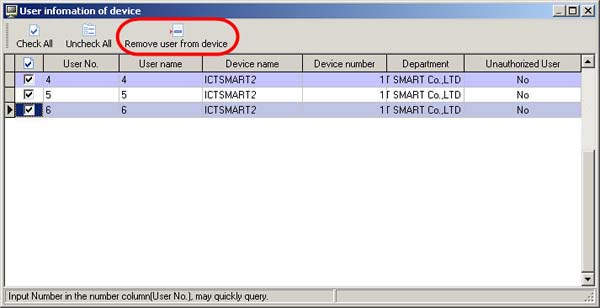
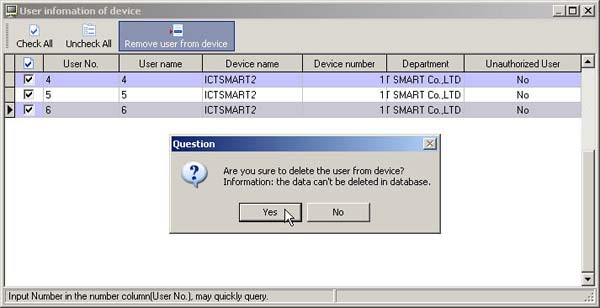
- The program will ask if you want to remove the user from the scanner device
- Click Yes to confirm the deletion of the user from the scanner device
- Select Privilege Mng from the menu
- Double-click on the user list
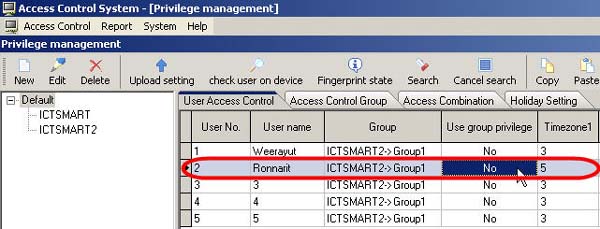
- Check the checkbox at the Unauthorized User section
- Then click the Save button
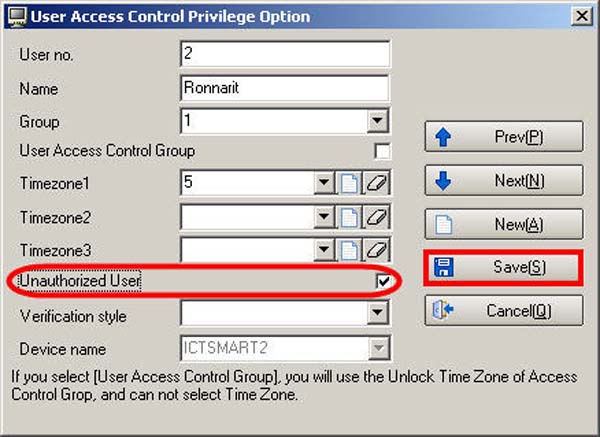
- A warning message will appear asking you to upload data to the scanner device, click OK
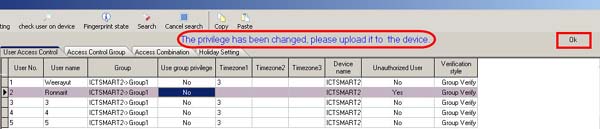
- Click the Upload Setting button
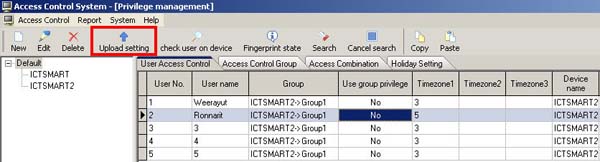
- Check the checkbox at the User Access privilege section
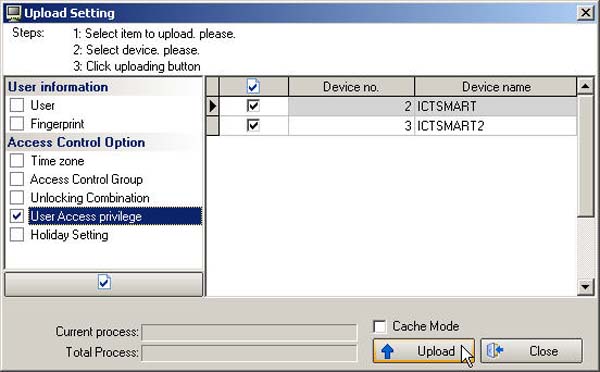
- Check the checkbox to select the scanner device to which you want to send the access privilege change data
- Then click the Upload button
- Select Privilege Mng from the menu
1. Select the user whose access privileges you want to modify
2. Select Edit from the menu
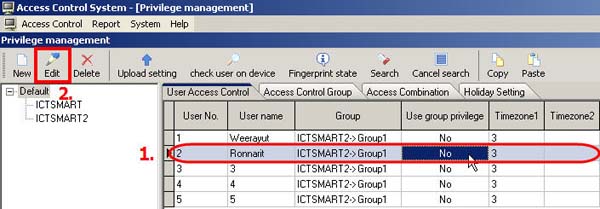
- Then select the Time Zone you want to change for the user
- Then click Save
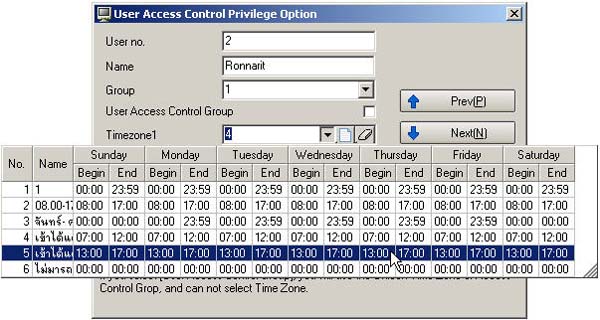
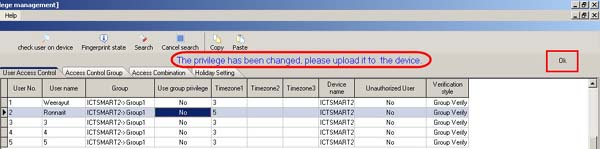
- A message will appear indicating that you need to upload the access privileges to the scanner device. Click OK
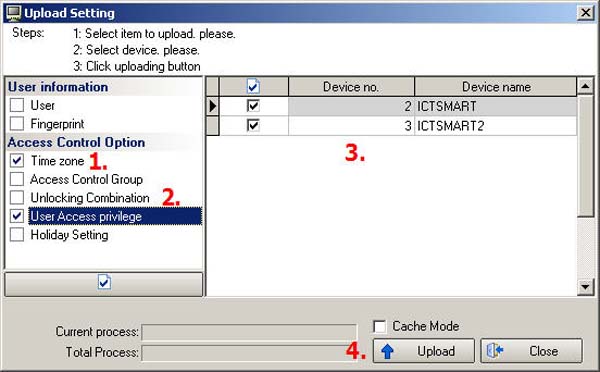
- Select Upload Setting from the menu
1. Check the Time Zone checkbox
2. Check the User Access privilege checkbox
3. Select the scanner device to which you want to send the access privileges for the user
4. Click the Upload button
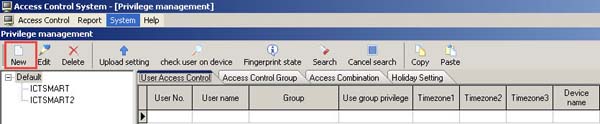
- Select at Privilege Mng
- Then select at New
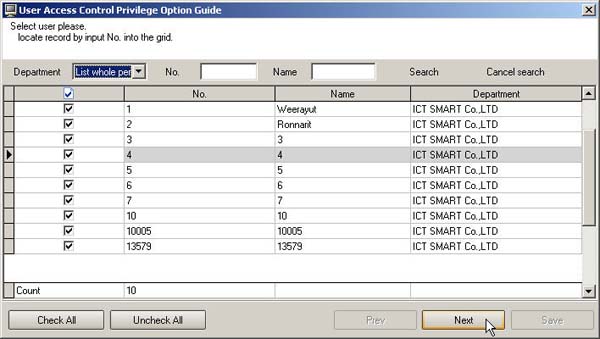
- Check the checkmark next to the user list for whom you want to assign door access permissions
( If you want to select all users, click the Check All button ) Then click the Next button
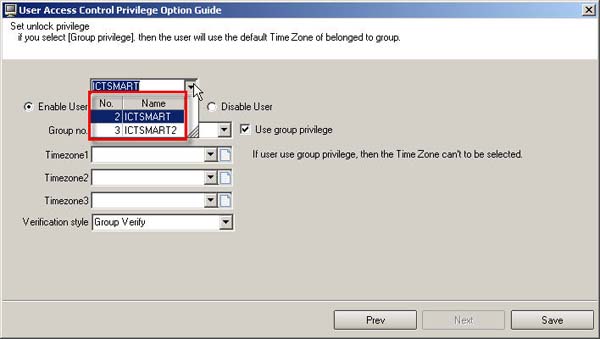
- Select the scanner device to which you want to send the user's door access permissions
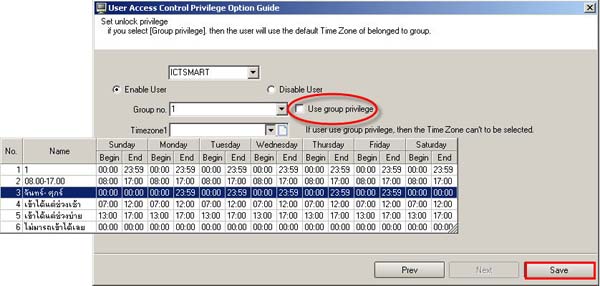
- Uncheck the checkmark at the Use group privilege section
- Then select the Time Zone range that has been set for the user, then click the Save button
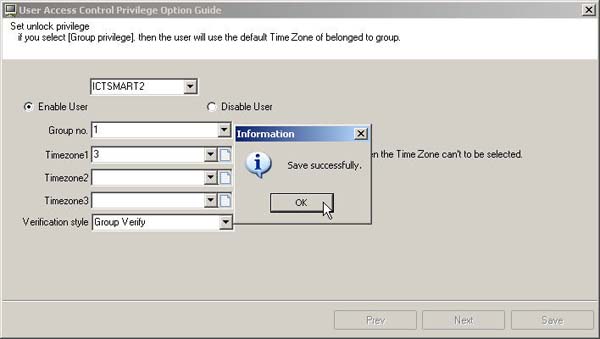
- Then the program will display a Save successfully message. Click the OK button
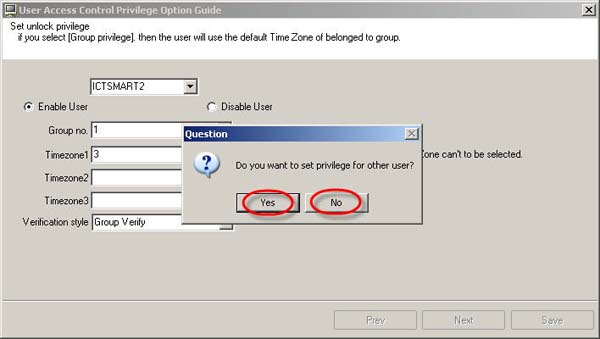
- Then the program will ask if you want to manage other users or not. If yes, click Yes; if not, click No
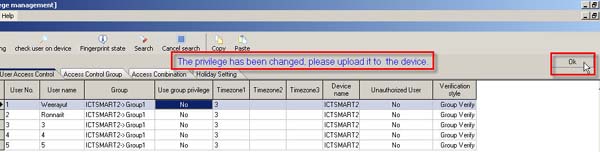
- Then a warning message will appear asking you to upload the data to the scanner device
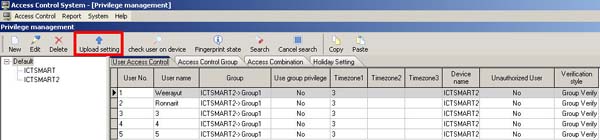
- After that, go to the Upload Setting menu to send the door access permissions to the scanner device
1. Check the checkmark at the Time Zone section
2. Check the checkmark at the User Access Privilege section
3. Select the scanner device to which you want to send the door access permissions
4. Click the Upload button
After that, click the Close button
- Then the user's door access permissions have been successfully sent to the scanner device
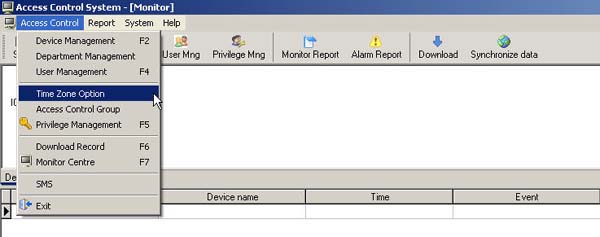
- Go to the Access Control menu and select Time Zone Option
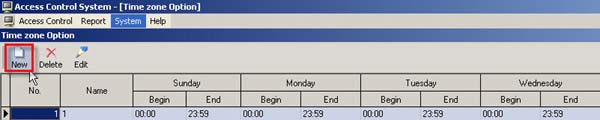
- Select the New menu
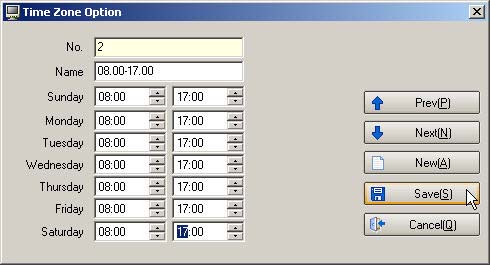
- Then enter the time period you want to allow entry and exit through the door, and click the Save button
- The Time Zone that has been set will be displayed on this page

- Note: How to allow users to enter the door from Monday to Friday
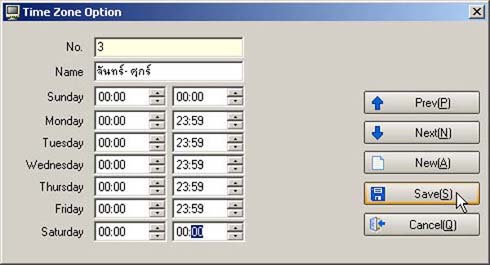
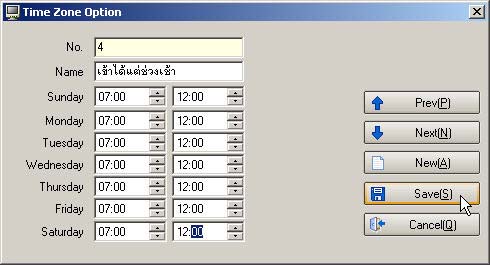
- How to allow users to enter the door only during morning hours every day
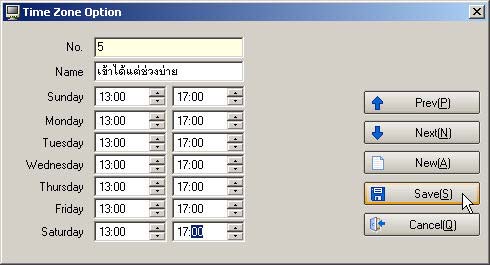
- How to allow users to enter the door only during afternoon hours every day
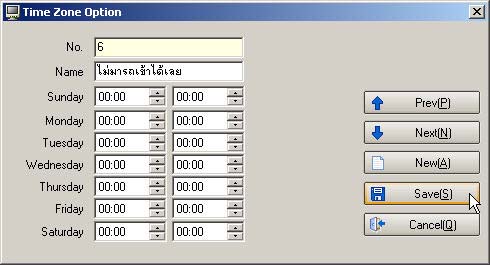
- How to prevent users from entering and exiting the door every day
- Go to User Mng menu
- Double click on the user ID field

- Then enter various details for the user
In the User No. field, do not change the number under any circumstances
Prev button goes back to the previous list
Next button displays the next user in the list
When finished, press the Save button

- The user list will be displayed on this page

- Then select the PC to Device menu

1. Right click on the user list and click Check All to select all users
(If you don't want to select all, check the checkmark next to each user's name)
2. Check the checkmark at the Finger Print heading
3. Select the scanner device to send the user list to
4. Then click the Upload button
Then the user data and fingerprints will be sent to the scanner device

- Go to the User Mng menu
- Select the Device To PC menu
1. Select the scanner device you want to retrieve data from
2. Click the View User button to view the list of users on the scanner device
3. Check the checkmark next to the user names you want to retrieve data from the scanner
4. Then click the Download button
- The program will then display a message that the data download is complete. Do you want to download data from another scanner? If yes, click the Yes button. If no, click the No button
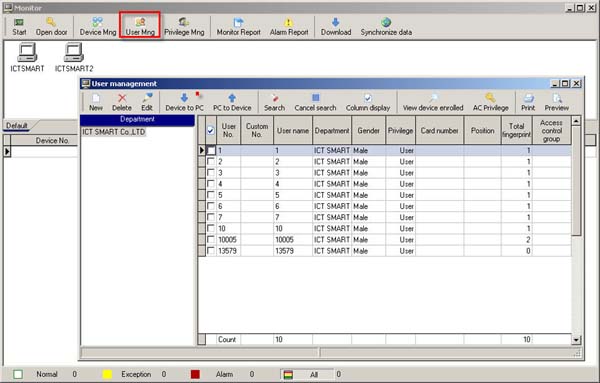
- When finished, go to the User Mng menu to verify the user list
The user list that was retrieved will be displayed on this page
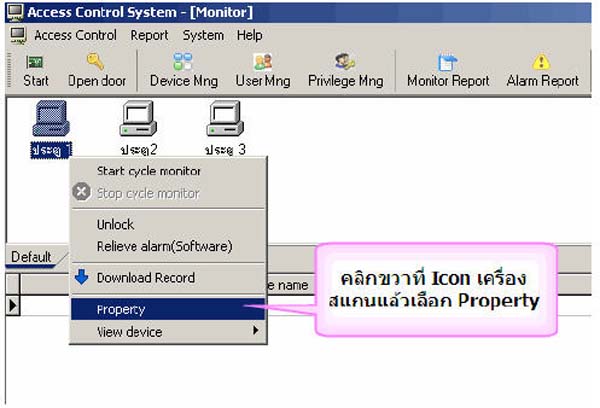
- Right-click on the scanner icon and select Property
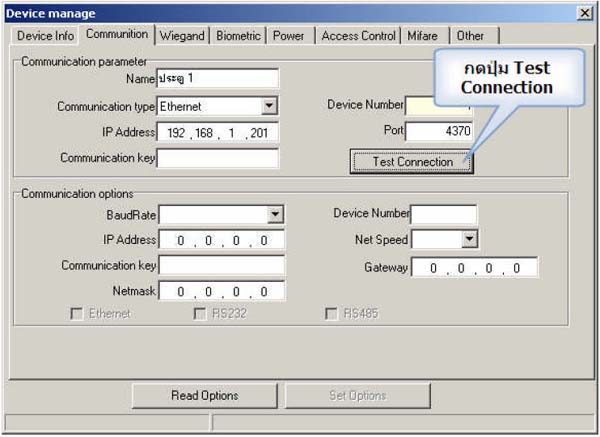
- Click the Test button
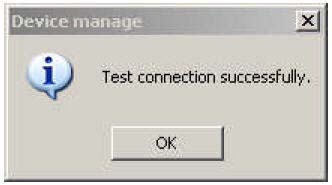
- If the connection to the scanner is normal, it will display a message saying "Test connection successfully."
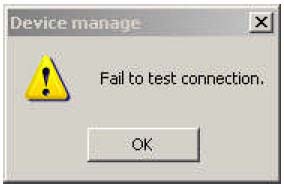
- If unable to connect to the scanner, it will display a message saying Fail to test connection
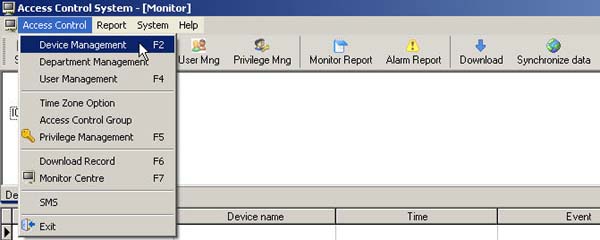
- Go to the Access Control menu and select Device Management
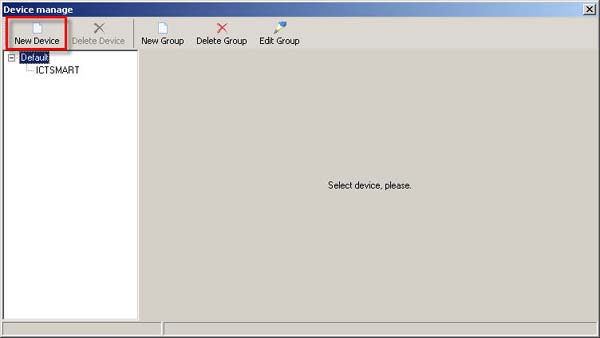
- Click on the New Device menu
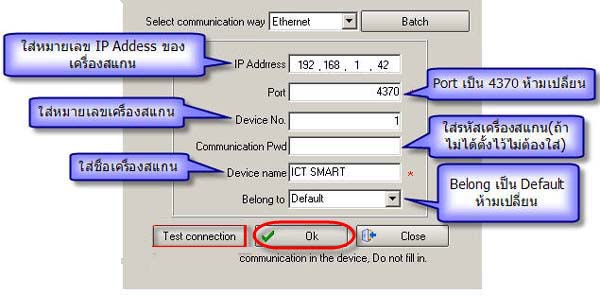
- Enter the details of the scanner device and click the OK button
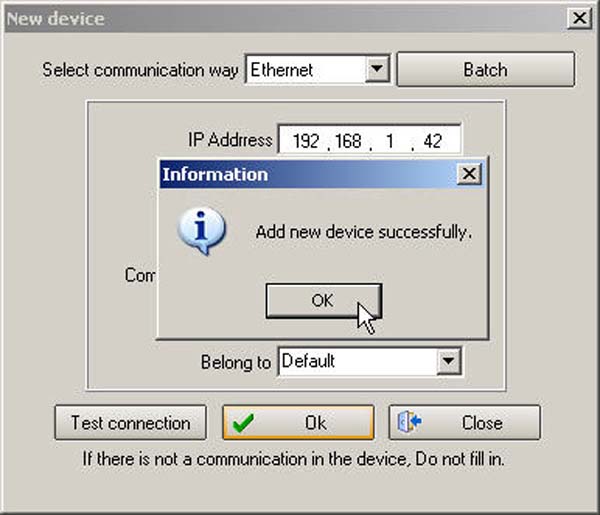
- Then click the OK button again
- Then click the Close button
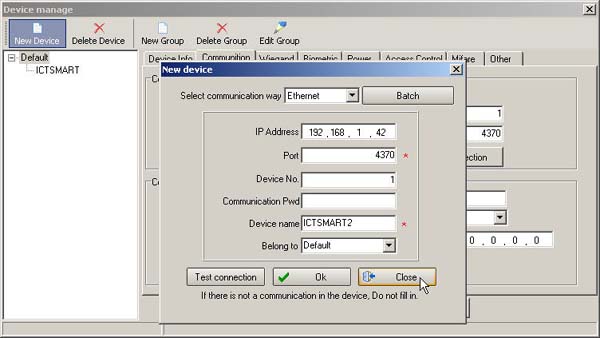
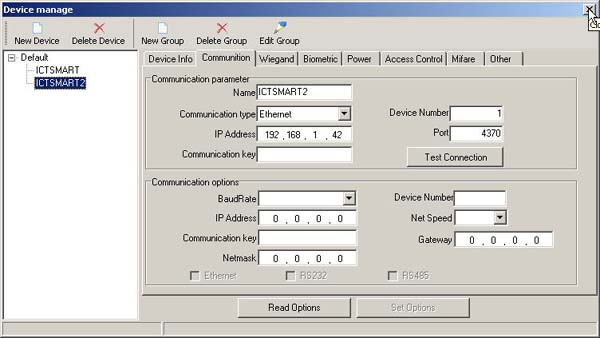
- The list of scanner devices that have been added will be displayed in the left window
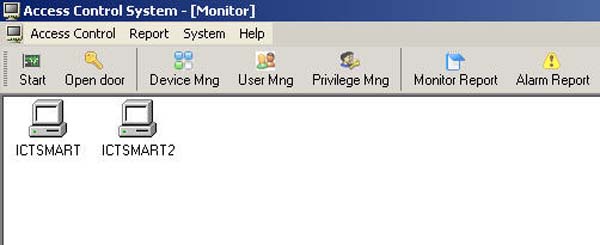
- Then the device image will be displayed in the main menu page
- Double-click on the program icon to launch it
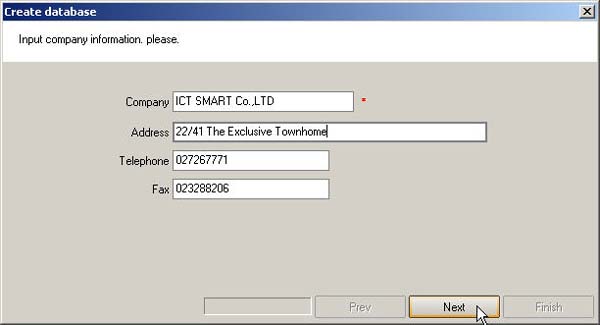
Then enter the company details in this window and click the Next button
- After creating the database successfully, click the Finish button
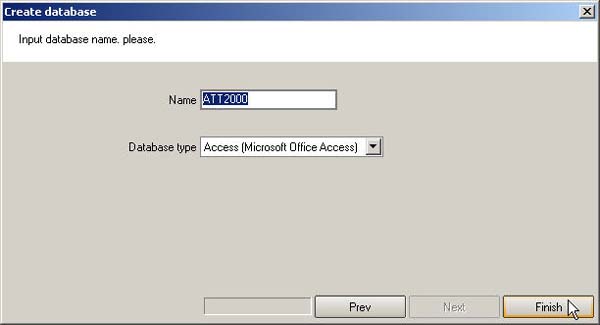
- Then a message will appear indicating that the database has been created successfully. Click the OK button
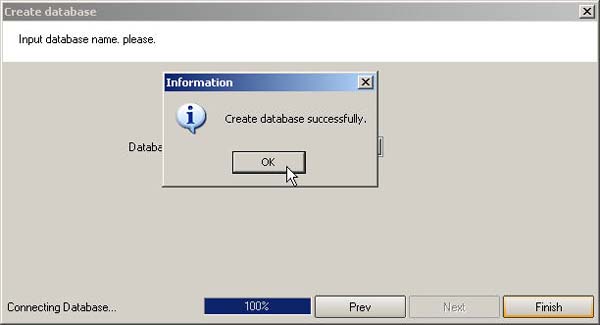
- Then the User login window will appear. You do not need to enter a password, just click the OK button
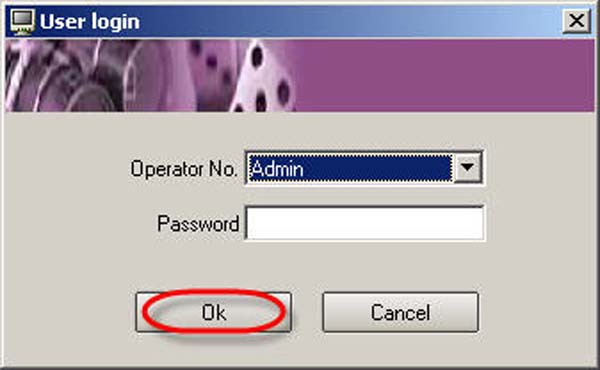
- Then a message will appear asking you to add a scanner device. Click the Yes button
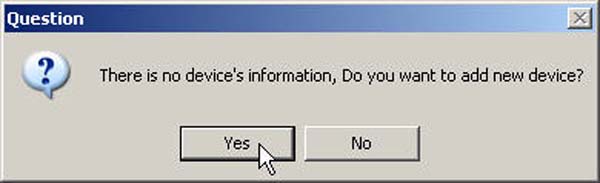
- Then enter the various information to add the scanner device and click the Test connection button
to test the scanner device addition
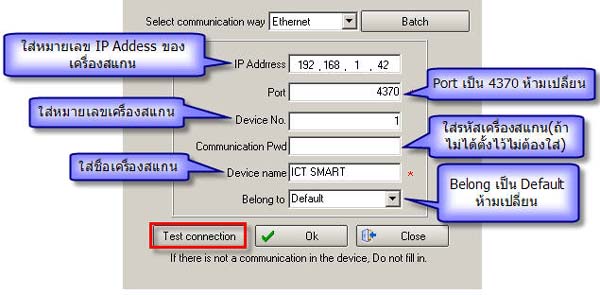
- If the scanner device is connected successfully, a message will appear saying Test connection successfully. Then click the OK button
(In case the scanner device cannot be connected, please verify that you have entered the information correctly
or check the LAN system connecting the scanner device and the computer)
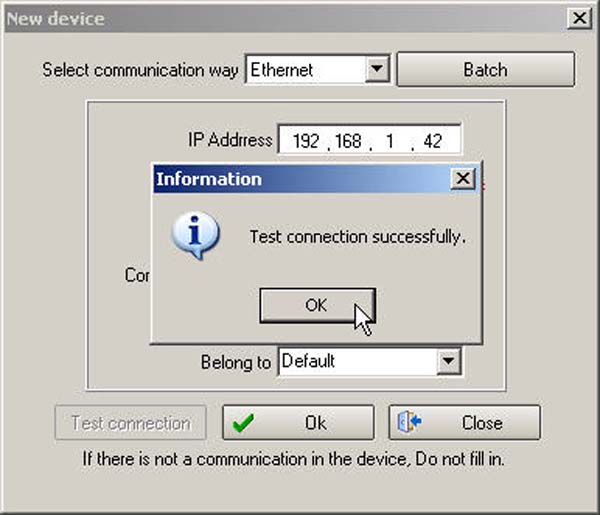
- Then click the OK button again
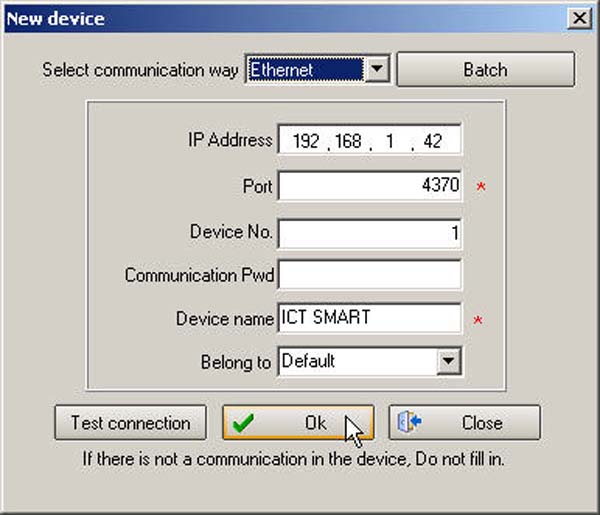
- Click the OK button again after a message box appears indicating that the new scanner device has been added successfully
- Then click the Close button and the list of scanner devices will be displayed as shown in the image
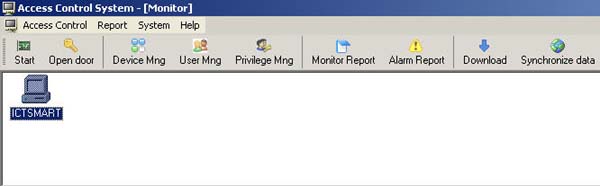
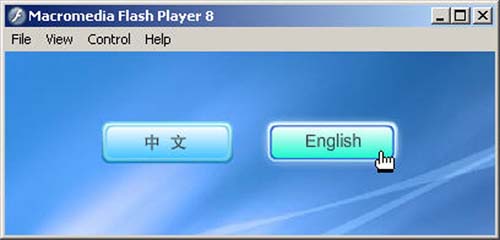
- Double-click the AUTO RUN button

- Select English
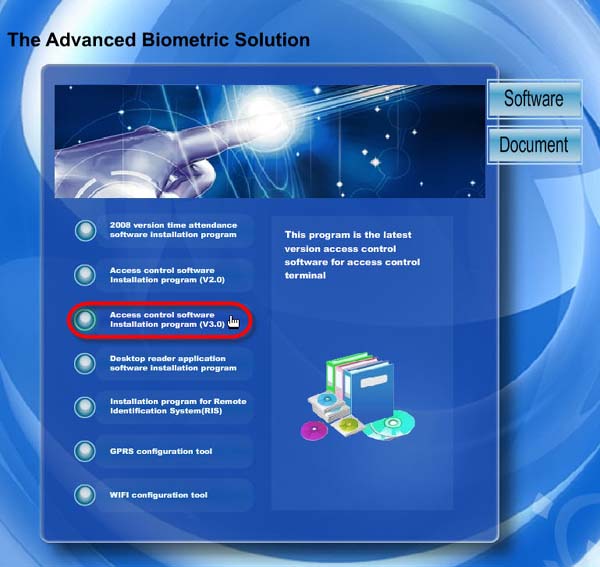
- Then select Access Control Software Installation Program (V3.0)
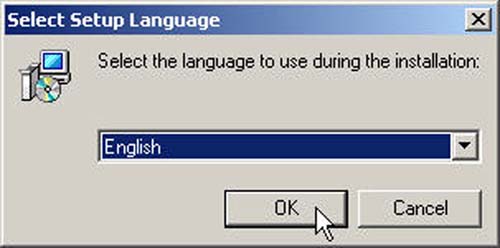
- Click the OK button
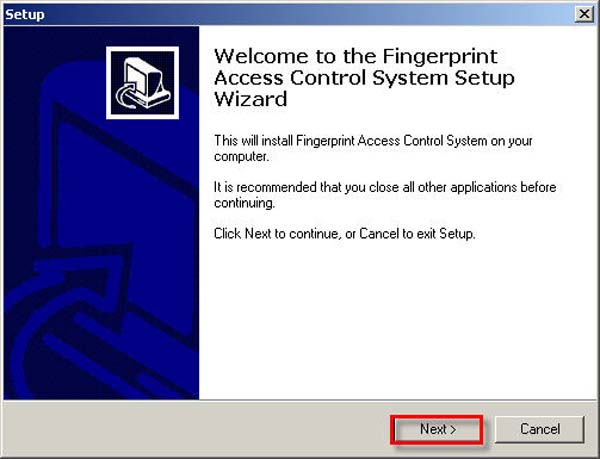
- Click the Next button
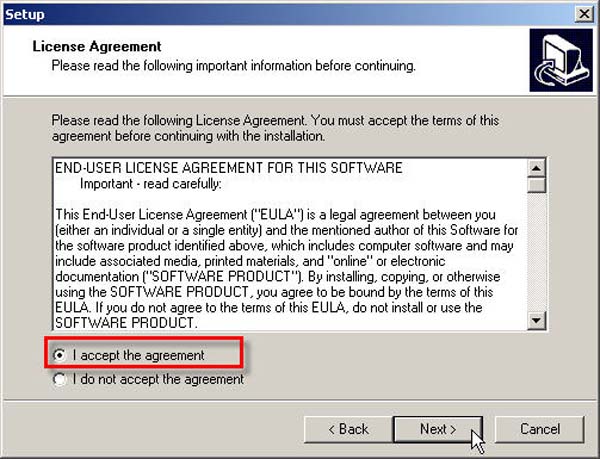
- Select the I accept the agreement option and click the Next button
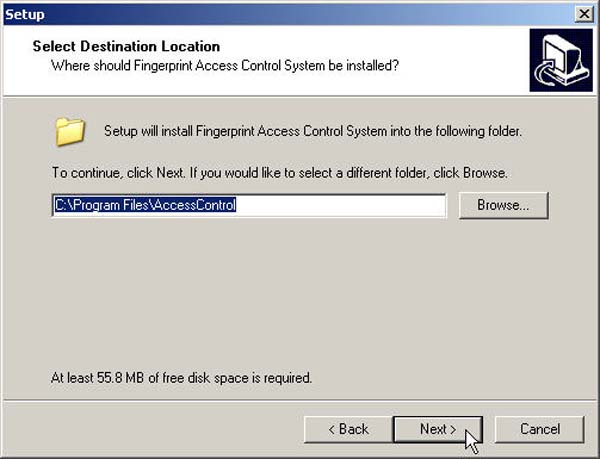
- Select the location where you want to install this program and click the Next button
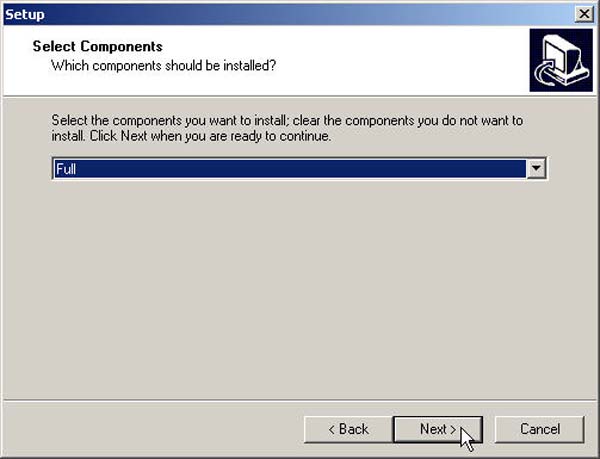
- On this page, click the Next button
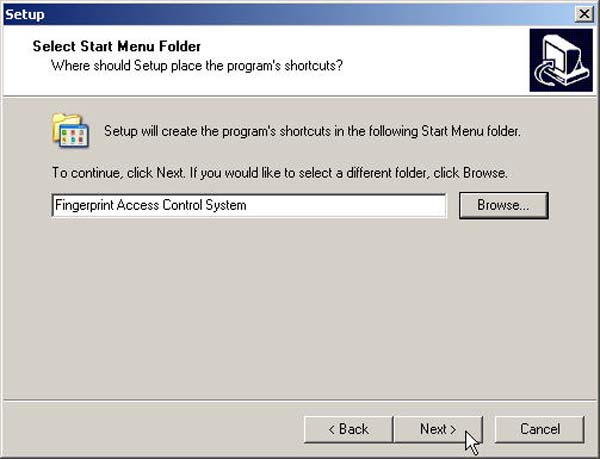
- Click the Next button
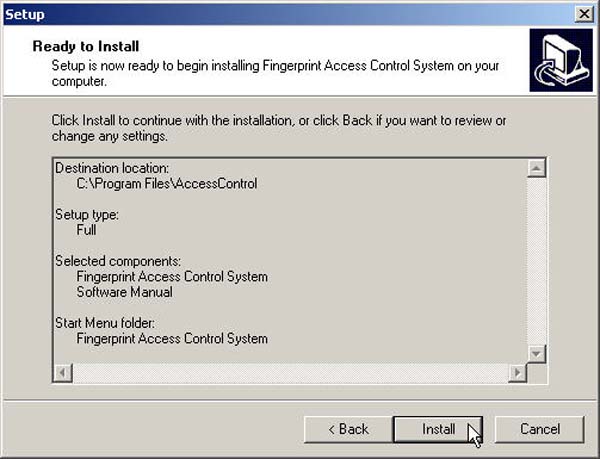
- Then click the Install button
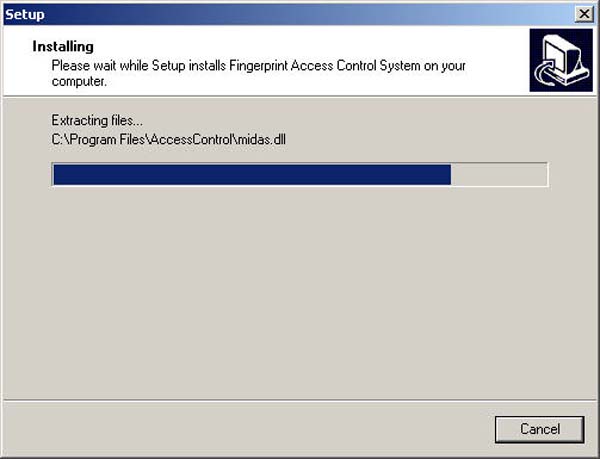
- The program is now installing
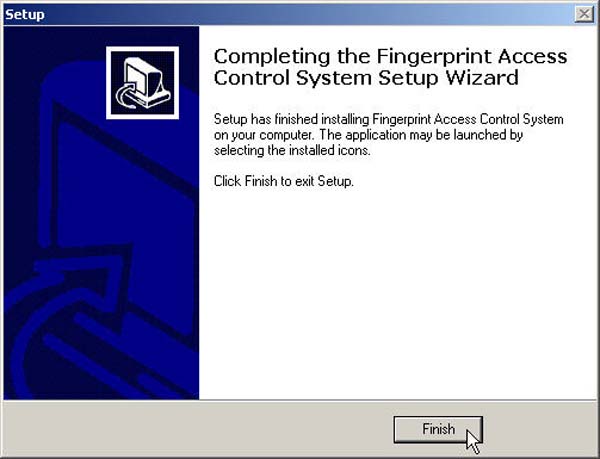
- Click the Finish button to complete the program installation
- The program icon will appear in this format