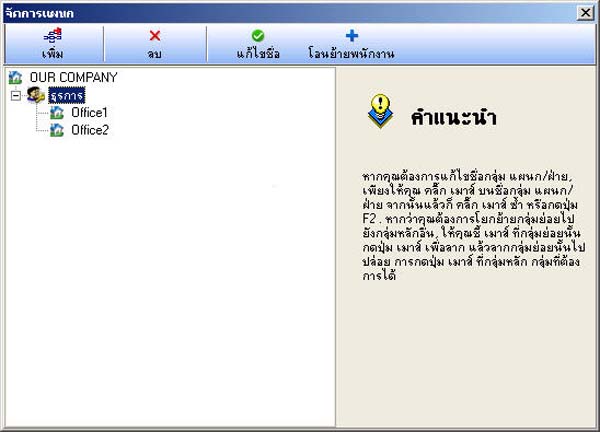
ZK Attendance Management V.3.6.2 Usage Guide
SearchSelect the menu Updates/Settings

Then select the System Settings menu
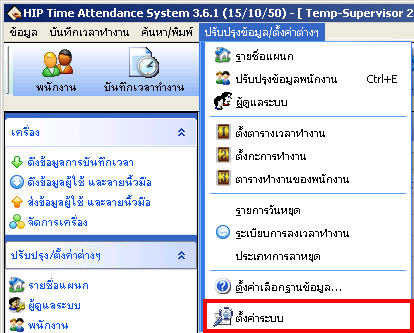
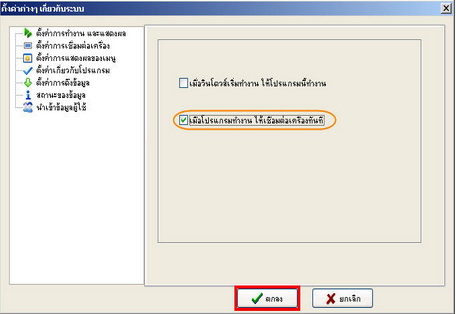
Select the topic Program Settings
Then check the checkbox next to the topic When the program runs, connect to the device immediately
Click the OK button
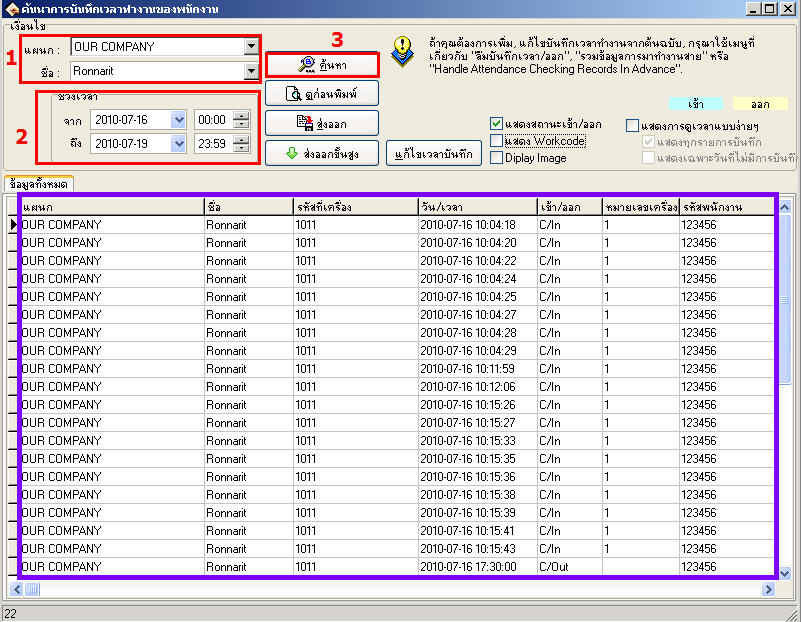
Go to the Work Time Log menu

1. Select the department for each department and then select the name you want to view
2. View from which date to which date
3. Then click the Search button
The scan time will be displayed in the window below
Click the Advanced Export button
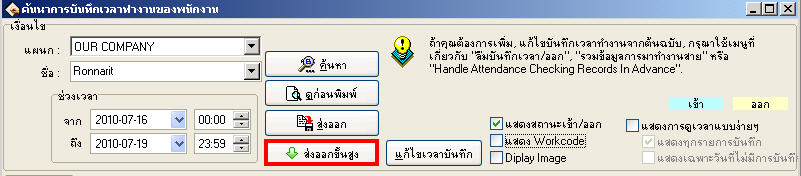
4. Select where you want to save this file
5. Then select what file format you want to export as
6. Then click the Start Export button
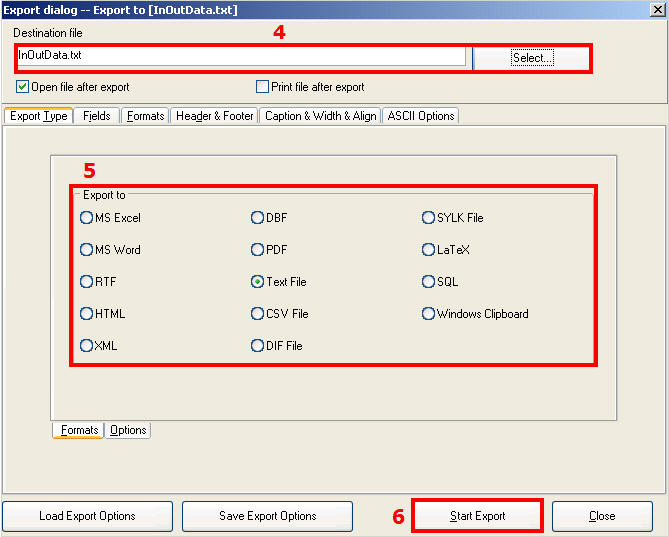
The report format that was exported will be displayed
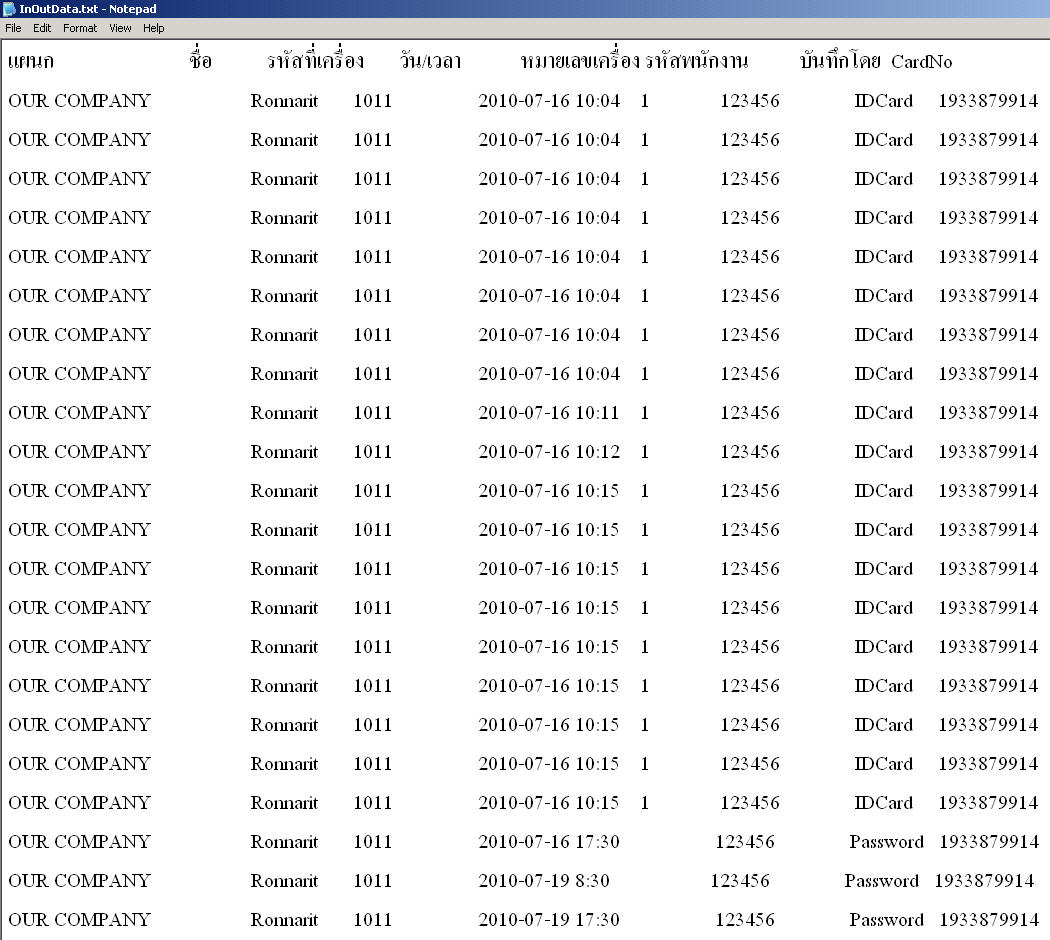
- Go to the Employee menu
- Select the department where the user is located and then select the user's name. After that, you can enter details for the
user then click the Save button
(In the ID code field, you must not change the user's ID number under any circumstances)
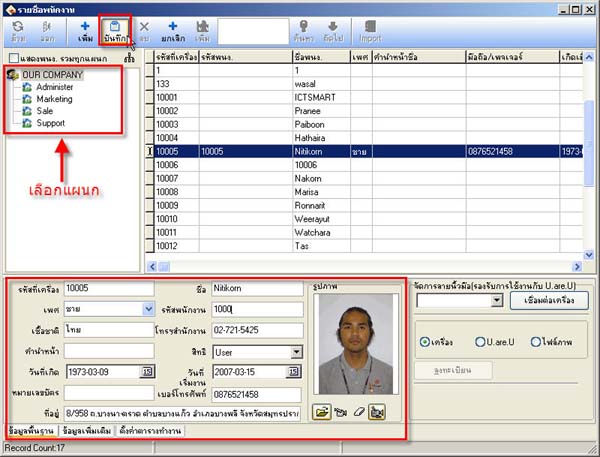
- Various employee information entered will be stored in the database
- Right-click on the scanner device list and select Connect
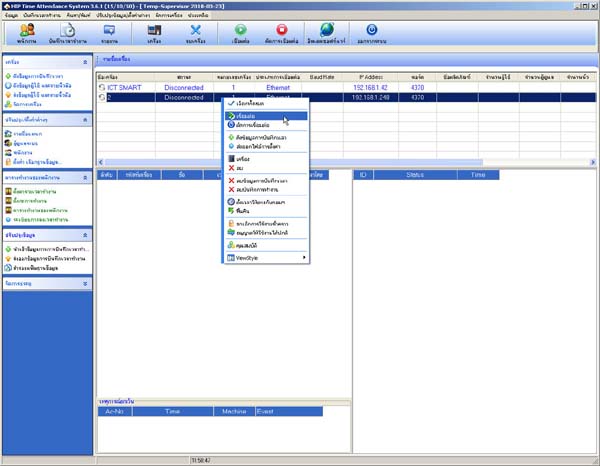
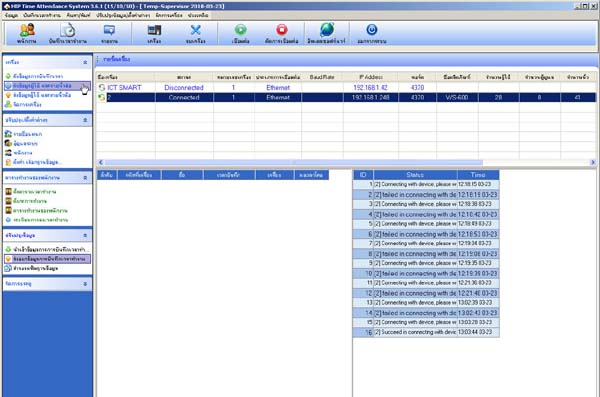
- After connecting successfully, go to the menu to Download User and Fingerprint Data
- Click the View Users on Device button to retrieve a list of all users in the scanner
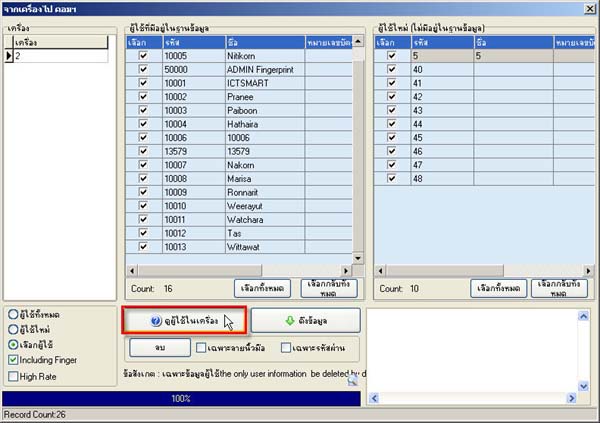
- Then click the Select All button if there are users in the right window
Click the Select All button as well
(The users shown in the right window are new users that have not been downloaded and stored in the database)
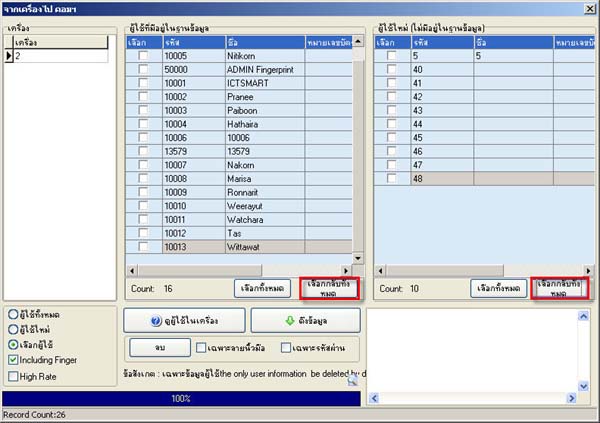
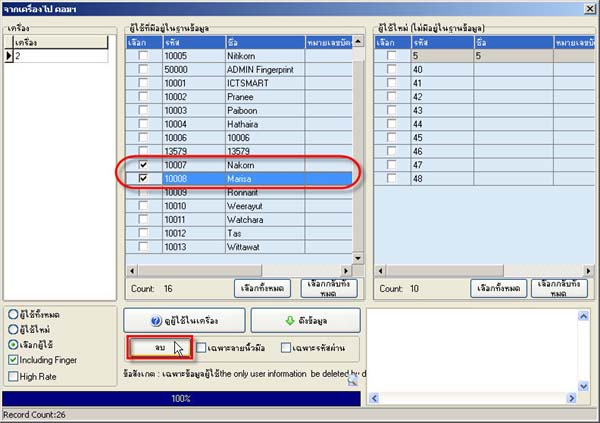
- Then check the checkbox next to the users you want to delete from the scanner, then
Click the Delete button
- A confirmation message will appear asking if you want to delete the users from the scanner and the number of users
Click the Yes button
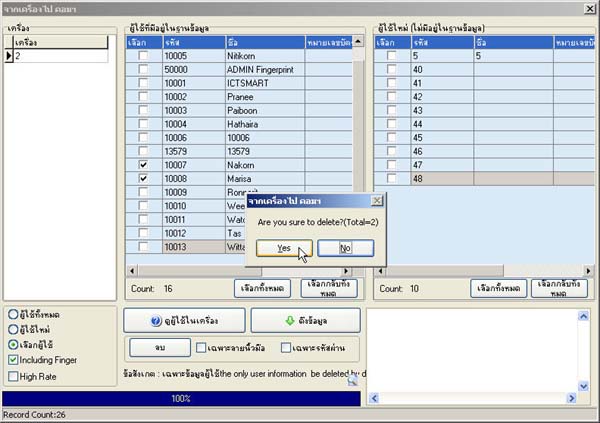
The selected users will be deleted from the scanner. When finished, close this window
- Then go to the Employee menu to delete users from the database
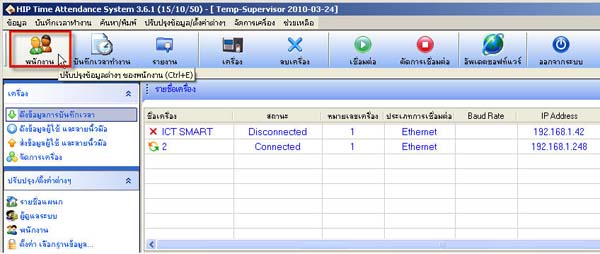
- Select the department and then select the users you want to delete from the database
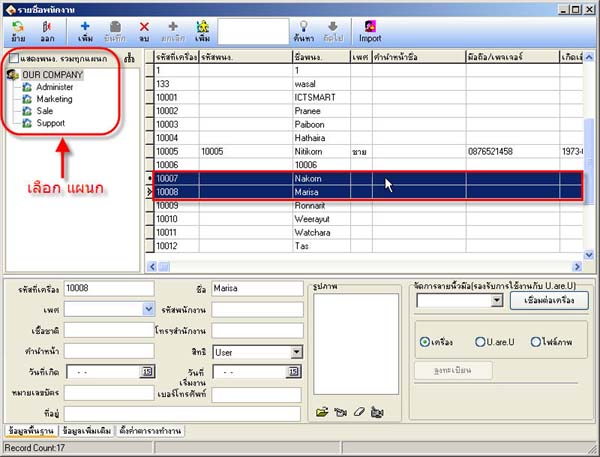
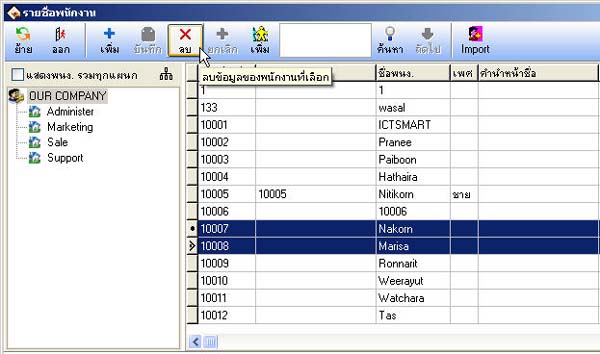
- When finished, click the Delete menu at the top
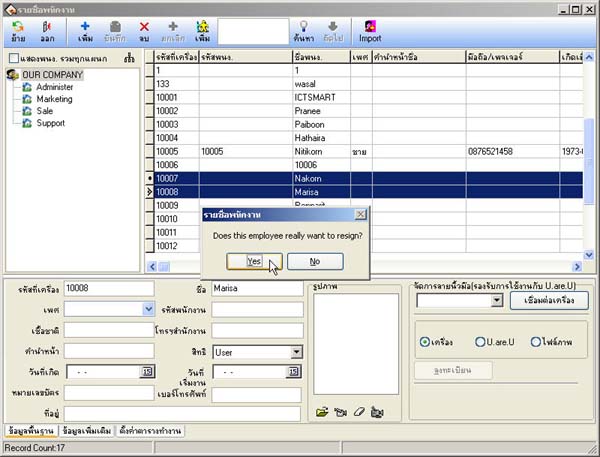
- A confirmation message will appear asking if you want to delete the users from the database. Click Yes
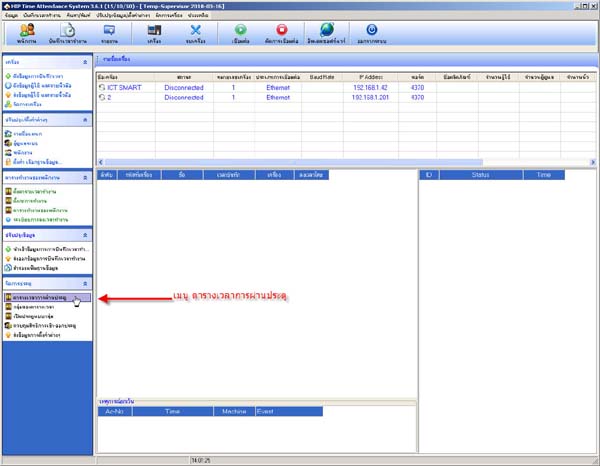
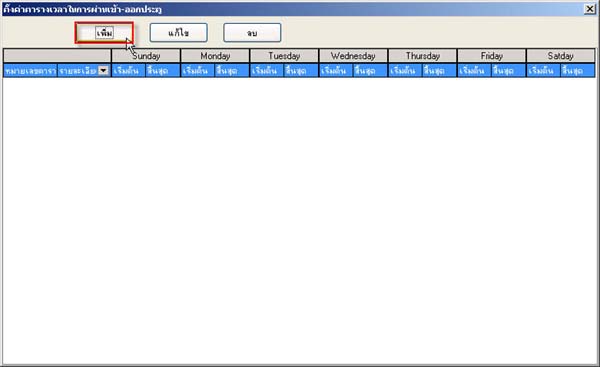
- Select the door passage schedule
- Click the Add button to add a Time Zone for the user's door entry and exit, specifying what time or day the user
can access the door
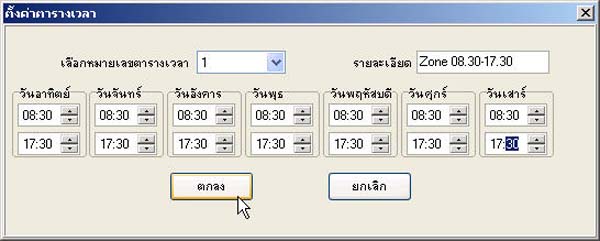
- In this window, specify what time or day the user can pass through the door
(If you want the user to have access at all times, set the time to 00.00-23.59)
(Or if you want the user to have no access at all, set it to 00.00-00.00)
- After that, enter the name of the Time Zone and click the OK button
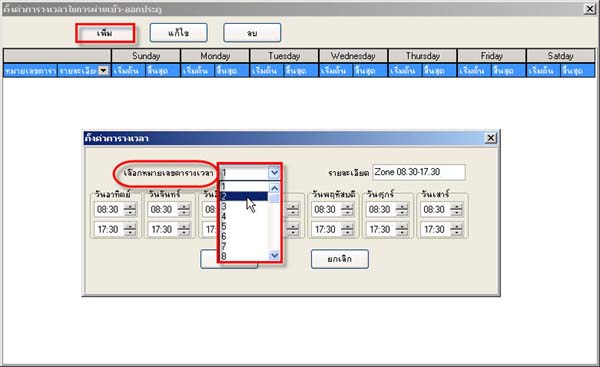
- If you want to add another Time Zone, click the Add button and in the Select schedule number field,
select the next number after the first one - After clicking the OK button, if you want to edit, click the Edit button or if you want to delete, click the Delete button
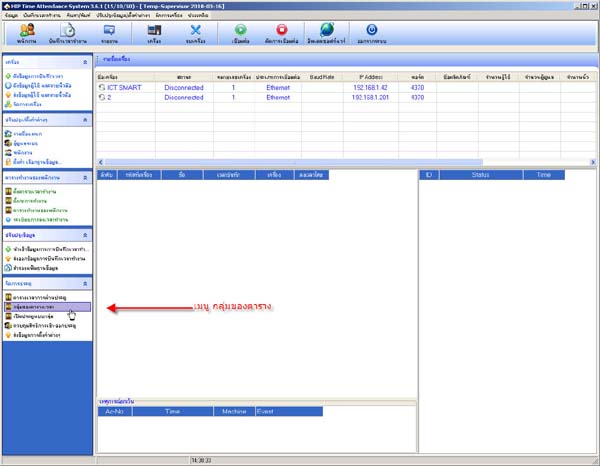
- Then go to the Schedule Group menu
- In this window, for each group, select which Time Zone you want to be in the group, then click Save
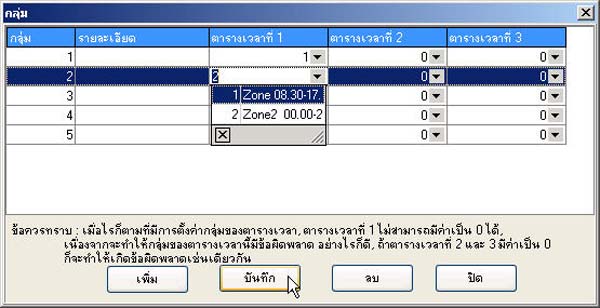
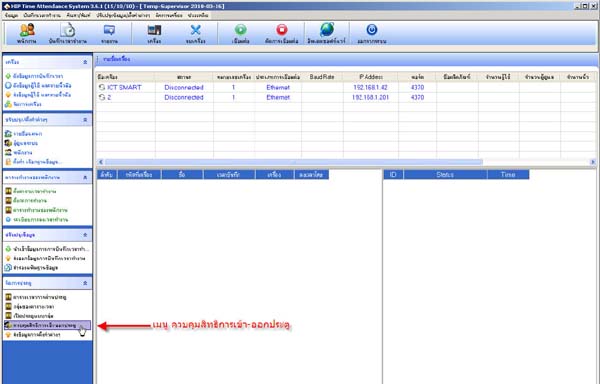
- Then go to the Door Access Control menu
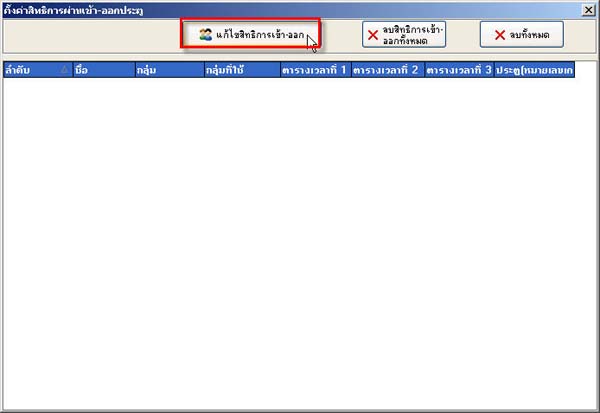
- Click the Edit Access Rights button
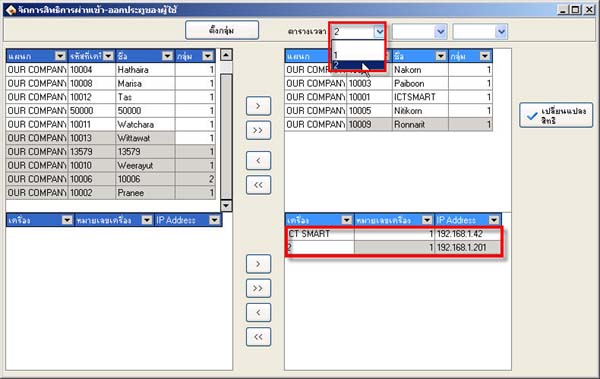
- Select the user you want to assign a Time Zone to, then move the user name to the right side
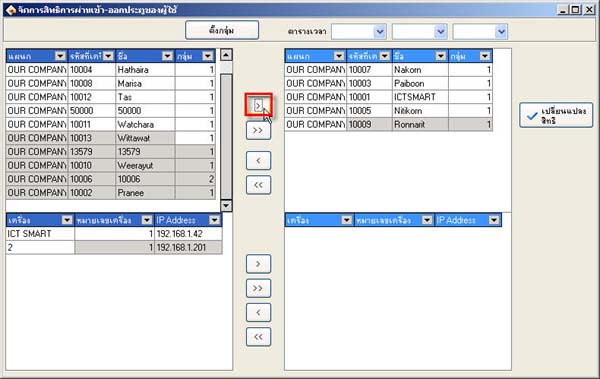
- Select the Time Zone for the user, then move the scanner device names that need to send the Time Zone value to the right window
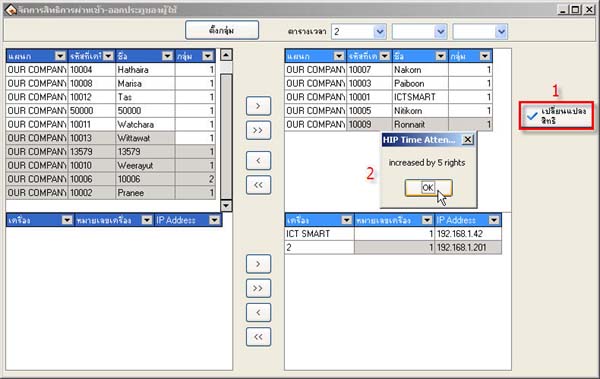
- Click the Change Rights button, then click the OK button and close this window
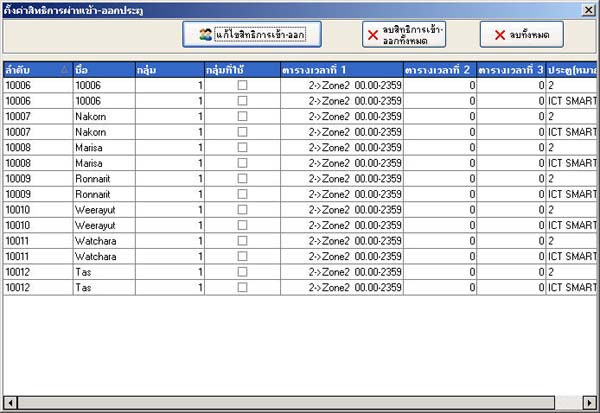
- The information about the creation of the door entry and exit schedule for the user is displayed in this window
(If you want to delete the door access rights, click the Delete All Access Rights button)
(Or if you want to delete all the door entry and exit schedule settings, click the Delete All button)
- Then close this window
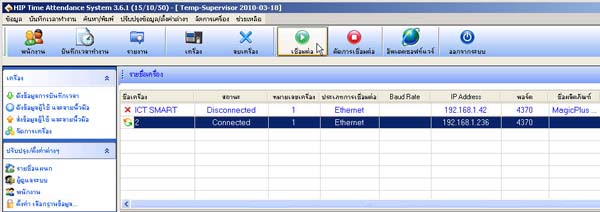
- Then connect the scanner device to send the door access rights to the scanner
- Then go to the Send Settings menu
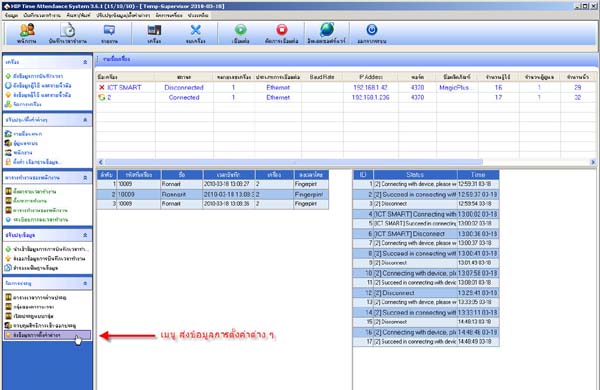
- A message will appear. Check the boxes next to Device Settings and User Settings, then click the OK button

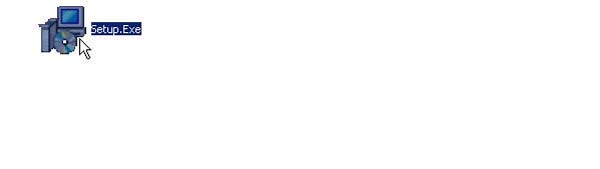
- Double-click the Setup Icon
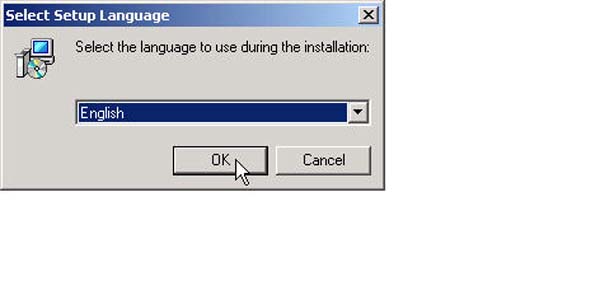
- Click the OK button
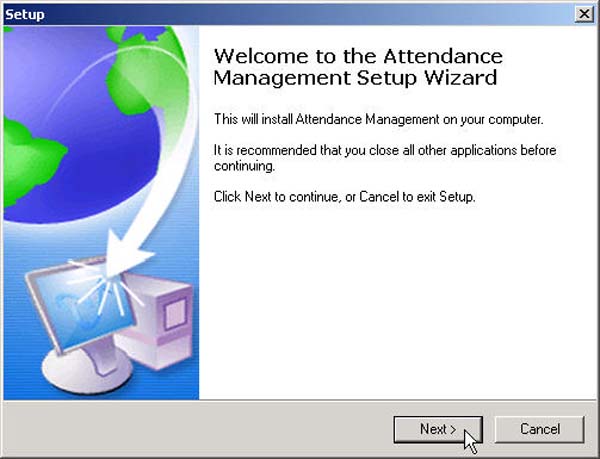
- Click the Next button
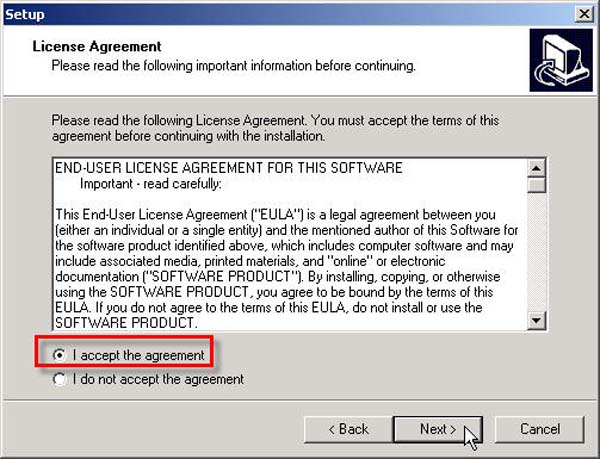
- Select the "I accept the agreement" option and click the Next button
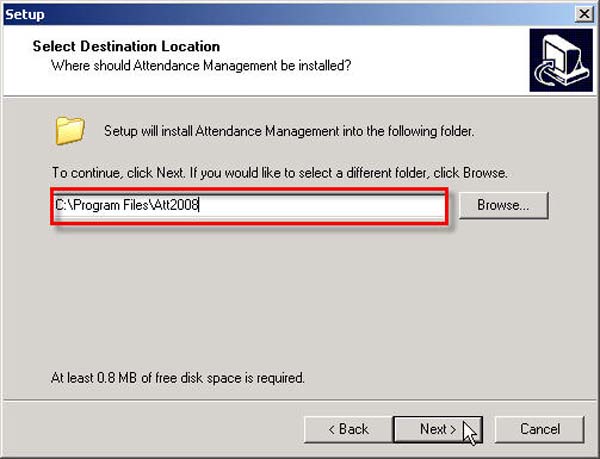
- Select the desired installation location for this program, then click the Next button
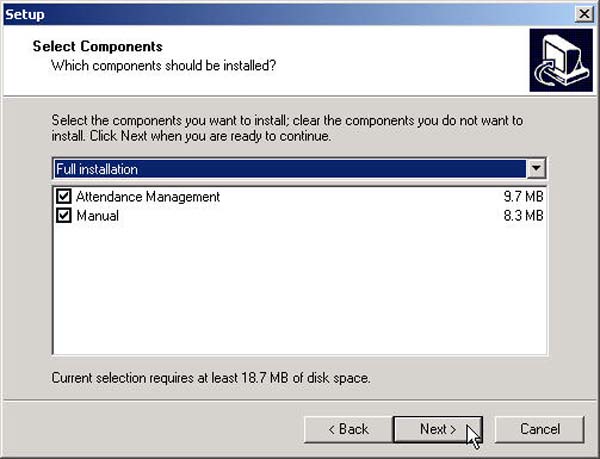
- For this step, click the Next button
- Click the Next button again
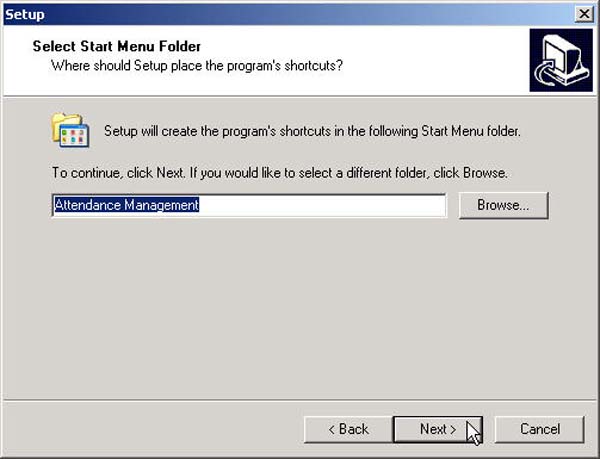
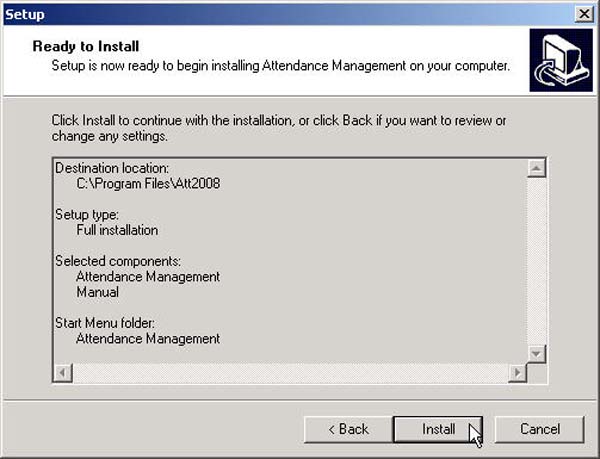
- Then click the Install button
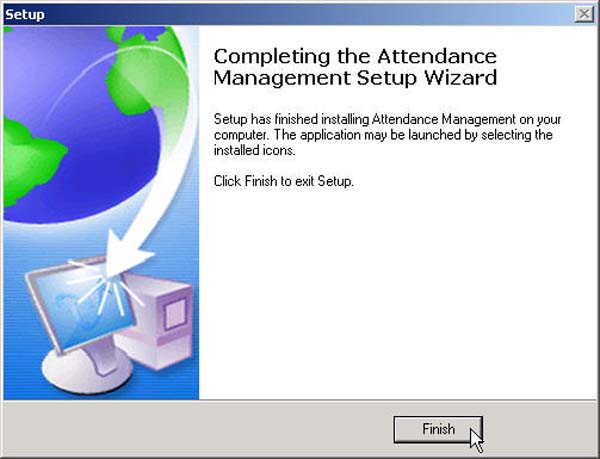
- Click the Finish button to complete the program installation
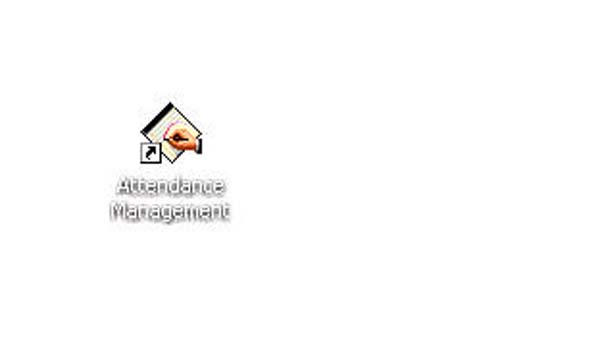
- After installation is complete, an Icon will appear on the Desktop
Promotion for affordable facial scanning machines, temperature measurement, or detection of non-compliance with mask wearing. Interested parties can contact 02 726-7771-2 ext. 613 Mr. Natthawut
- The first step before importing employee data and time is to retrieve employee data and time recording information from the scanning device first
Then insert the USB into the computer
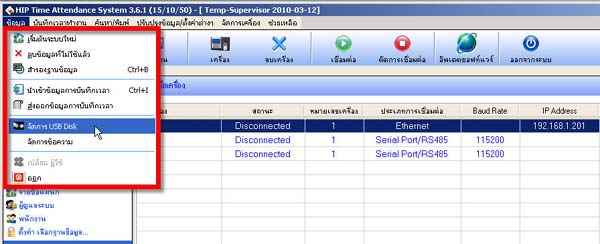
- Go to select the Data menu
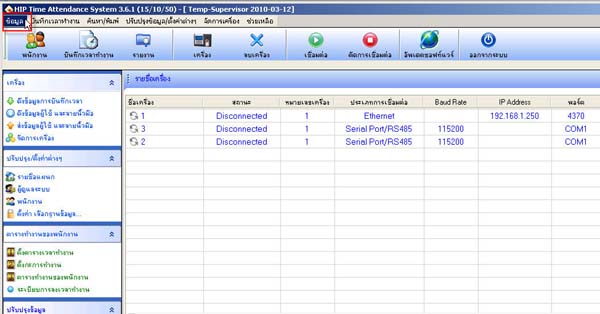
- Then select Manage USB Disk
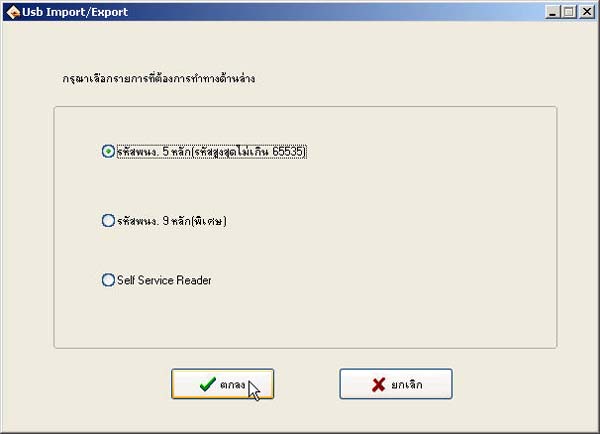
- For the selection, enter the ID code as 5 digits and then click the OK button
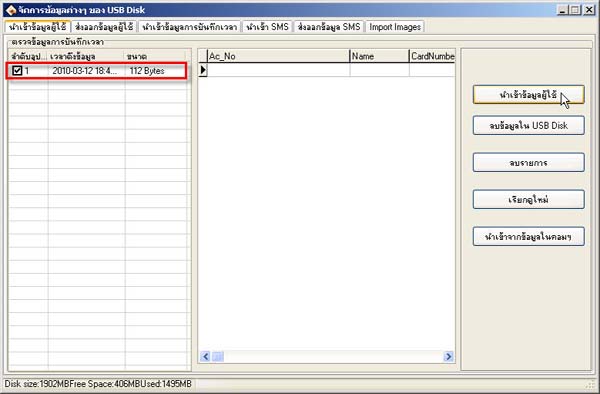
- The left panel will display the USB status. Click the Import User Data button to retrieve user data and store it in the database
- Then a message will appear asking if you want to import the data. Click the OK button to proceed with importing the data
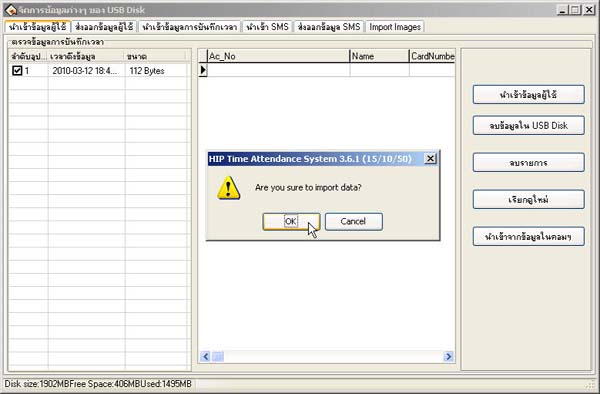
- Click the OK button again
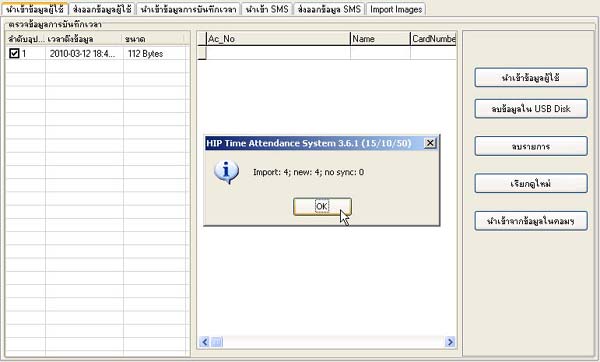
- The message will display the status of employee data retrieval showing how many employee records were imported. When complete, click the OK button
The user data will be stored in the database successfully
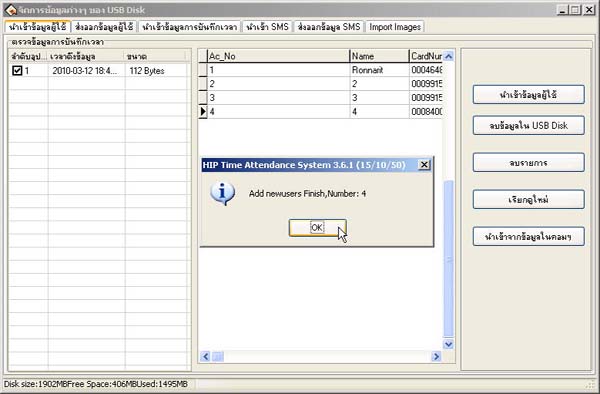
- Then go to select the Import Time Recording Data section to retrieve the time recording data of employees
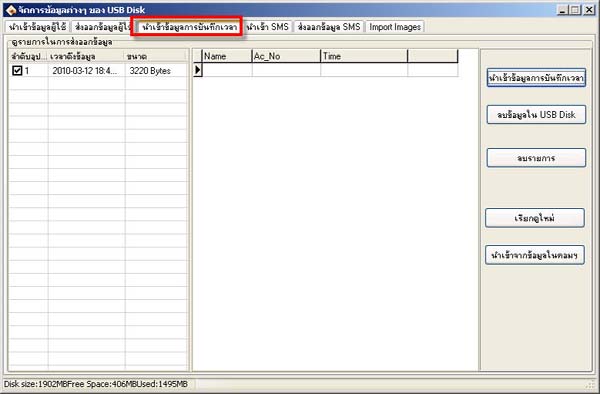
- Click the Import Time Recording Data button
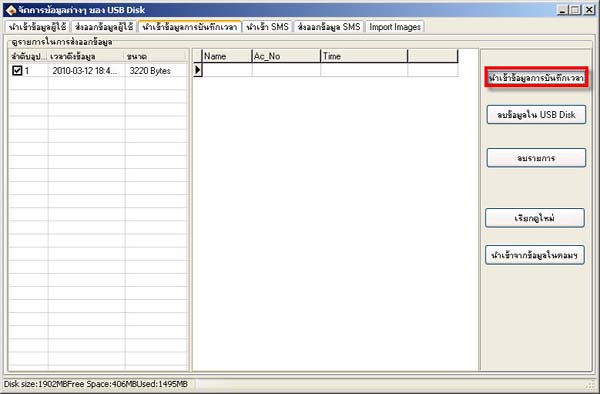
- Then click the OK button again to retrieve the recorded time data
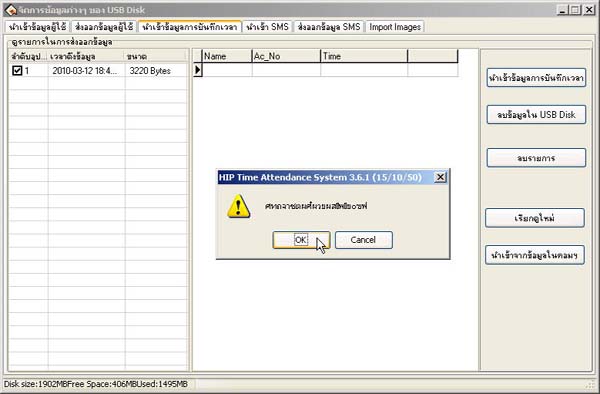
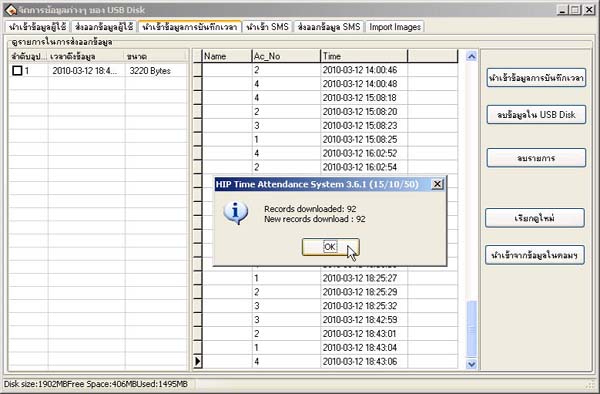
- Then the message will display the status of the time data that was retrieved showing how many records there are, and then click OK
All data will be stored in the database successfully
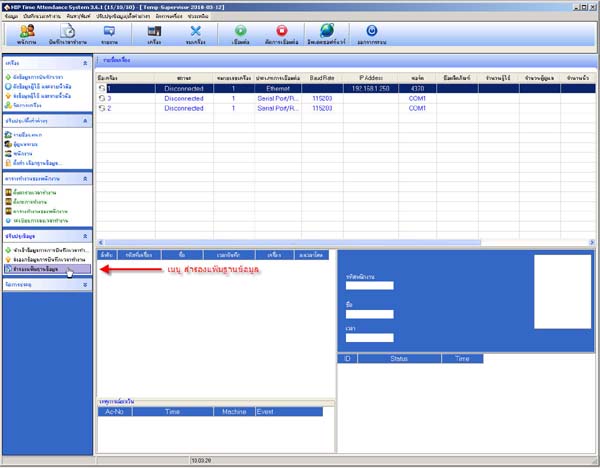
- Select Database Backup from the menu
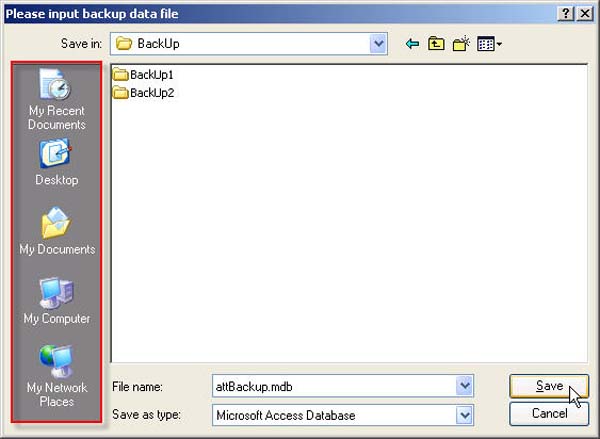
- Then enter a name and select where to store this database. When finished, click the Save button
- Then the database backup is complete
Go to the Reports menu
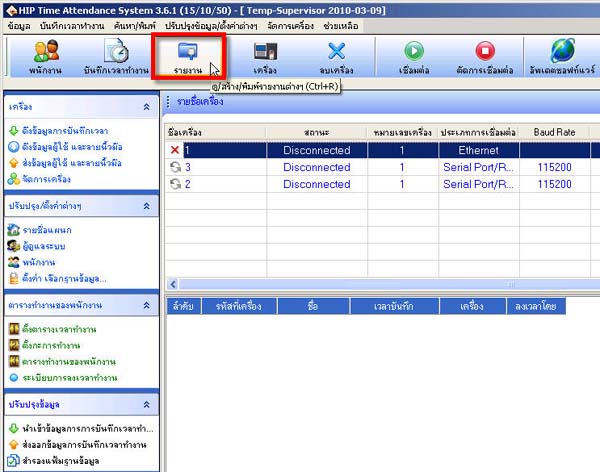
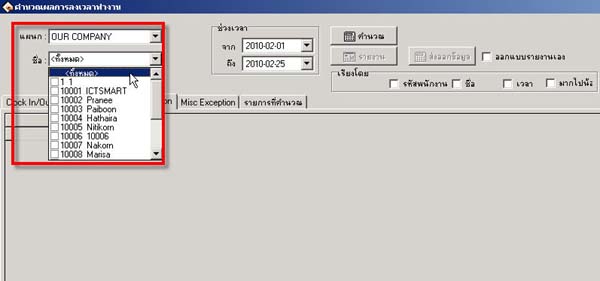
Select the department you want to view the report for (if you want to select all departments, select OUR COMPANY)
In the name field, select the name of the employee whose report you want to view (if you want to view all employees, select )
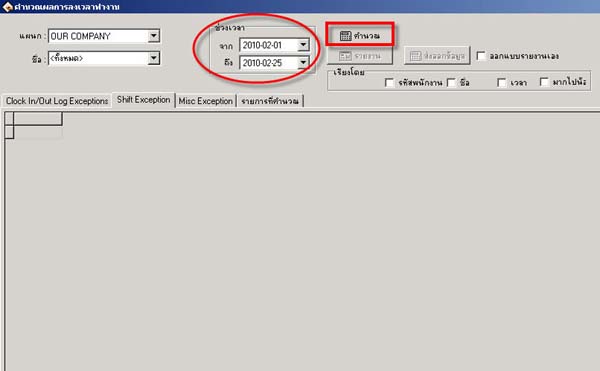
Select the date range for the report you want to view Then click the Calculate button
Once complete, the clock in/out report will be displayed
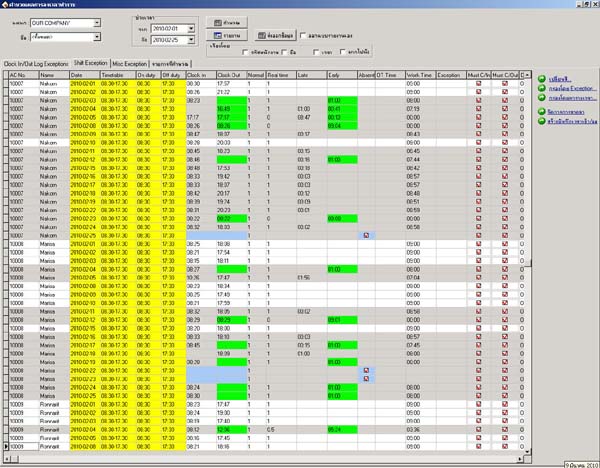
If you want to view all scan times for each day, select the ClokIn/Out Log Exception section
This window will display all times when there was a scanin/out
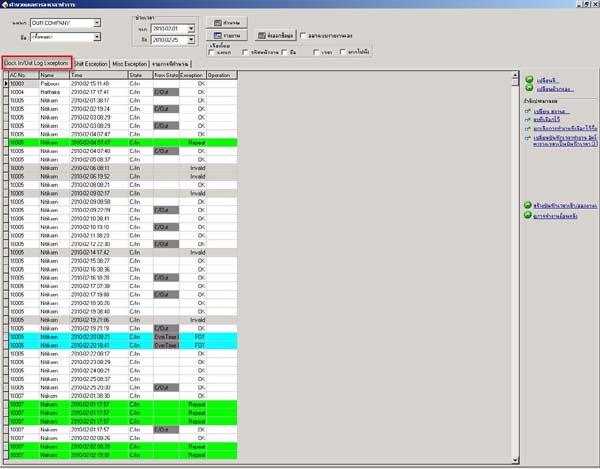
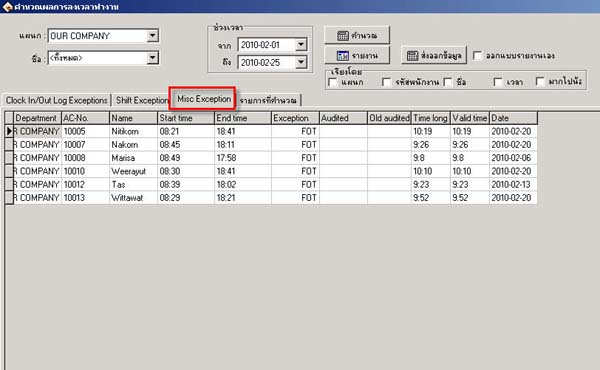
This window will display scan times outside the scheduled work hours, for example
if the work schedule is set to 08.30-17.30 (Mon.-Fri.) but the employee came to work on Saturday, this window will display the scan time for Saturday
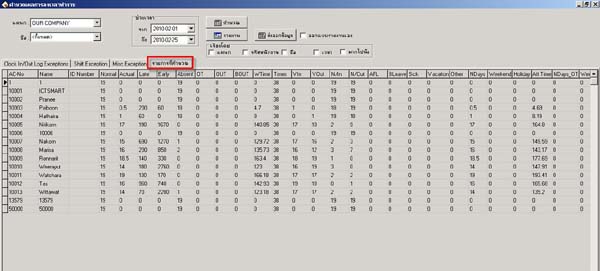
In the Calculation Details window, it displays the aggregated data of days and times that show the employee's clock in/out
showing how many days worked in each month, how many minutes late, or how many hours of overtime worked
This window will calculate everything for you
The employee's clock in/out scans can be exported as a report format by clicking the Report button
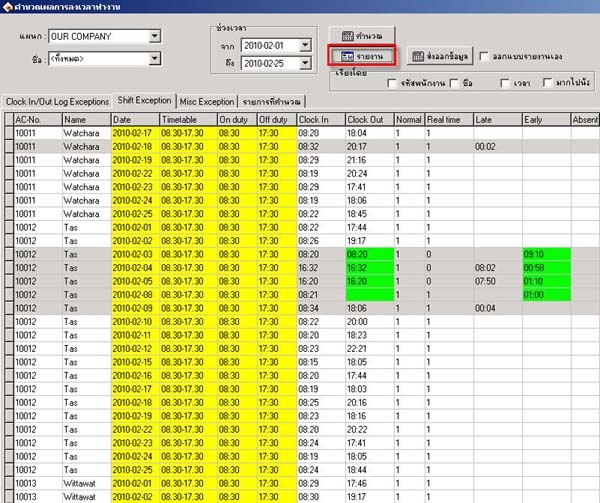
Then select the report format you want
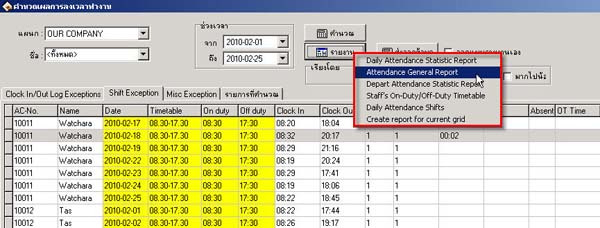
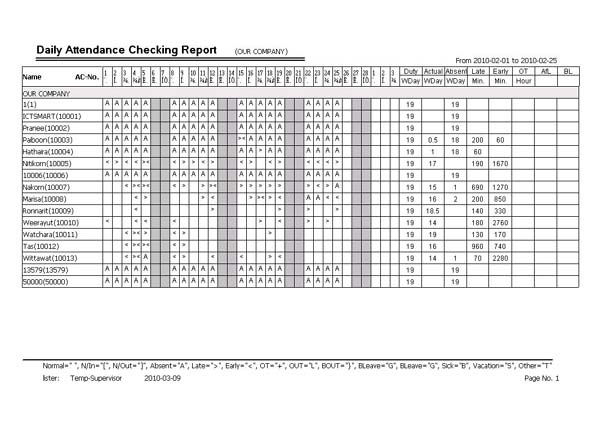
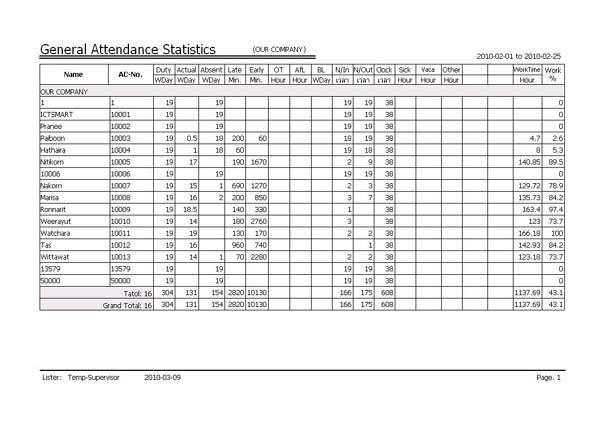
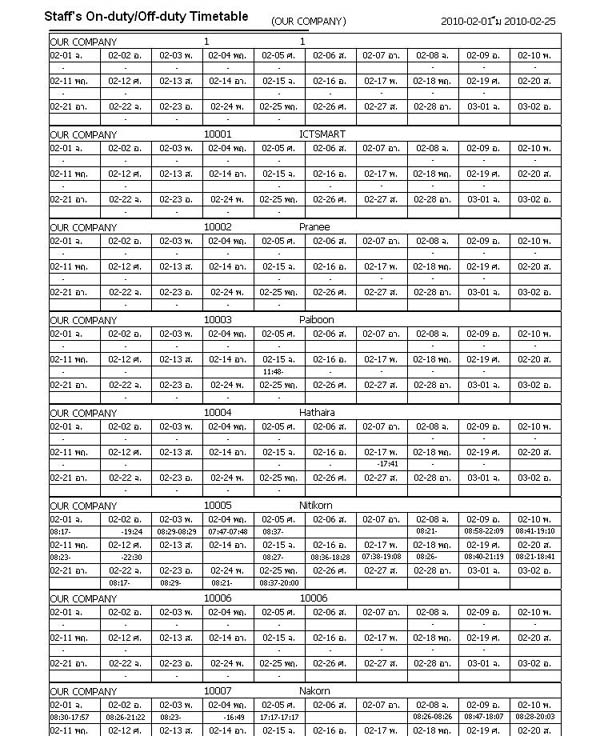
Example report formats
______________________________________________________________________________________________
______________________________________________________________________________________________
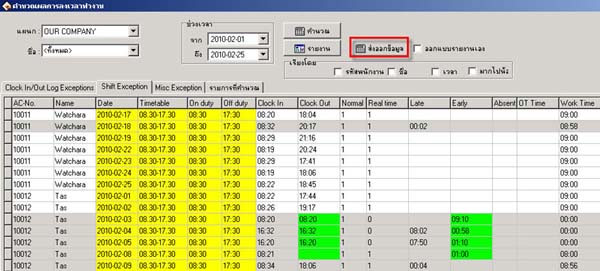
Or if you want to export various data files, click the Export Data button
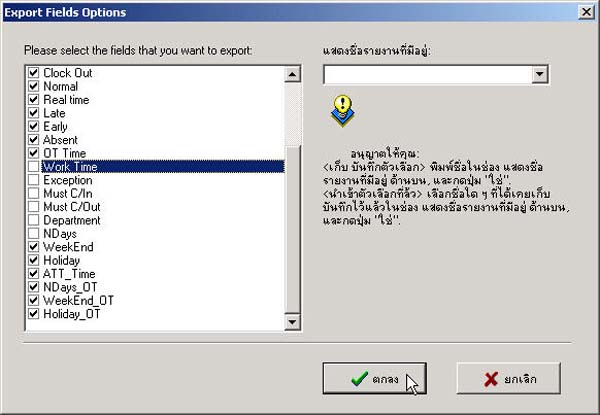
Then select which sections you want to display in the report and click OK
(If you don't want a section to display, uncheck the checkbox in front of that section)
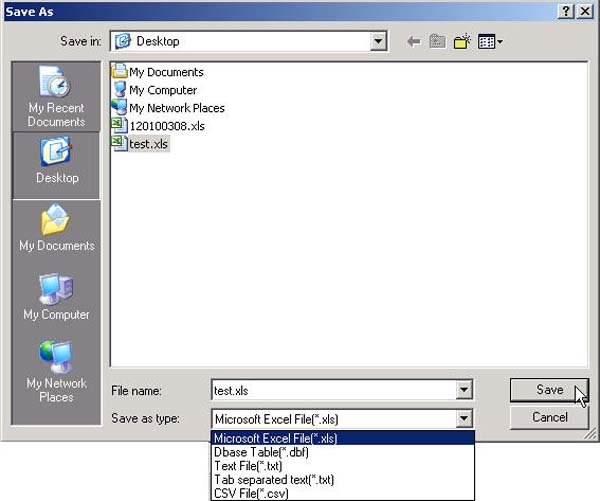
Select the folder where you want to save, name the file, select the file format you want, then click OK
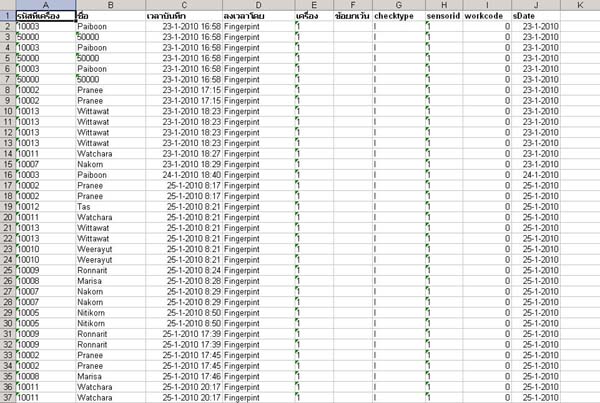
Example of exporting data as a Microsoft Excel file
- Go to the System Settings menu
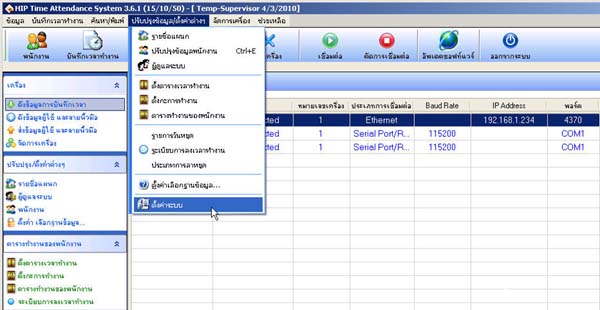
- Select Operation Settings and Display

- Then check the checkbox next to Show Employee Photo and click OK

- The menu to display employee photos will appear

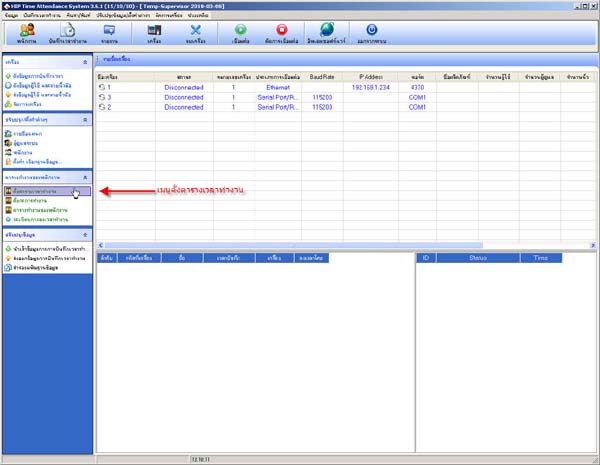
Go to the menu Set Work Schedule
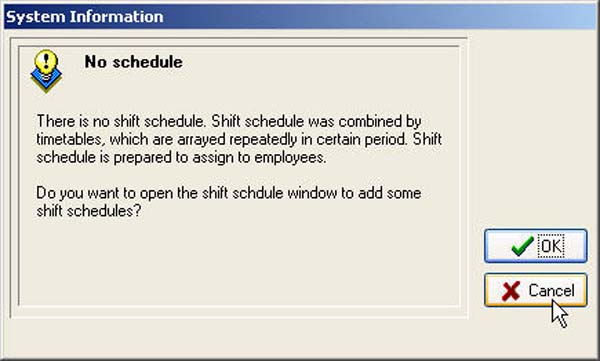
- Press the Cancel button
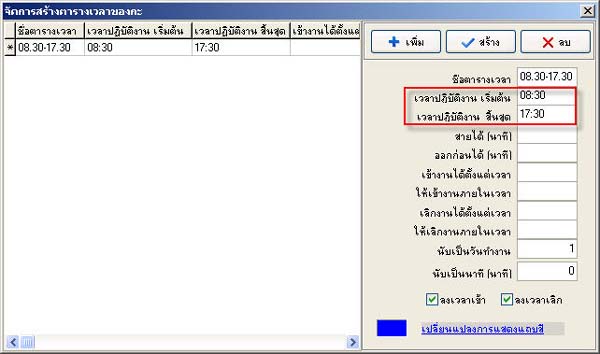
- The first step is to enter the name of the work schedule
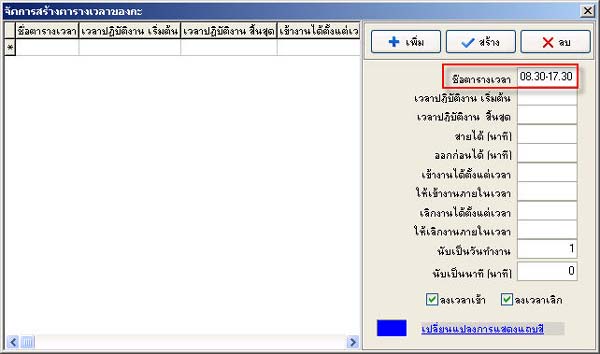
- Then enter the start time and end time
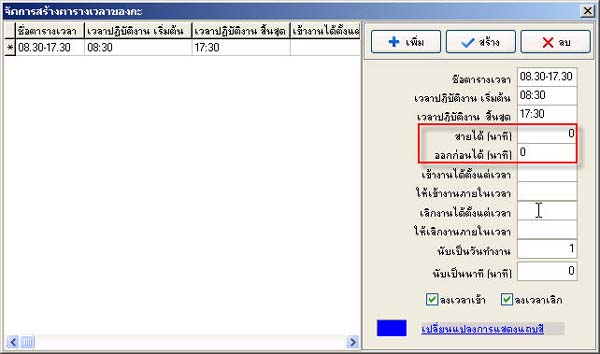
- Enter in this field how many minutes late or early an employee can leave
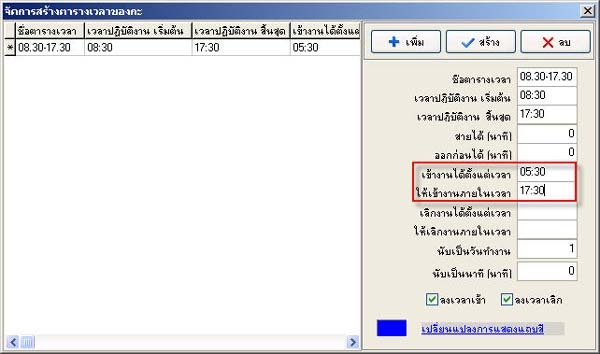
- In the field Can start work from time, enter a time before the work start time, for example, if work starts at 08.30, enter05.30 in this field
- In the field Must start work by time, enter the same time as the work end time
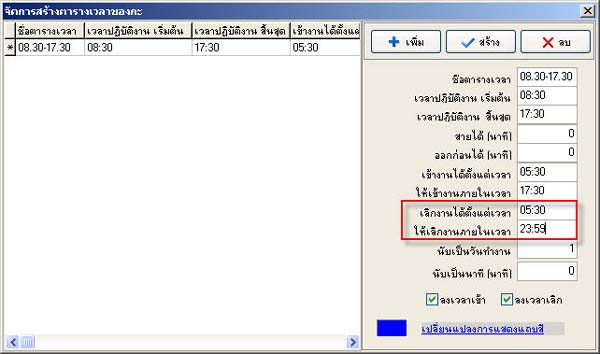
- In the field Can leave work from time, enter the same time as the field Can start work from time
In the field Must leave work by time, enter
23.59 because sometimes employees leave work after 17.30 of the work schedule
so the time will be recorded and saved
- In the field Count as working day, enter as 1 working day
- In the field Count as minutes, enter the total minutes worked in this day or leave it blank if not needed
Then in the section Clock in, Clock out, leave it as is
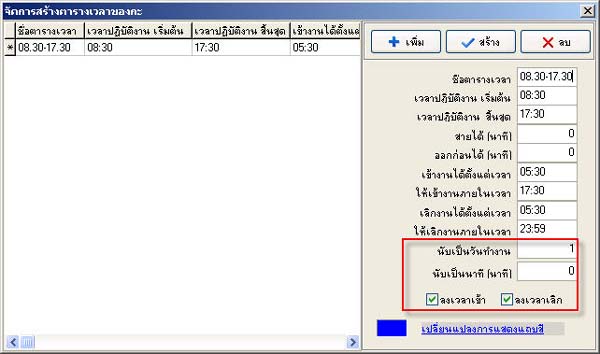
If you want to change the color of the work schedule, click on Change color bar display
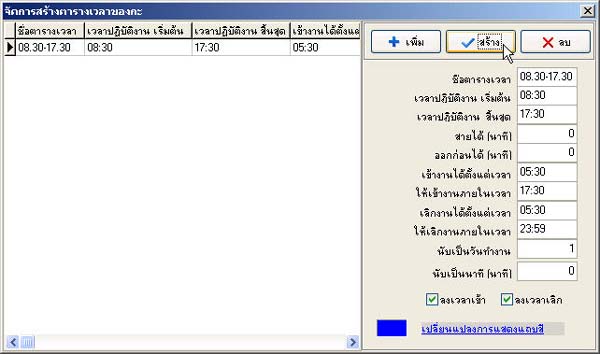
- When done, press the Create button
(If you want to add another work time, press the Add button, or if you want to delete the schedule, press the Delete button)
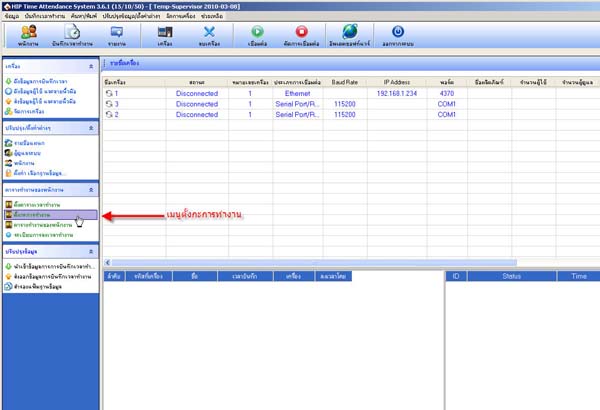
Then go to the Set Work Shift menu
- Press the Add button
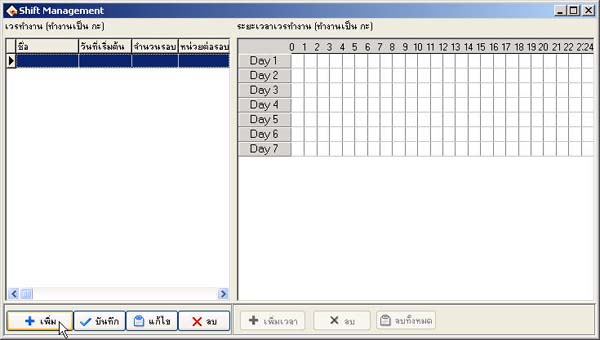
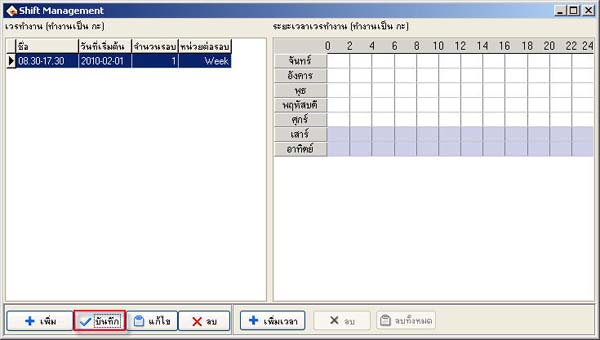
- Enter the name of the Shift Management and the start date of the employee schedule
- In the field Number of cycles and the field Units per cycle, no need to change. When done, press the Save button
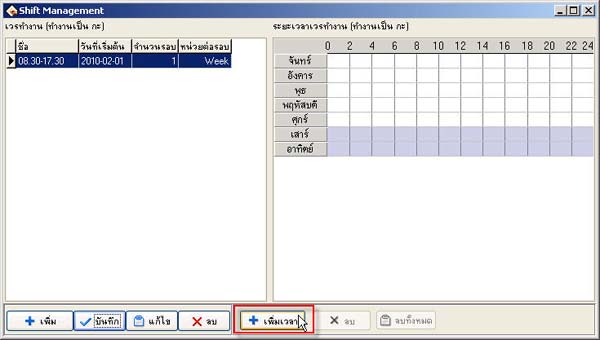
- Then press the Add time button
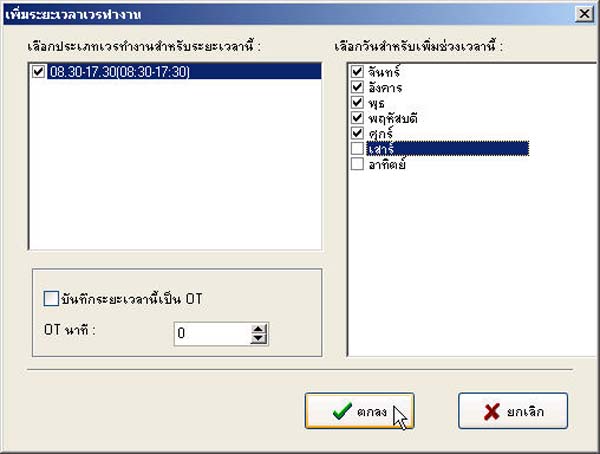
- Check the checkbox for the type of work time of the employee
- Then select the date you want to apply this schedule to. When done, press the OK button
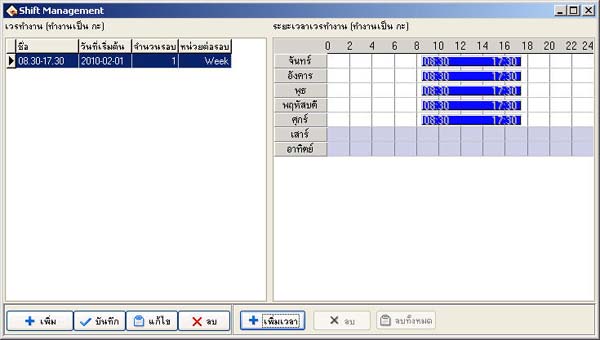
- The employee's work schedule will be displayed on the right side of the window
(If you want to add another schedule, press the Add button on the left side first, then click the Add time button on the
right side)
Then go to the Employee Work Schedule menu
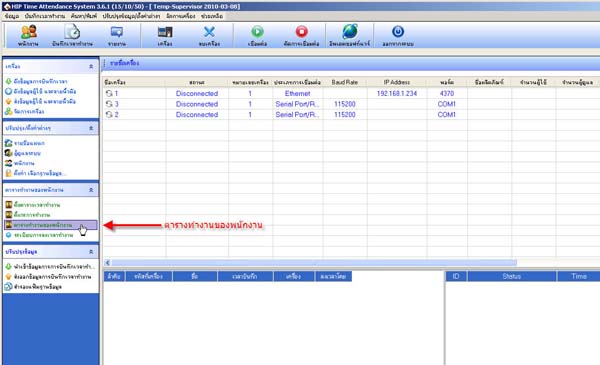
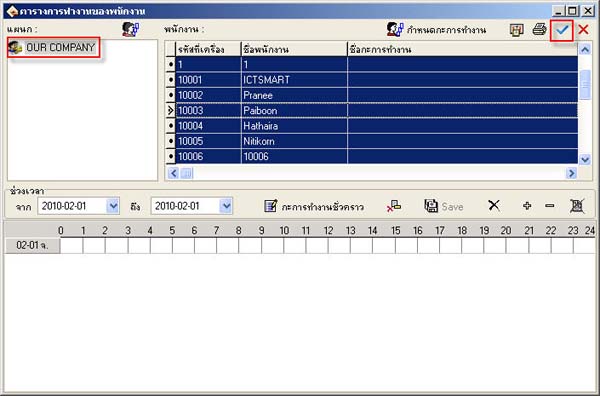
- Select the Department and then select the employee name. If you want to select all employees, click on theblue checkmark
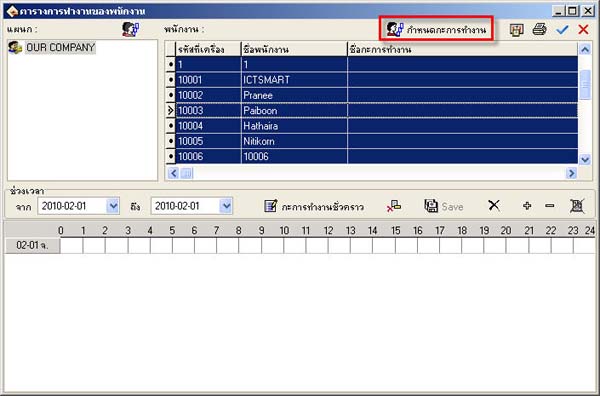
- Then click on Assign Work Shift
- Click on the plus button
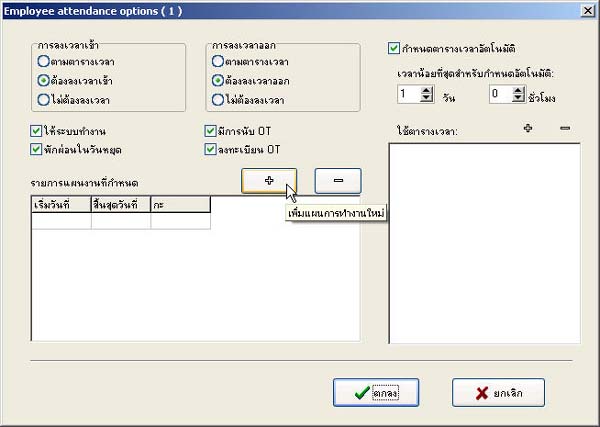
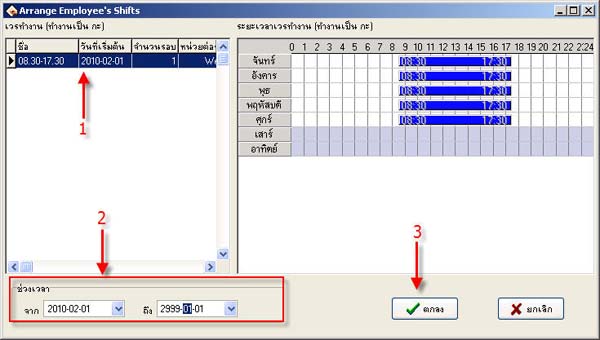
1. Select the work schedule you have set up
2. Select the period for using the work schedule from what date to what date
(In the To field, it is recommended to enter B.E. as 2999 for those who do not have any changes to the work schedule)
3. Then click the OK button
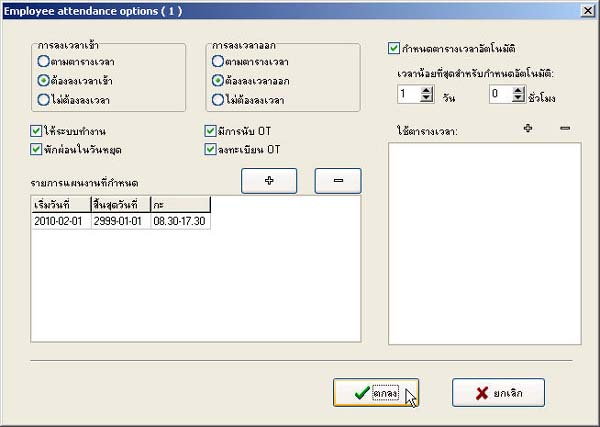
- Press the OK button
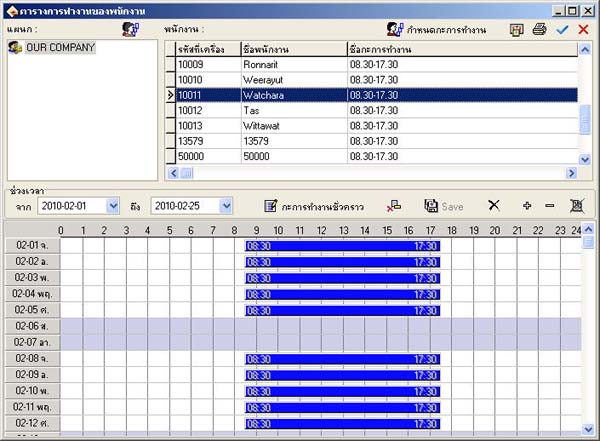
- Then the work schedule name will be displayed in the Work Shift name field
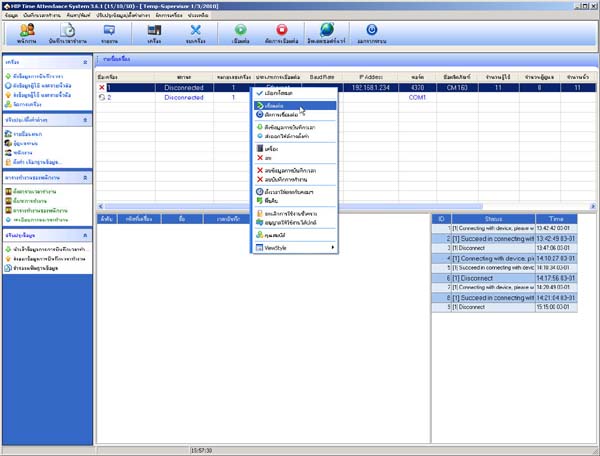
- Right-click on the scanner list
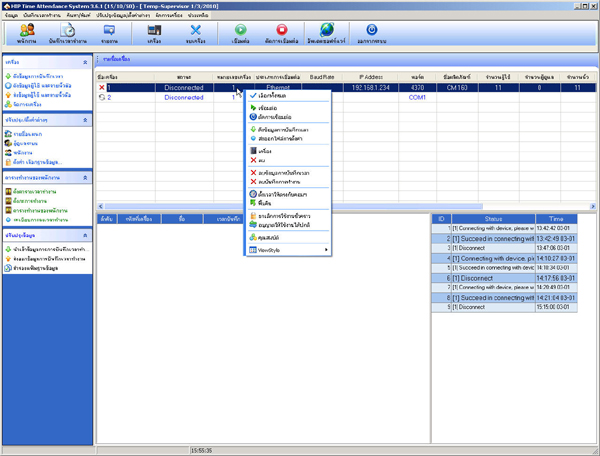
- Select Connect
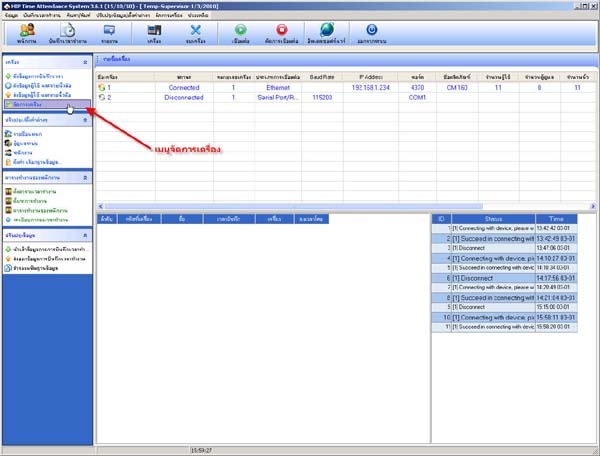
- Go to the Device Management menu
- Click on the button to retrieve device operation data
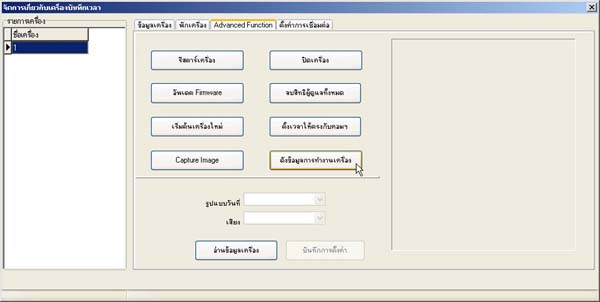
- Then close this window
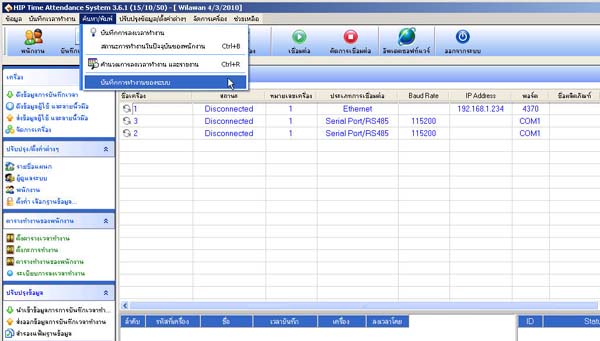
- If you want to view the device operation data, go to the Search/Print menu and select
System Operation Log
- Go to the Work Time Record menu
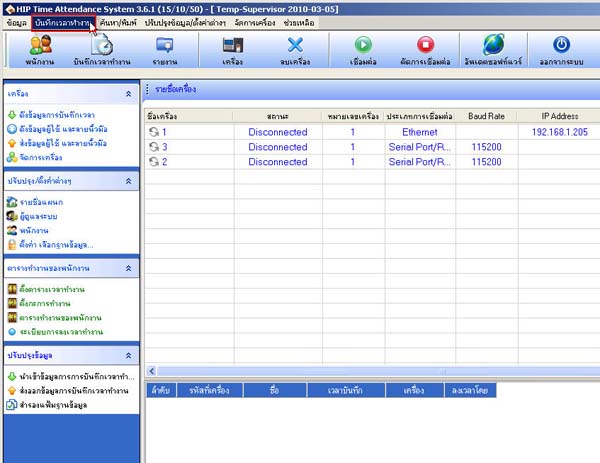
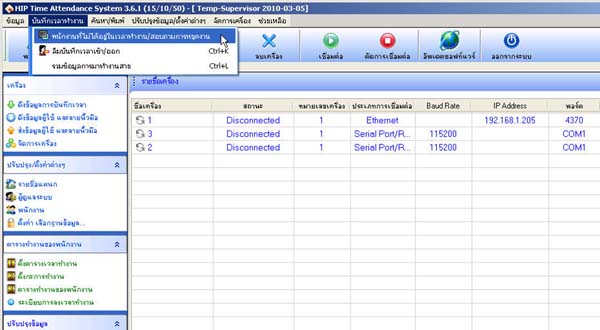
- Select Employees Not Present During Work Hours/Inquire About Leave
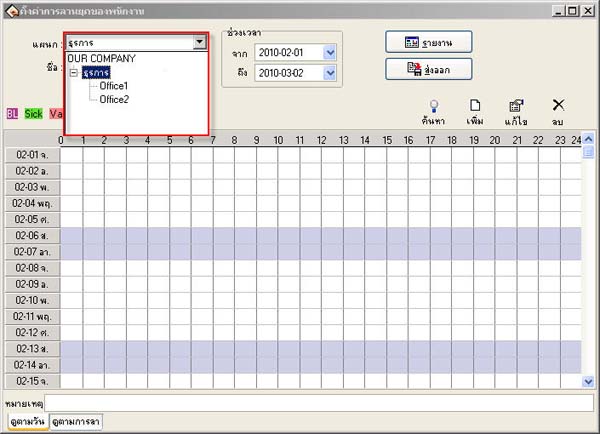
- Select the employee's department
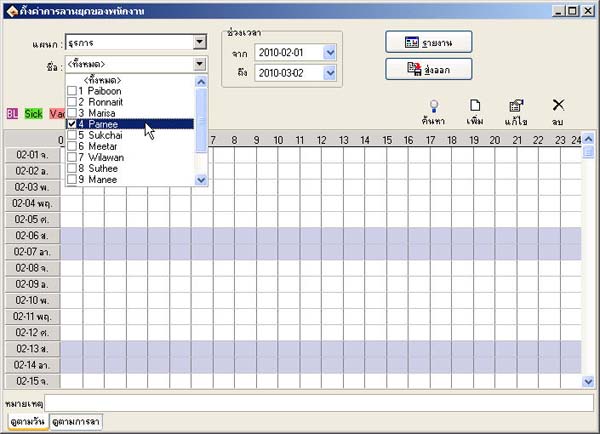
- Select the list of employees you want to add leave dates for
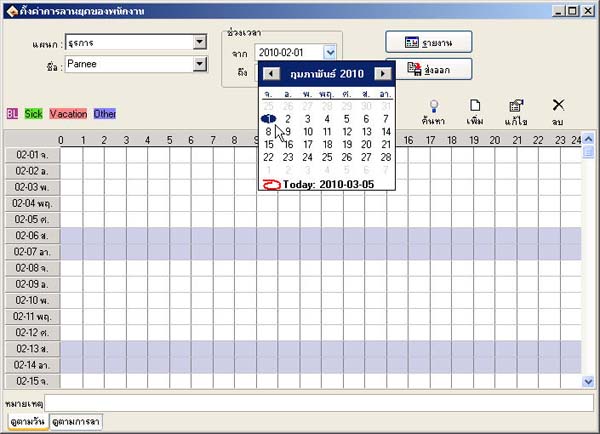
- Select the date that you want the employee to be on leave
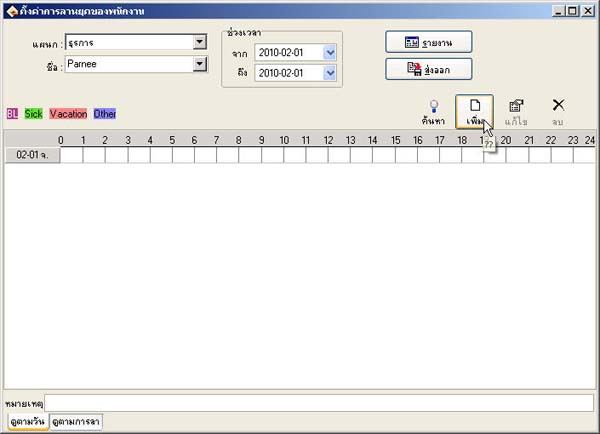
- Then click the Add button
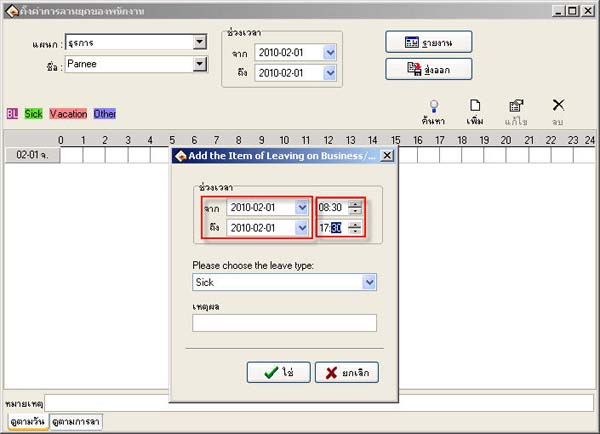
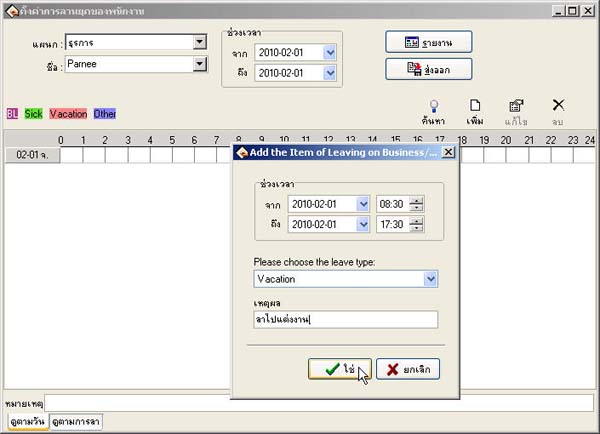
- Enter the period and time of leave for the employee
- Select the type of leave for the employee
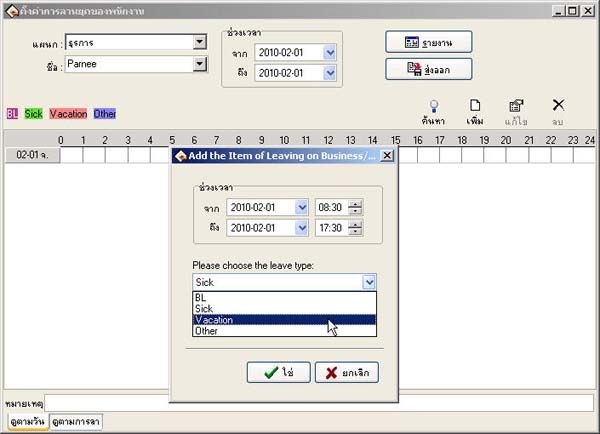
- Then enter the reason for the employee's leave and click the Yes button
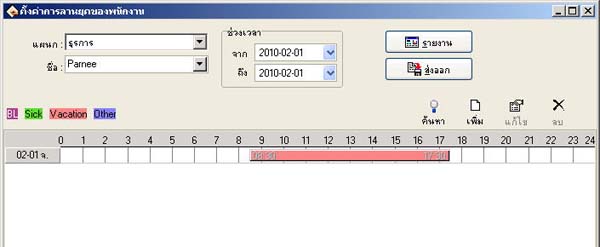
- The employee's leave date record will be displayed in this format
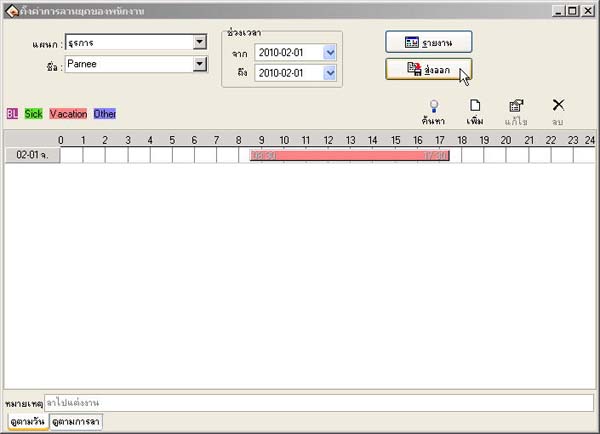
- If you want to export the report, click the Export button
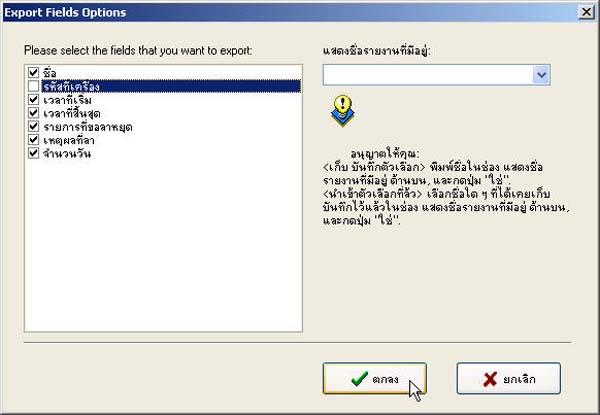
- In this dialog, select which topics you want to include. If you don't want a topic, uncheck the checkbox next to it, then click the OK button
- Select the location and file you want to save, then click the Save button
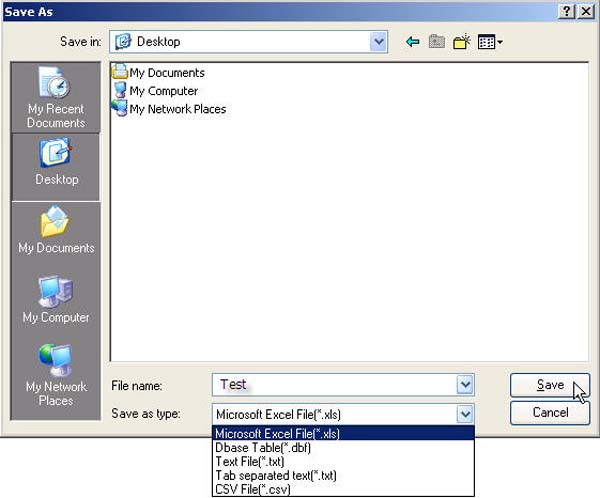
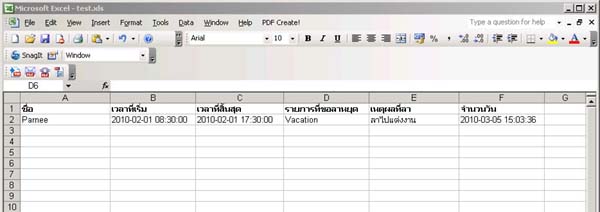
- Then you will get the employee leave report
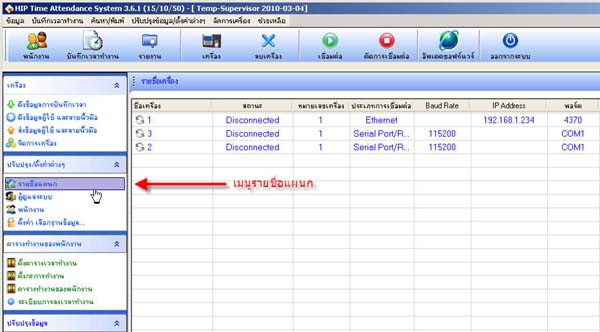
- Go to the menu Department List
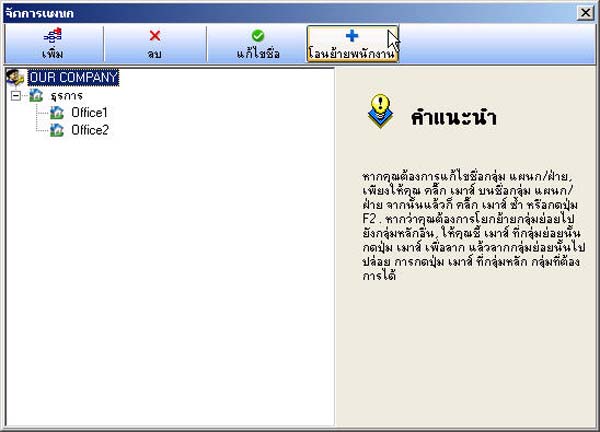
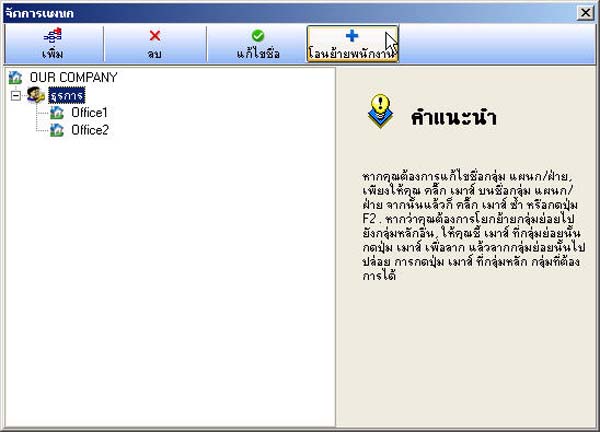
- Select OUR COMPANY and click the Transfer Employee button
(To transfer employees out of the OUR COMPANY department first)
- Press the Move Out button to transfer employees out of the OUR COMPANY department and then press the Close button
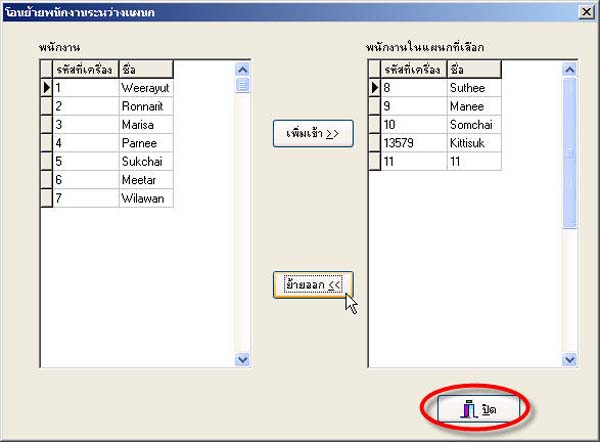
- Select the department you want to transfer the employee to and press the Transfer Employee button
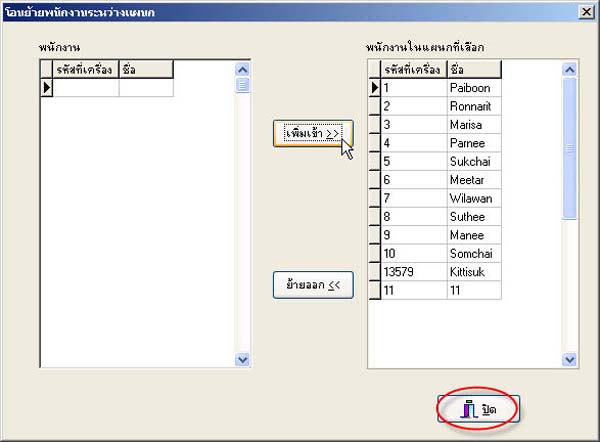
- Click the Add In button to transfer the employee to that department and then click the Close button
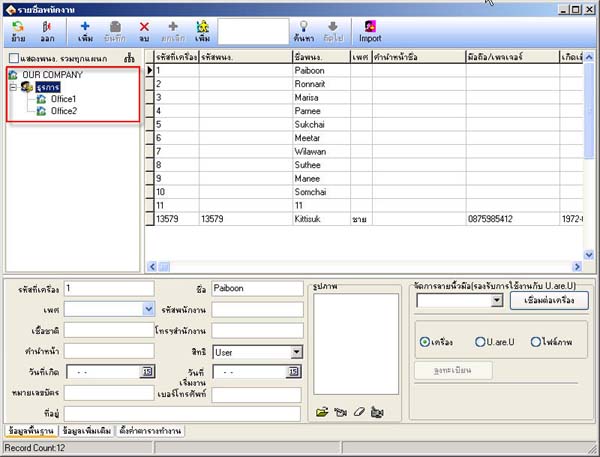
- Then verify and check the employee list in the Employee menu
- Select from the menu Department List
- Click the Add button
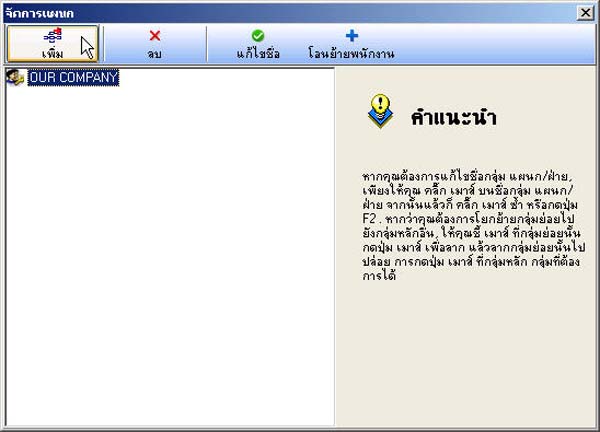
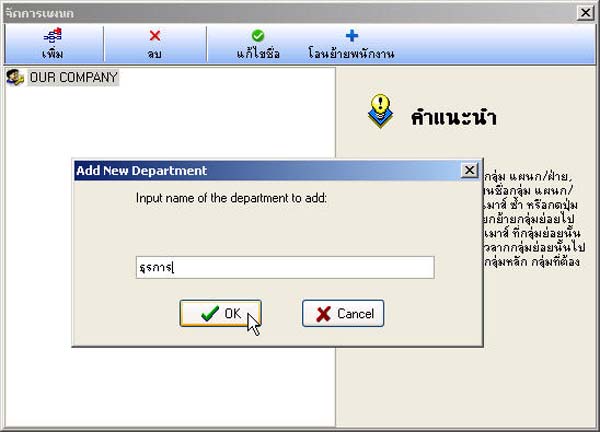
- Then enter the department name and click the OK button
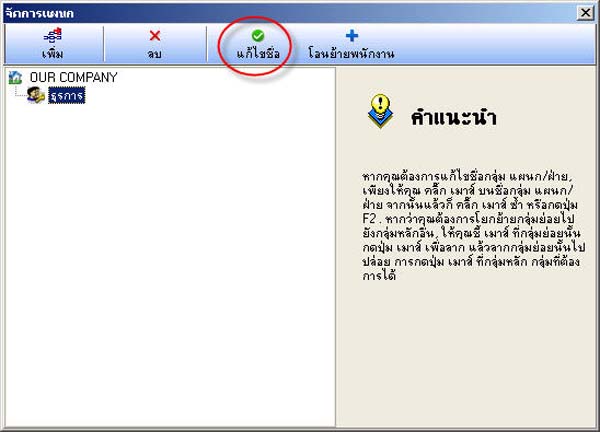
- The department list will be displayed (if you want to edit the department name, click the Edit Name button)
- If you want to create a sub-department from the existing department that was created, click on the main department and then click the Add button
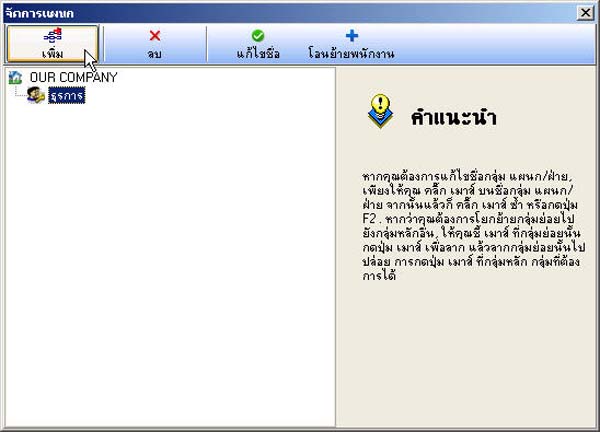
- The department list will be in this format