ZKTime Net 4.0 Software
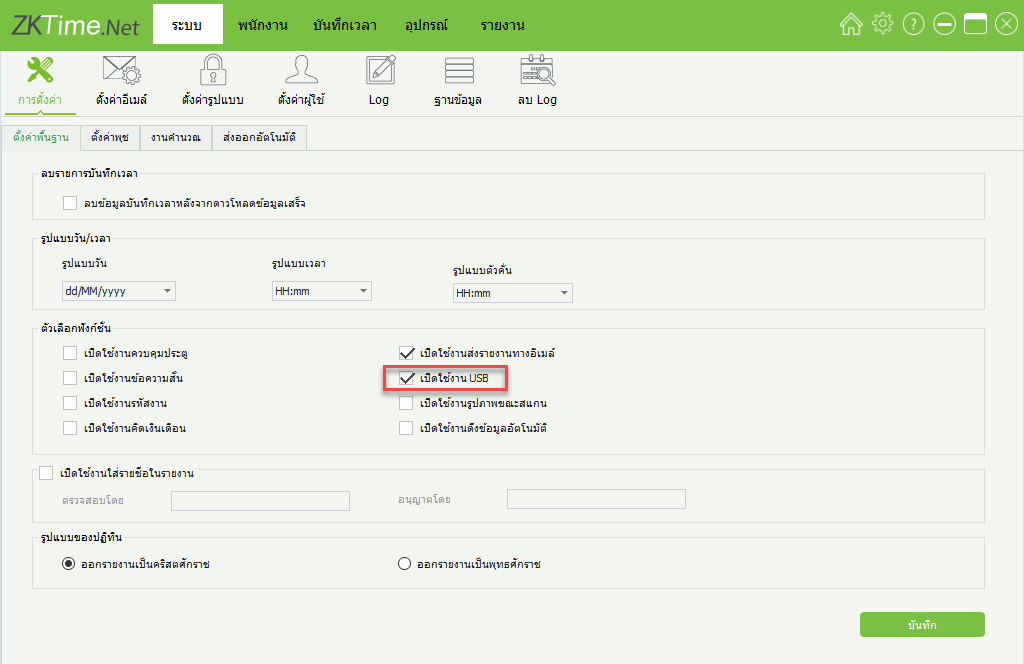
Search1.Click on the System menu > Settings > Enable USB > Save to enable the USB data import function
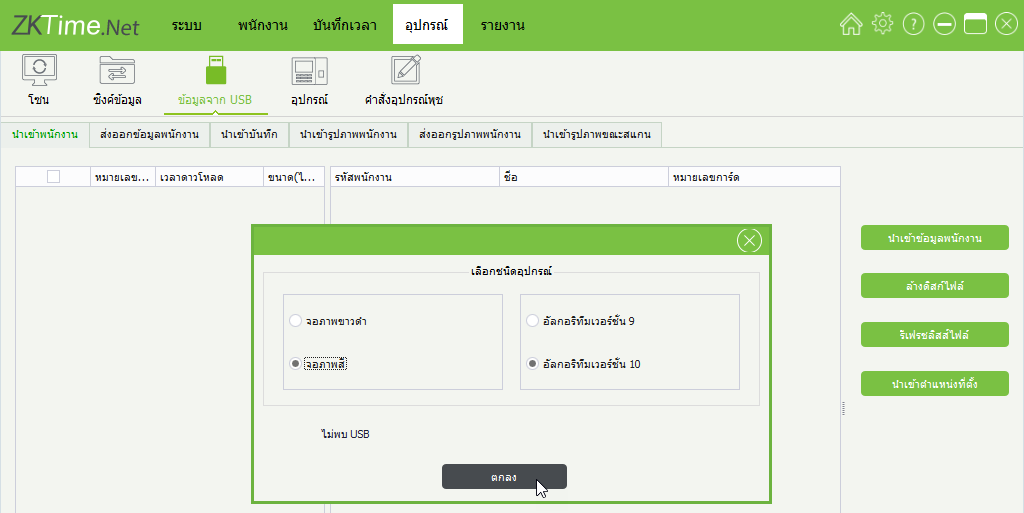
2.Click Device > Data from USB The program will display a window for users to select the type of device to import, such as selecting a black/white display device or a color display device, then click OK
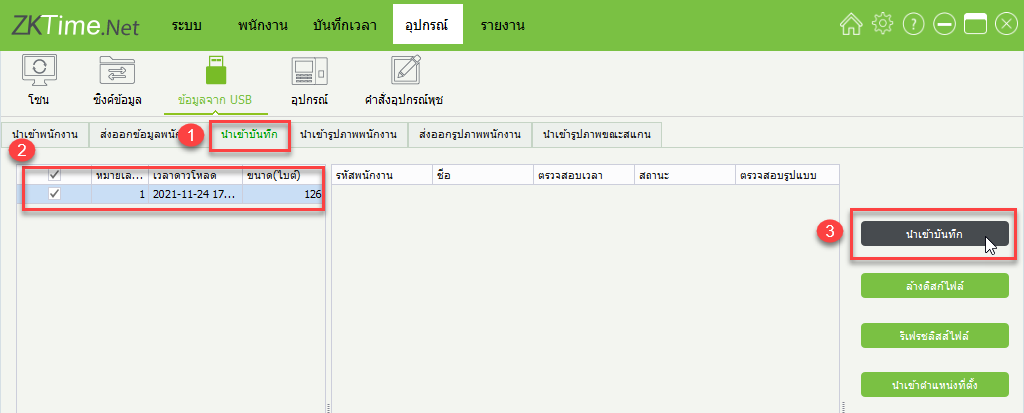
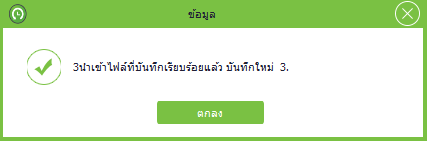
3.Click Import Records, then click the time recording data on the left side and press Import Records
4.The window displays the completion of importing employee time recording data, click OK
1. Click on the menu System > Settings > Enable USB > Save to enable the USB data import function
2. Click Device > Data from USB. The program will display a window for the user to select the type of device for import, such as selecting a black/white display device or color display device. Then click OK
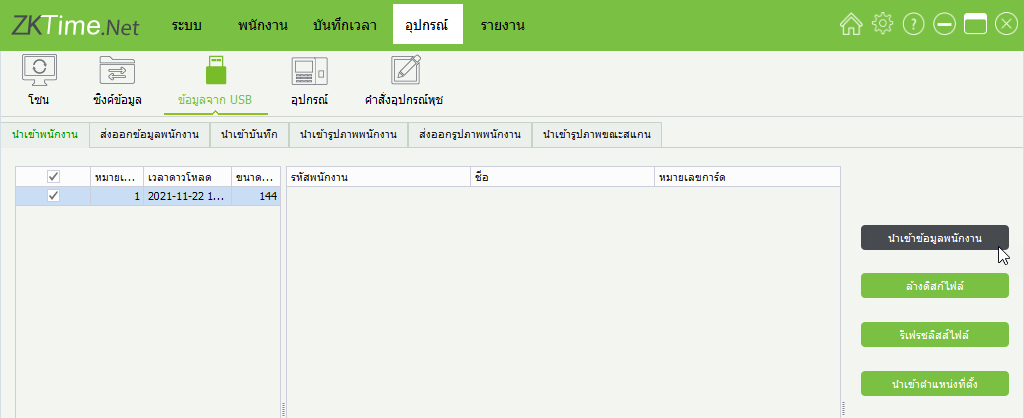
3. The program will display the data downloaded from the device via USB. Then click Import Employee Data if you want to import employees whose data was collected from the device
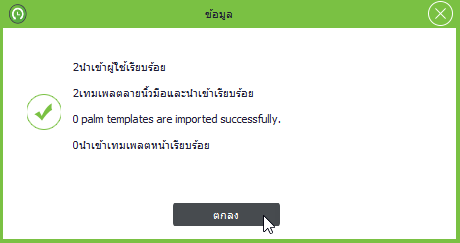
4. The window shows the employee data import is complete. Click OK
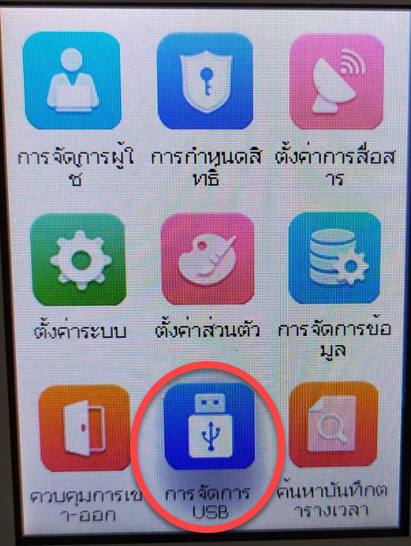
1. Enter the main menu > USB Management press Ok
2. Select Download USB press Ok
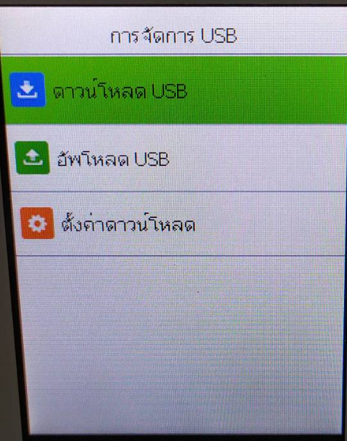
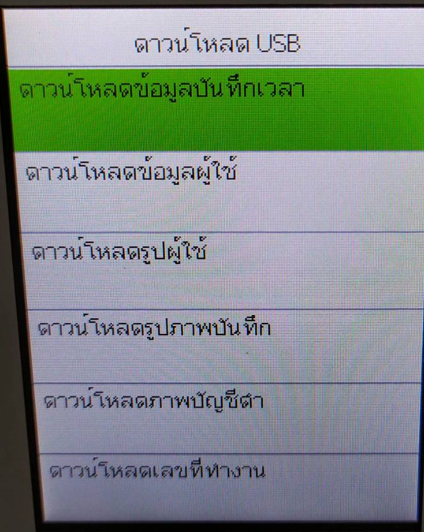
3. Select Download attendance records
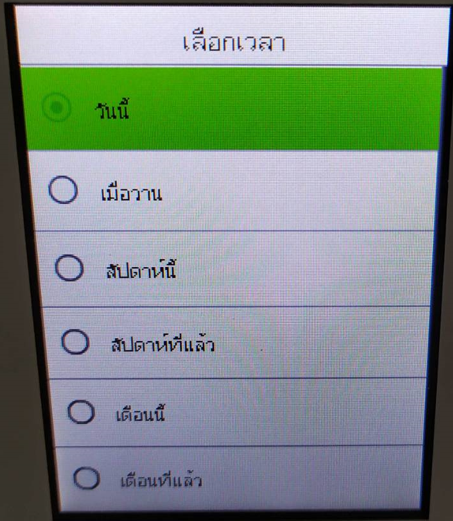
4. Select the desired time period such as Today's data, Yesterday, This week, This month, All
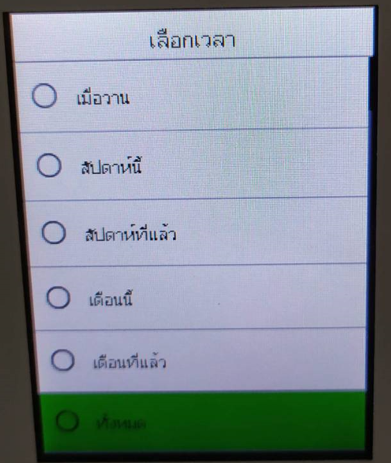
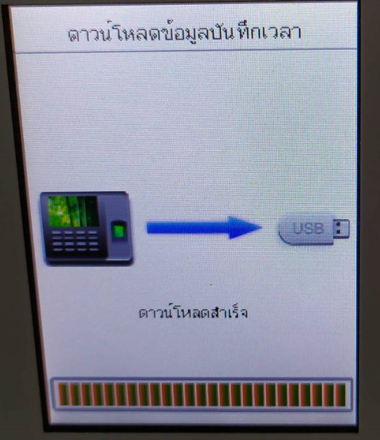
5. After selecting the data, press Ok to retrieve the data, then wait for the device to download
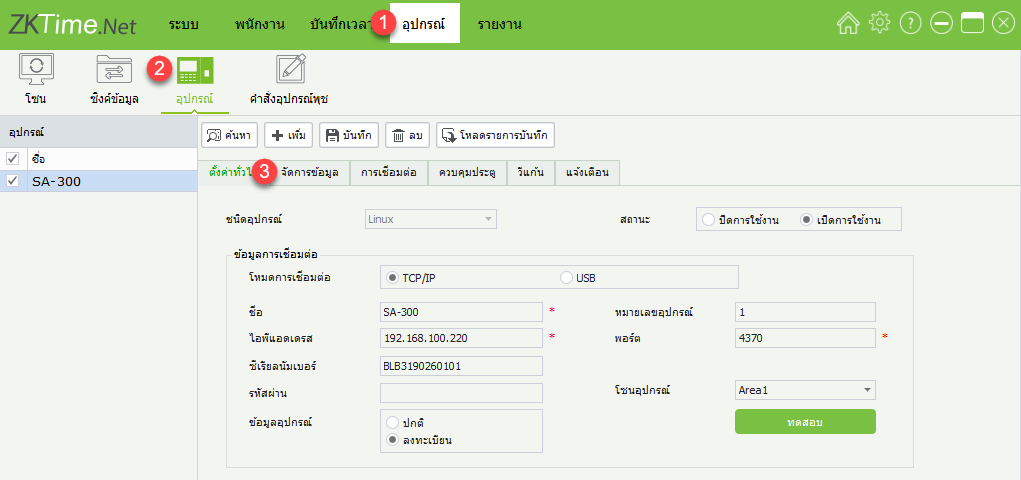
1. Click Devices > Devices > Manage Data
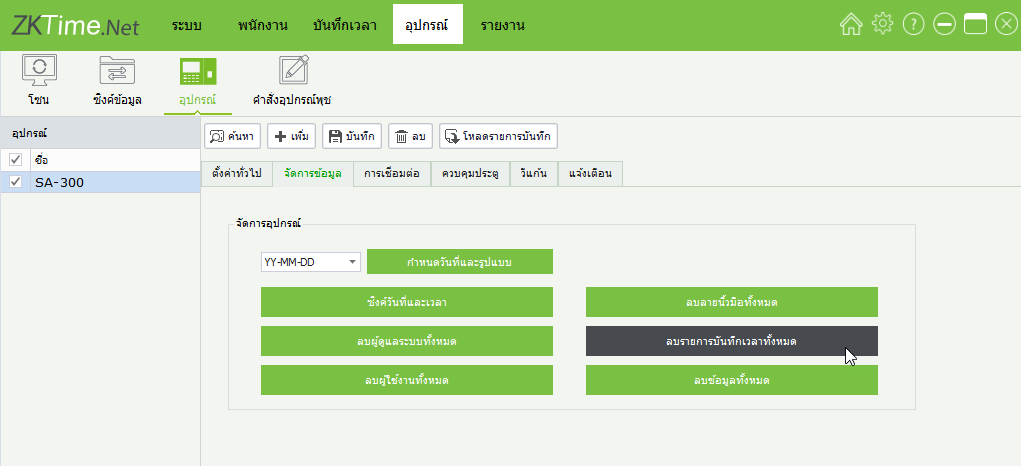
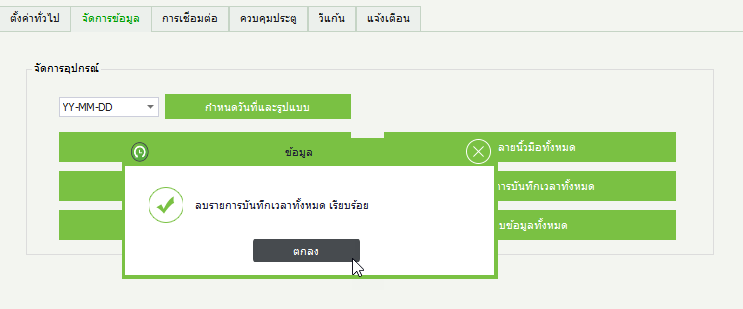
2. Click select "Delete all time records"
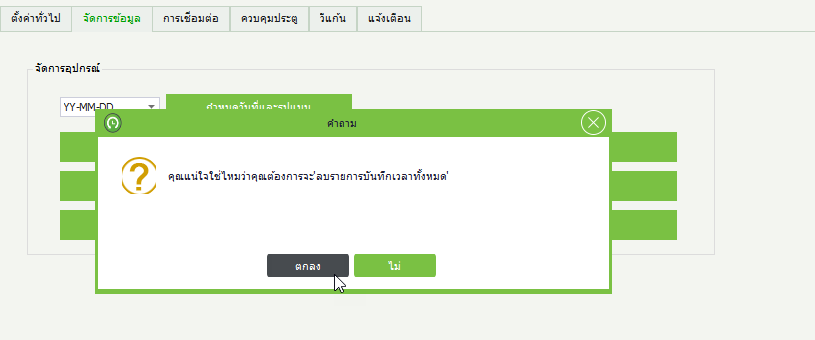
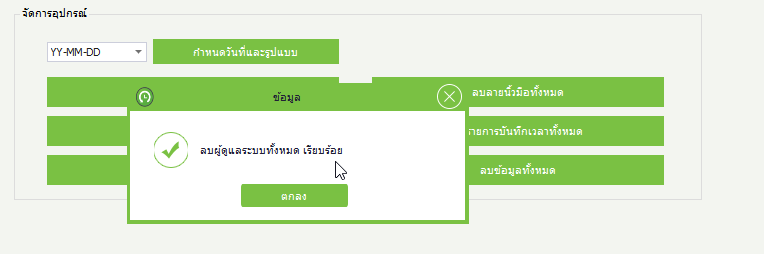
3. In the data deletion confirmation window, click OK
4. Window showing data deletion completed
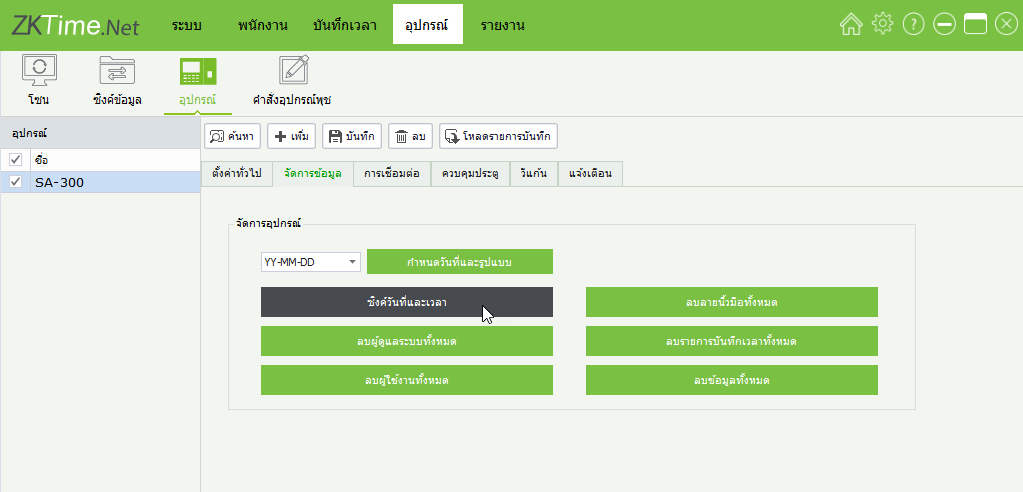
1. Click on the menu Device > Device > Manage Data
2. Click Sync Date and Time to set the date and time of the scanner to match the computer
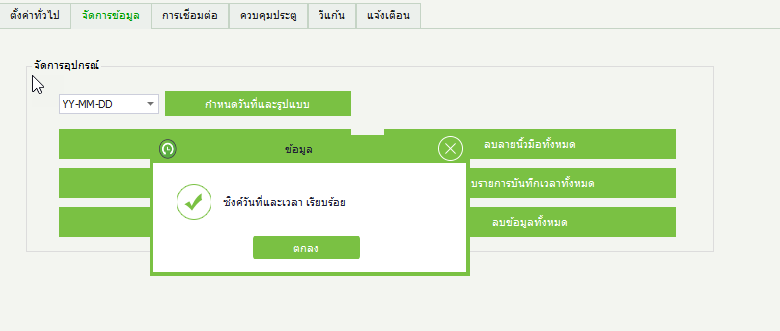
3. Window showing the operation completed
1.Click on the menu Device > Device > Manage Data
2.Click on the menu "Delete All Administrators"
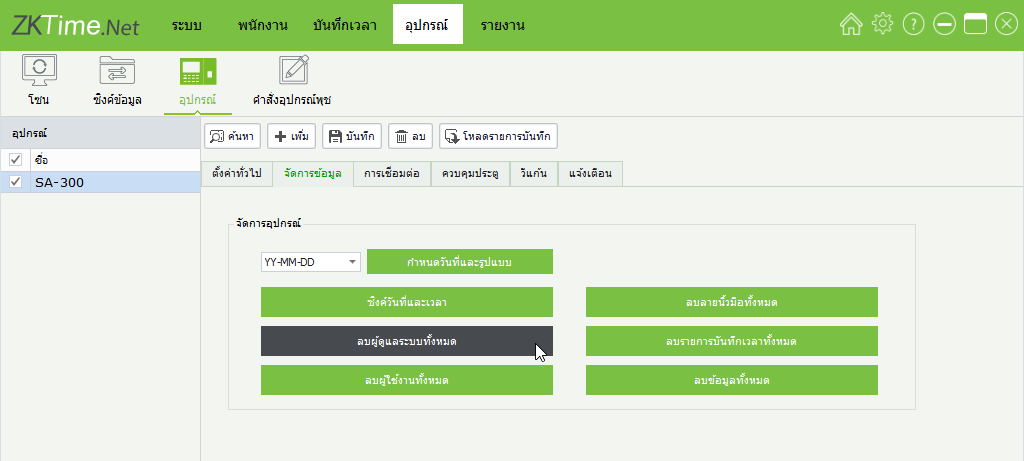
3.The window displays the successful deletion of administrator data
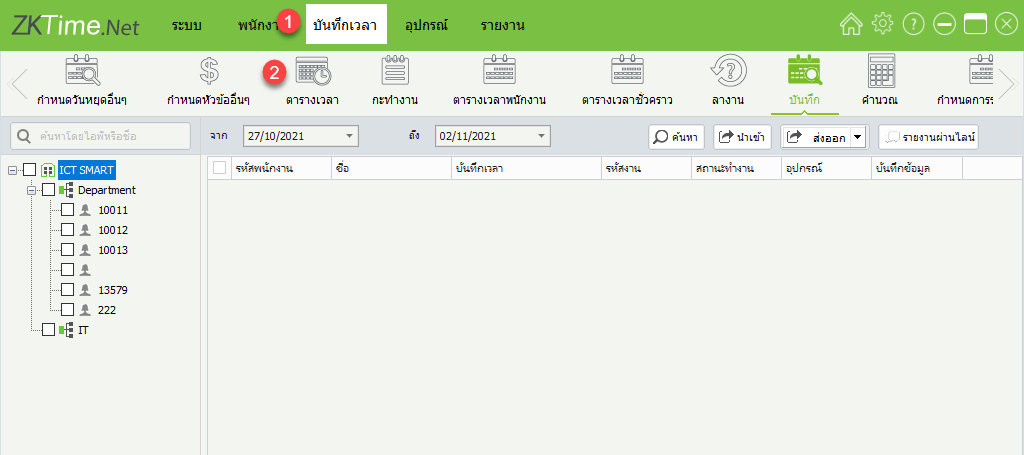
1. Click on the Time Recording > Schedule menu to create working hours
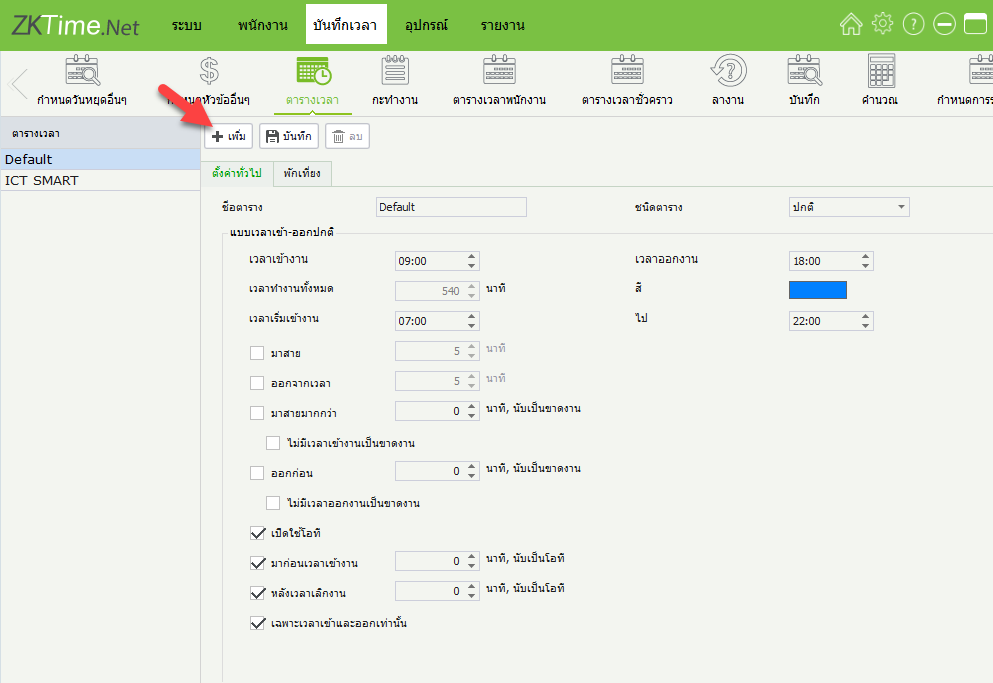
2. Click + Add to set working hours
3. Schedule details, then click Lunch Break
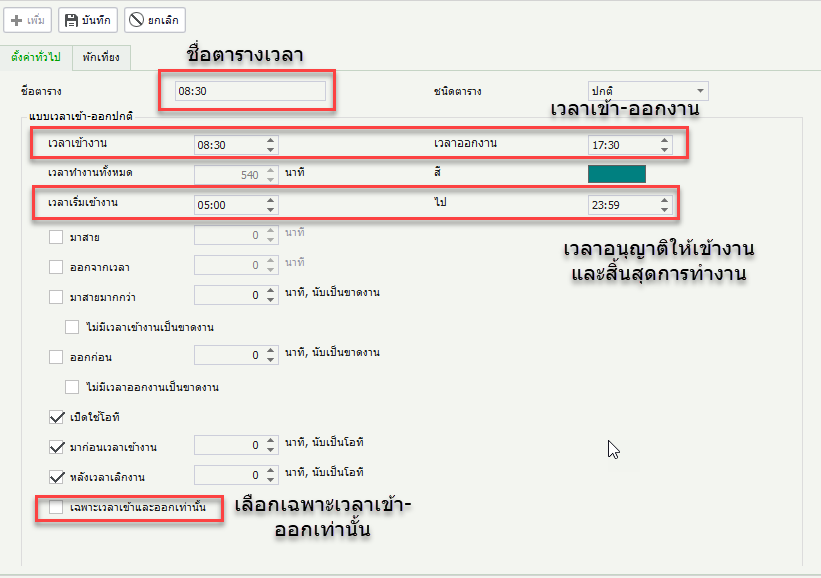
4. Click Set Lunch Break Time
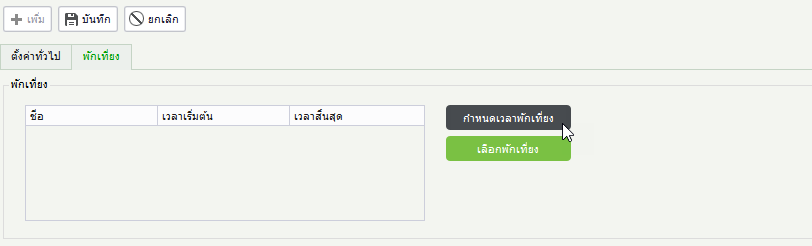
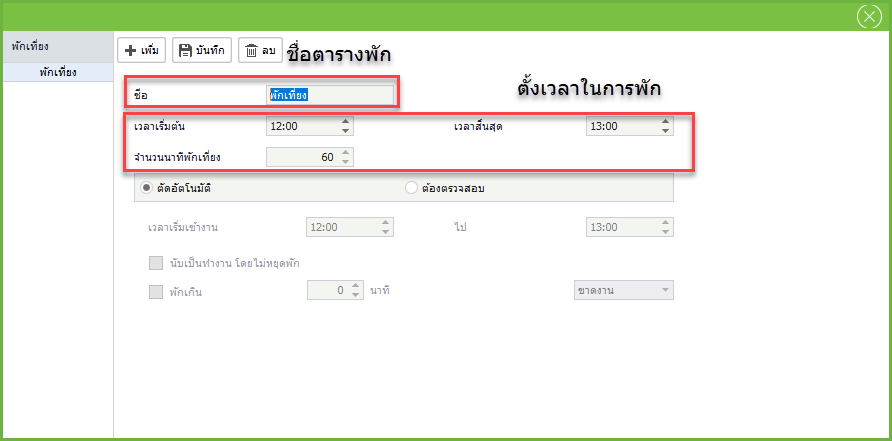
5. Click + Add to set break time, then click Save
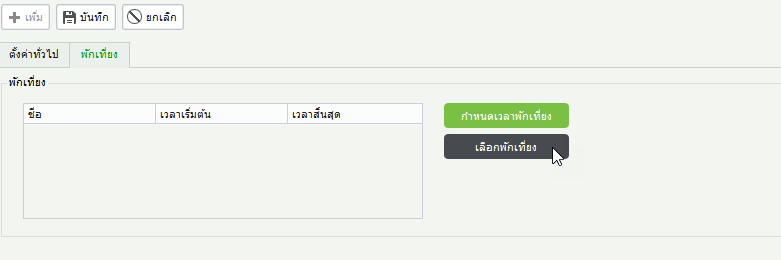
6. Click Select Lunch Break
7. Click Select the preset break time period and then click OK
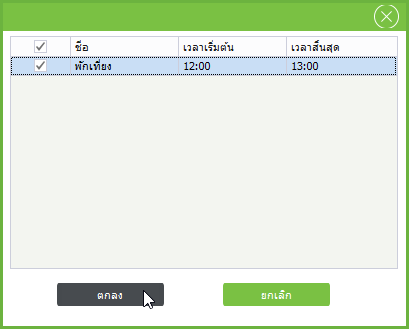
8. The program displays the break time period, then click Save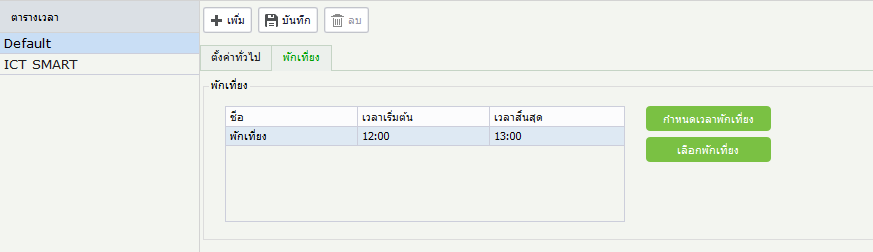
9. Click Work Shift > + Add to input the time into work dates
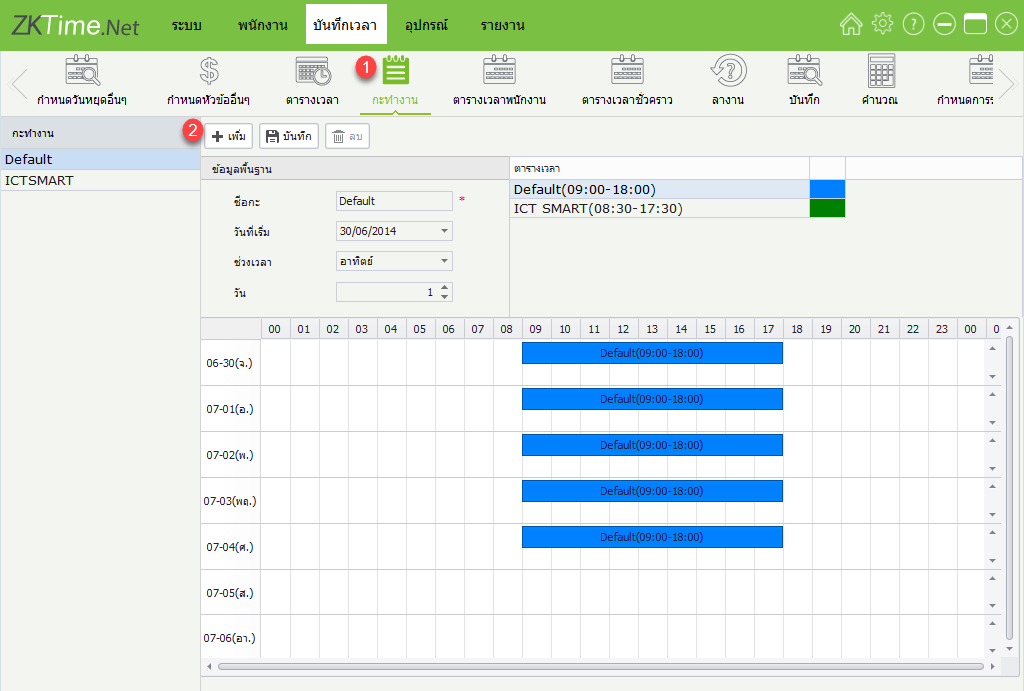
10. Fill in the details: shift name, start date, time period, and select details as Day, Week, then drag the schedule to place it according to the work dates and click Save
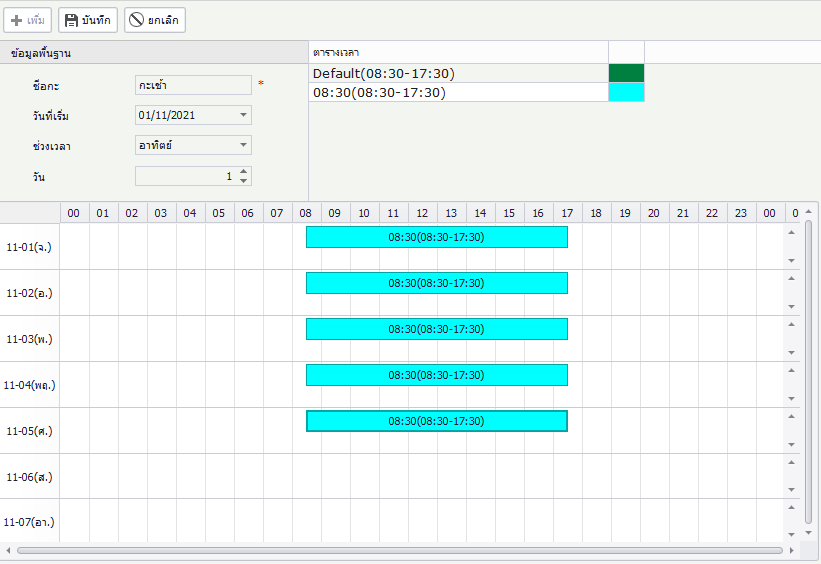
11. The program displays the work shift setup completion
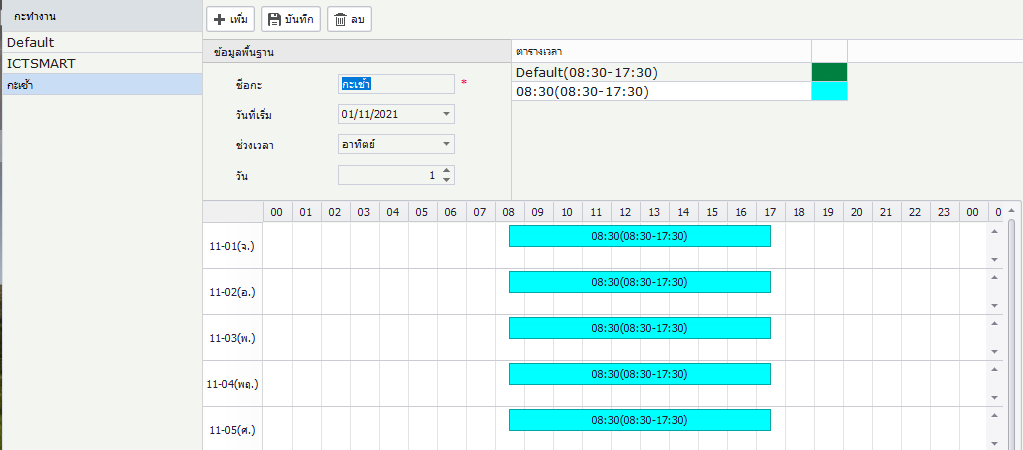
12. Click Employee Schedule to assign the work shift to employees
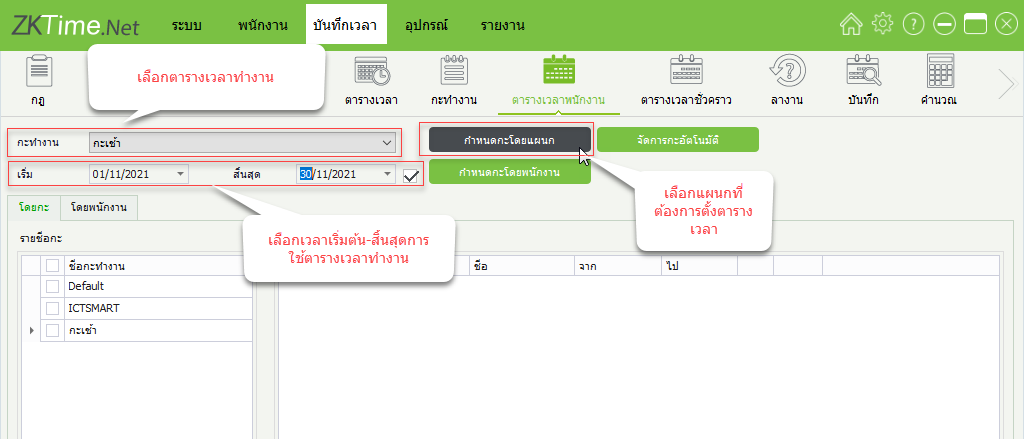
13. The program displays the work shift and shows a list of employees currently using the work shift
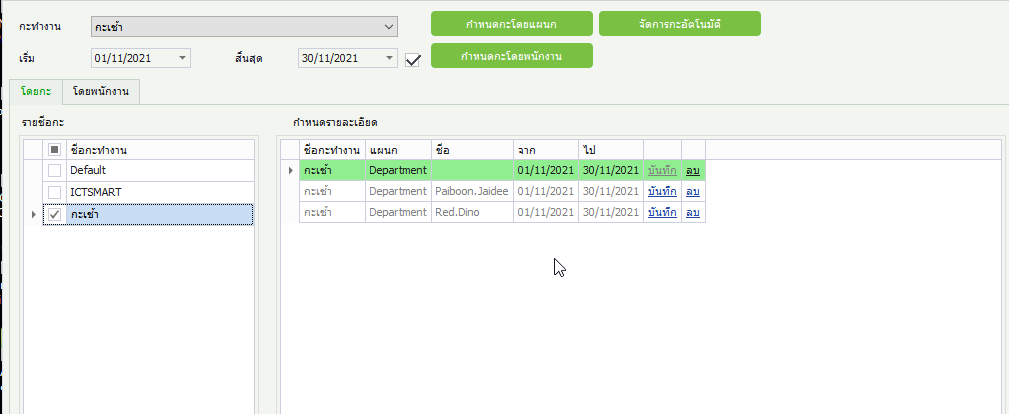
1. Click the Employee menu > Employee
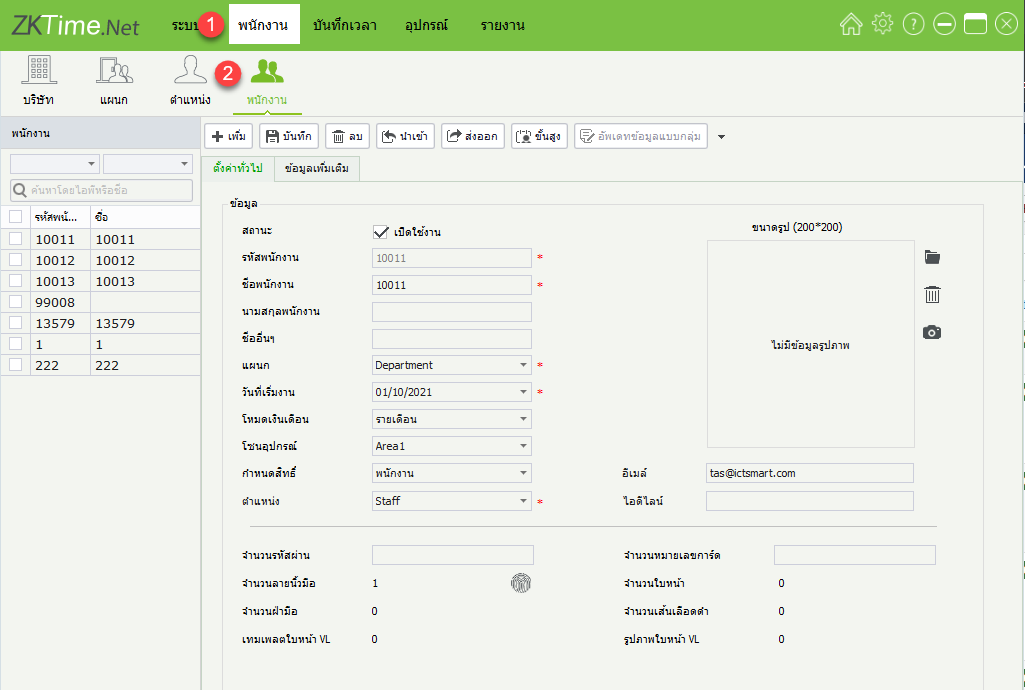
2. Click the employee you want to delete and select Delete
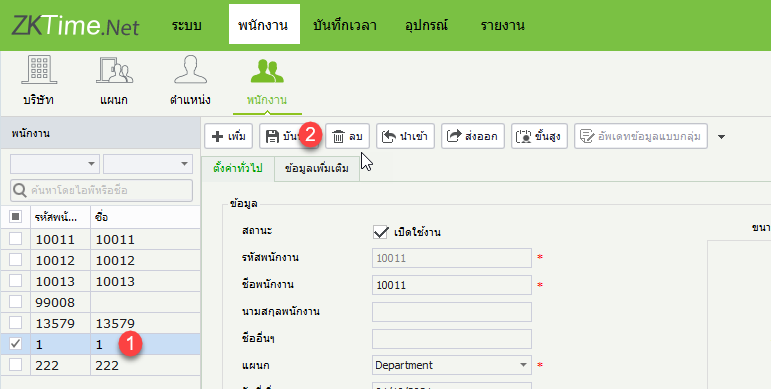
3. Employee deletion confirmation window
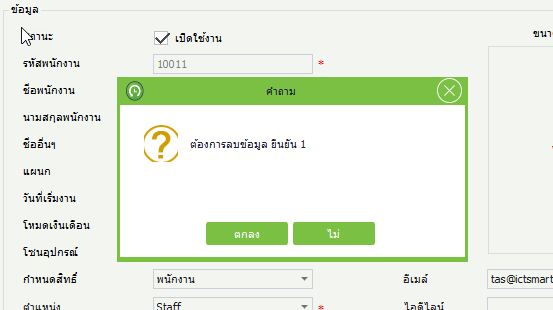
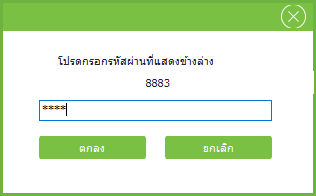
4. Enter the confirmation code to delete employee data
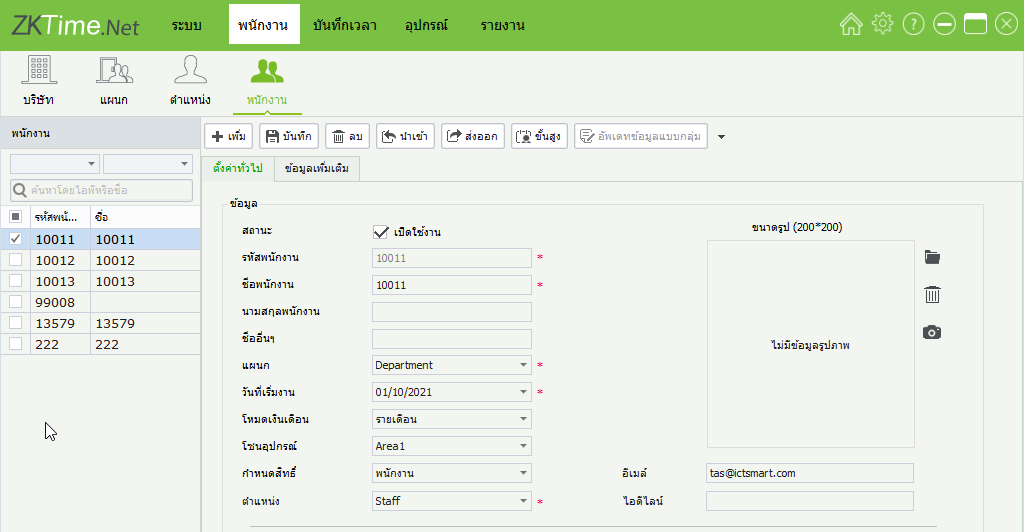
5. Employee has been deleted from the program
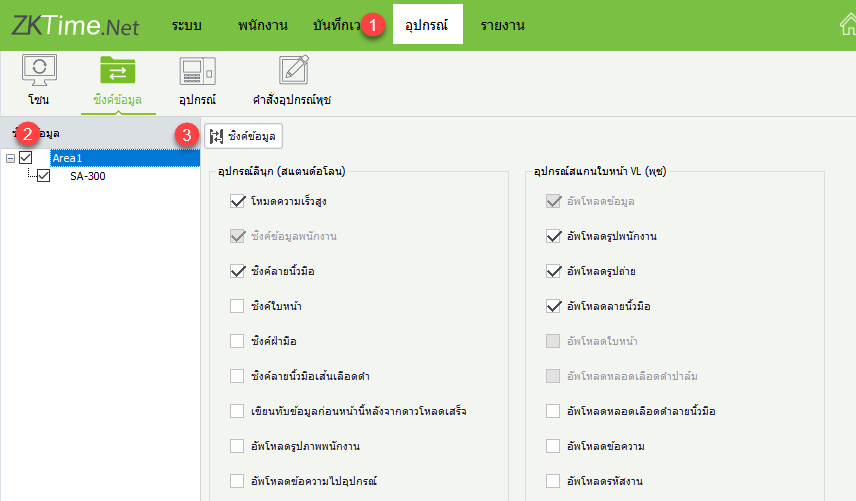
6. Click Device > Select Device > Sync Data to send the delete employee command to the device
7. Data deletion display window
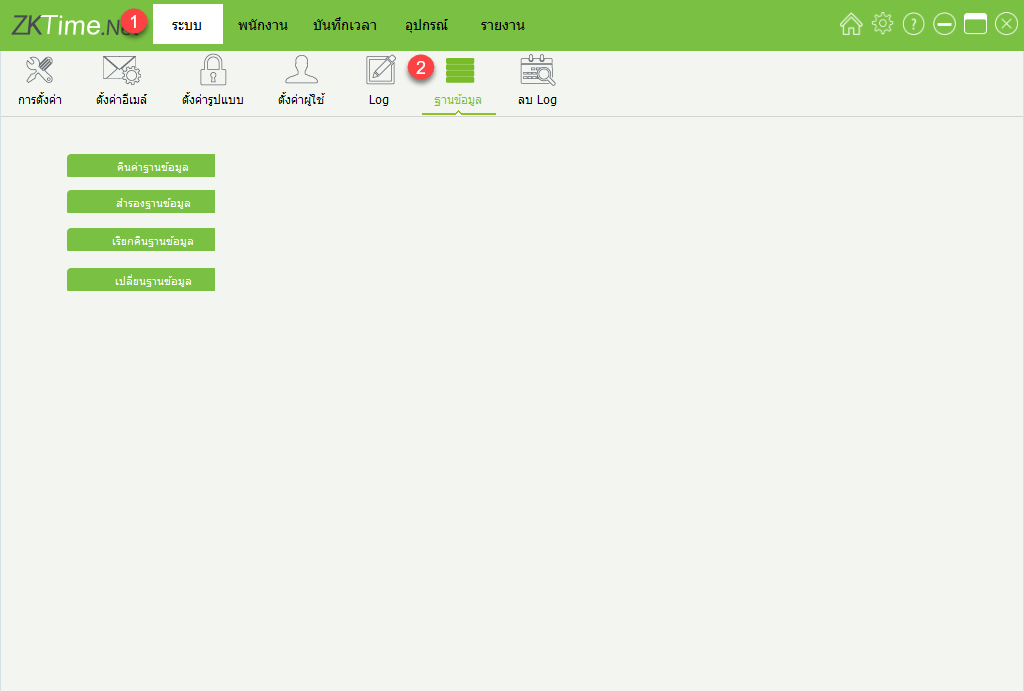
1. Click on the System menu > Database
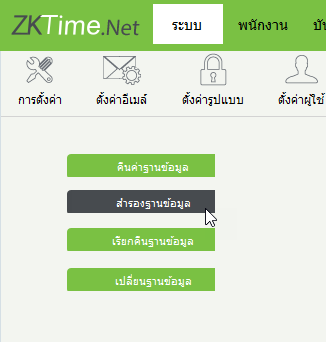
2. Click Backup Database
3. Database backup confirmation window
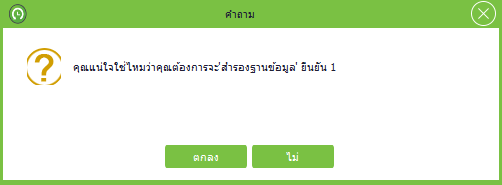
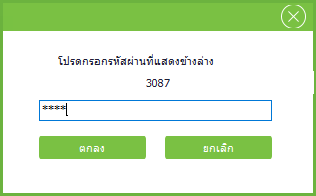
4. Database backup confirmation window by entering a 4-digit verification code
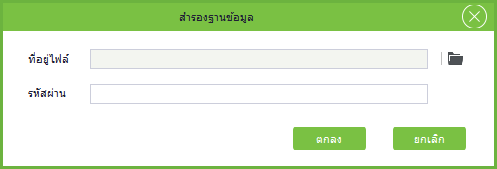
5. Window showing the selection of location for database backup
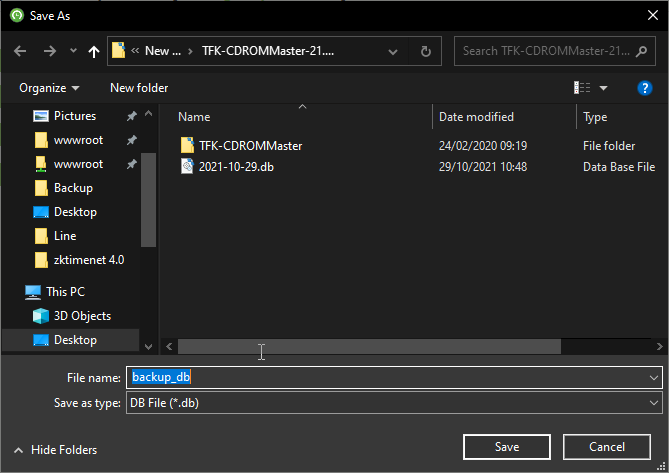
6. Proceed to select the location for database backup. Once the location is selected, click Save
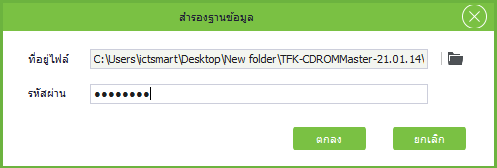
7. Enter the password for the program usage, then click OK to start the database backup process
8. The program is performing the database backup
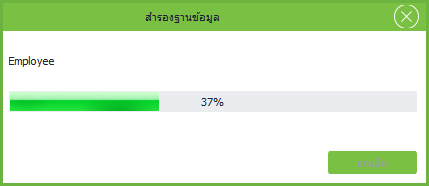
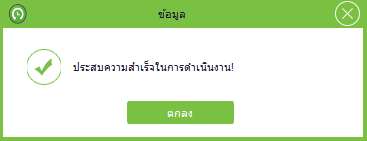
9. Window showing the database backup is complete
10. Backed up database

1.Click on the Devices menu > Select the scanner

2.Click Load Records. The program will display a window to download the records

3.Scanner window for downloading records

1. Click the Equipment menu > Sync Data
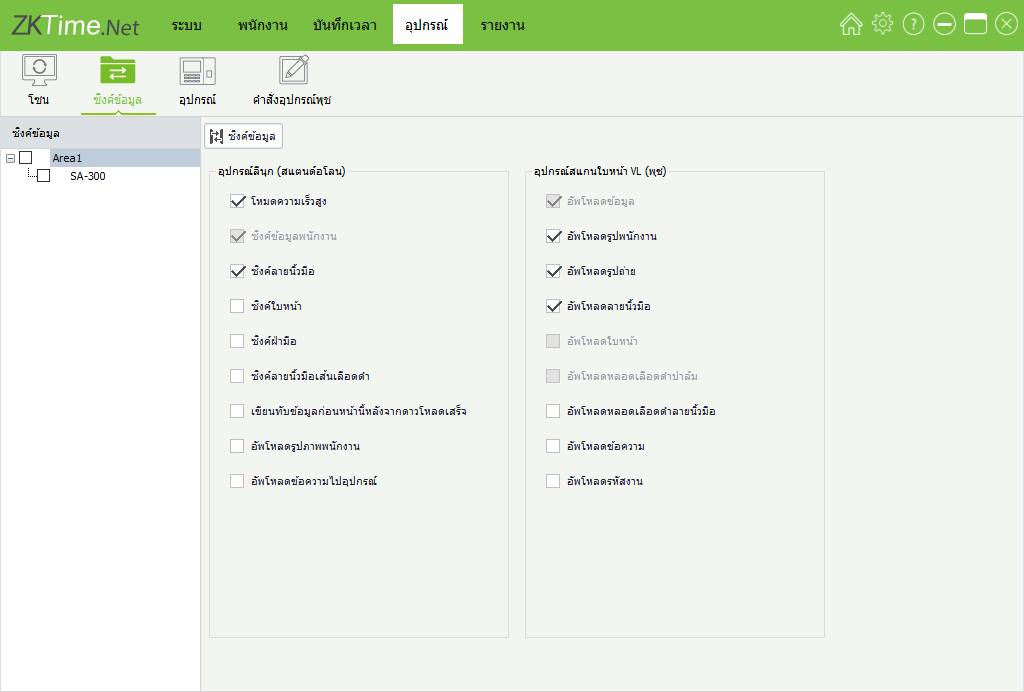
2. Click the scanner device from which you want to pull employee data, then select the details you want, such as fingerprints and employee photos on the page. Once selected, click Sync Data
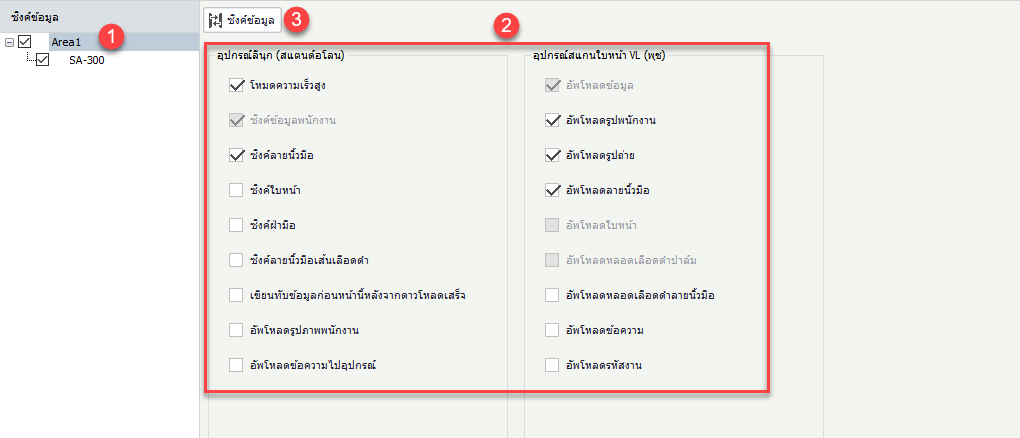
3. The program displays a window for pulling employee data from the device
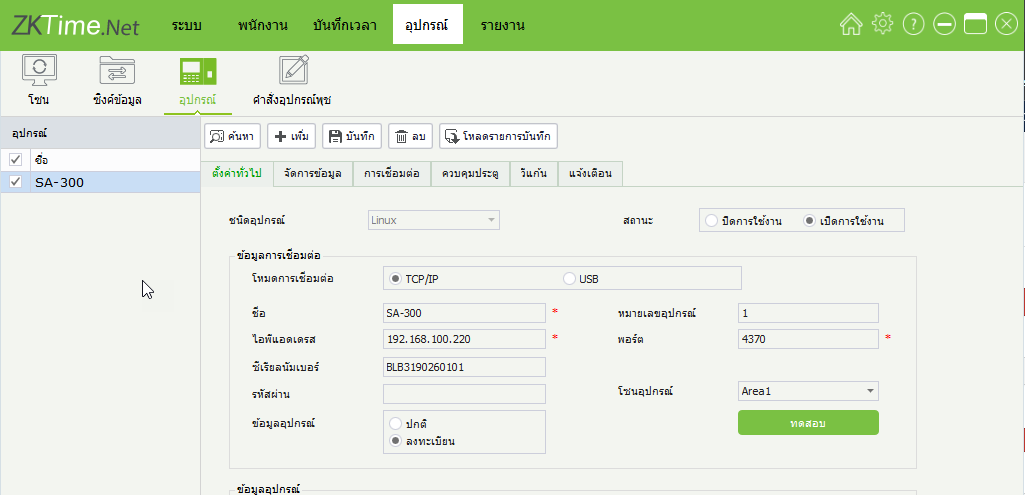
1. Click on the Devices menu, then click on the name of the device you want to delete
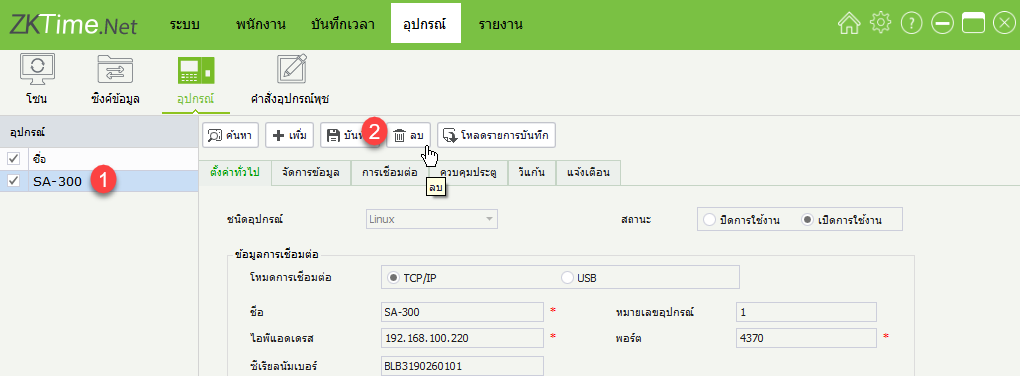
2. Click on the Delete menu
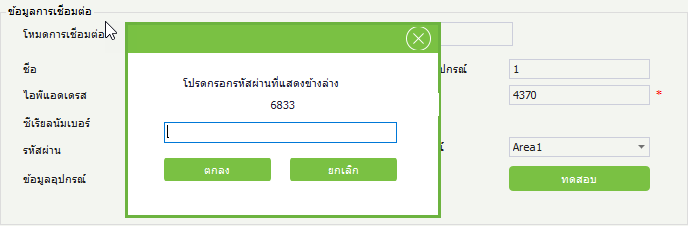
3. The system will display a dialog box to confirm the device deletion and provide a number for confirmation
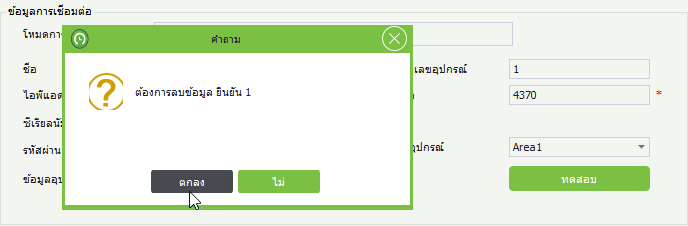
Enter the 4-digit number and click OK to confirm the device deletion
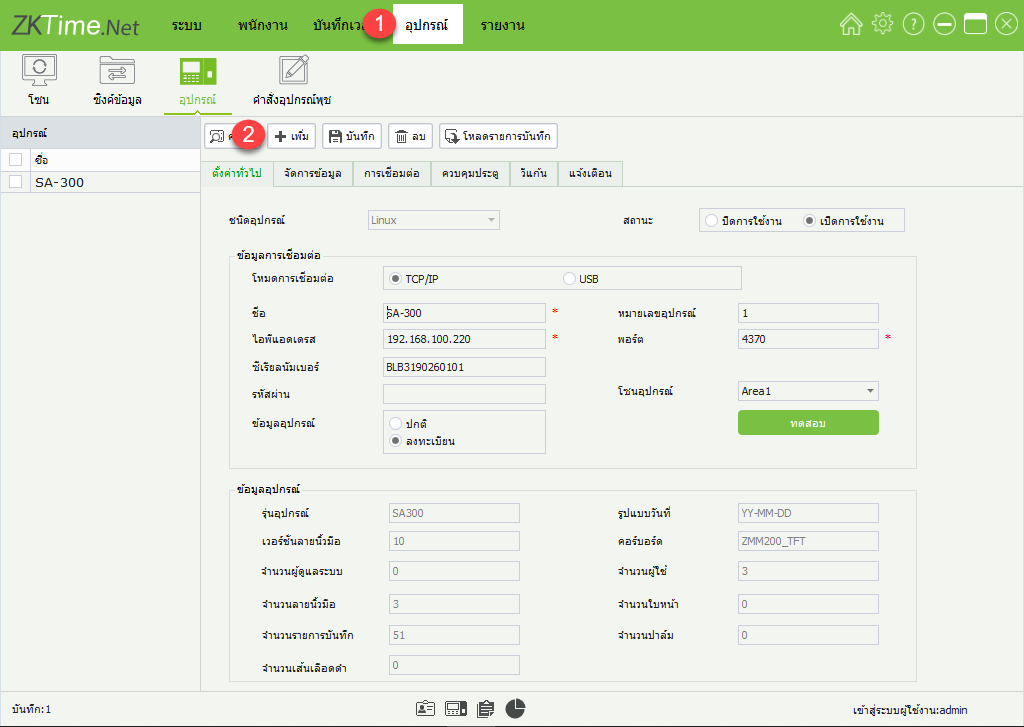
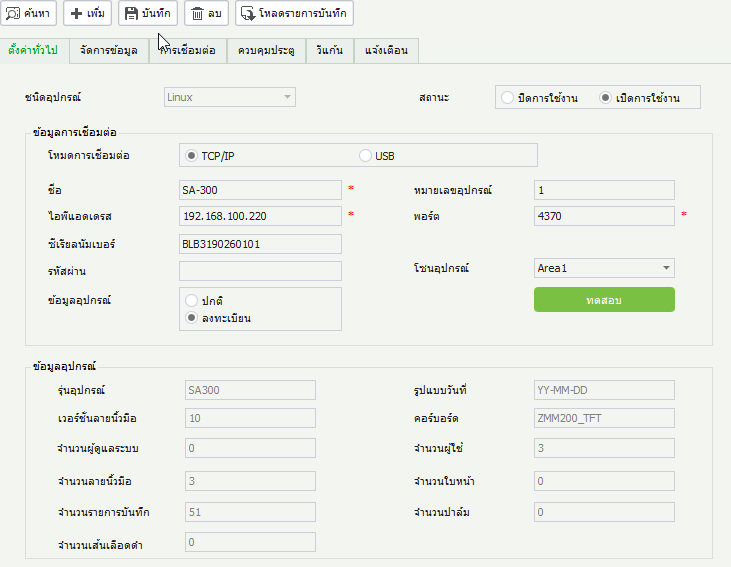
1. Click on the Devices menu and click Add
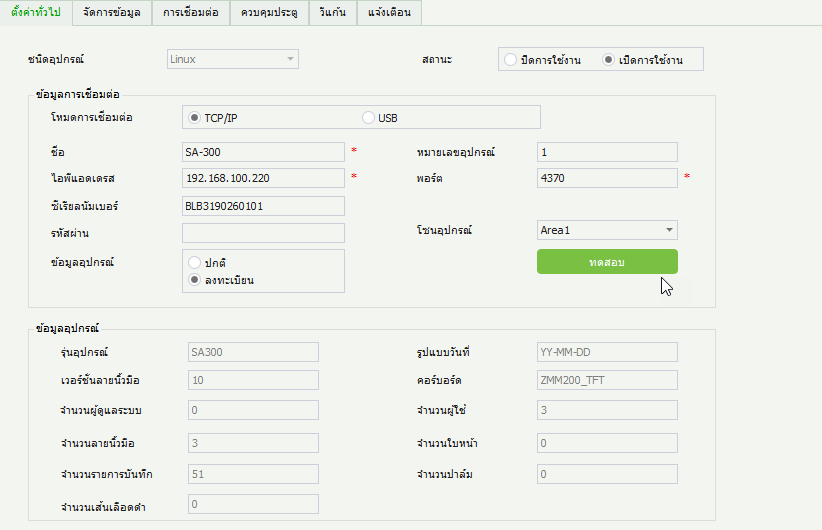
2. Enter the details, device name, and IP Address number, then click Test
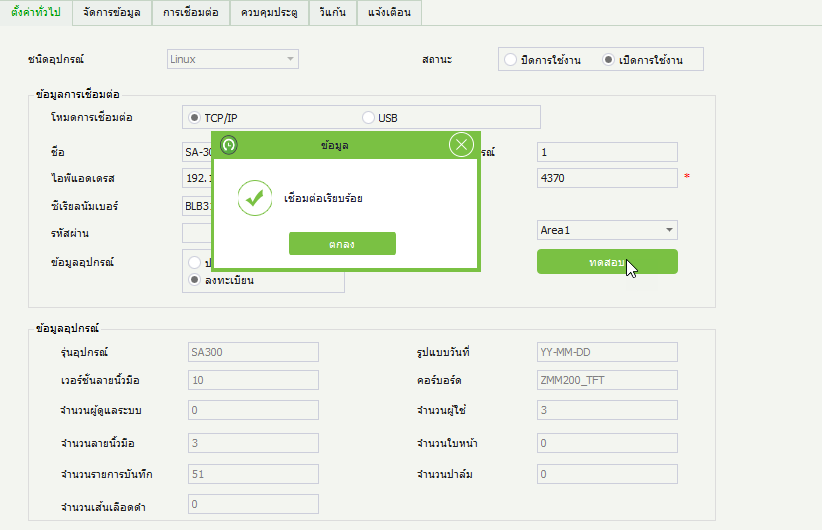
3. Test the connection between the device and the program
4. Click Save to add the device to the program
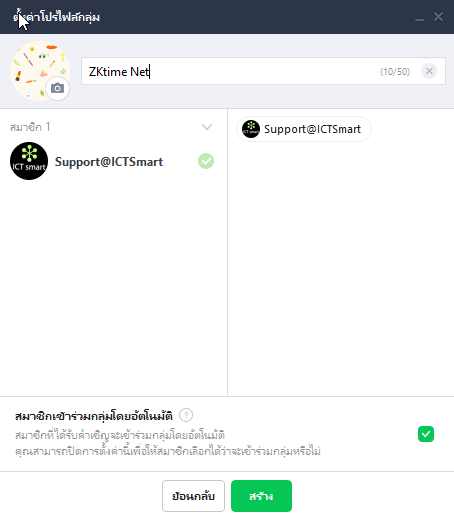
1. Create a Line group
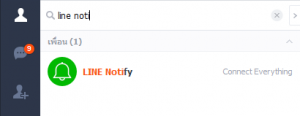
2. Search for Line Notify and click add friend
3. Go to the website https://notify-bot.line.me/th/ to request a token
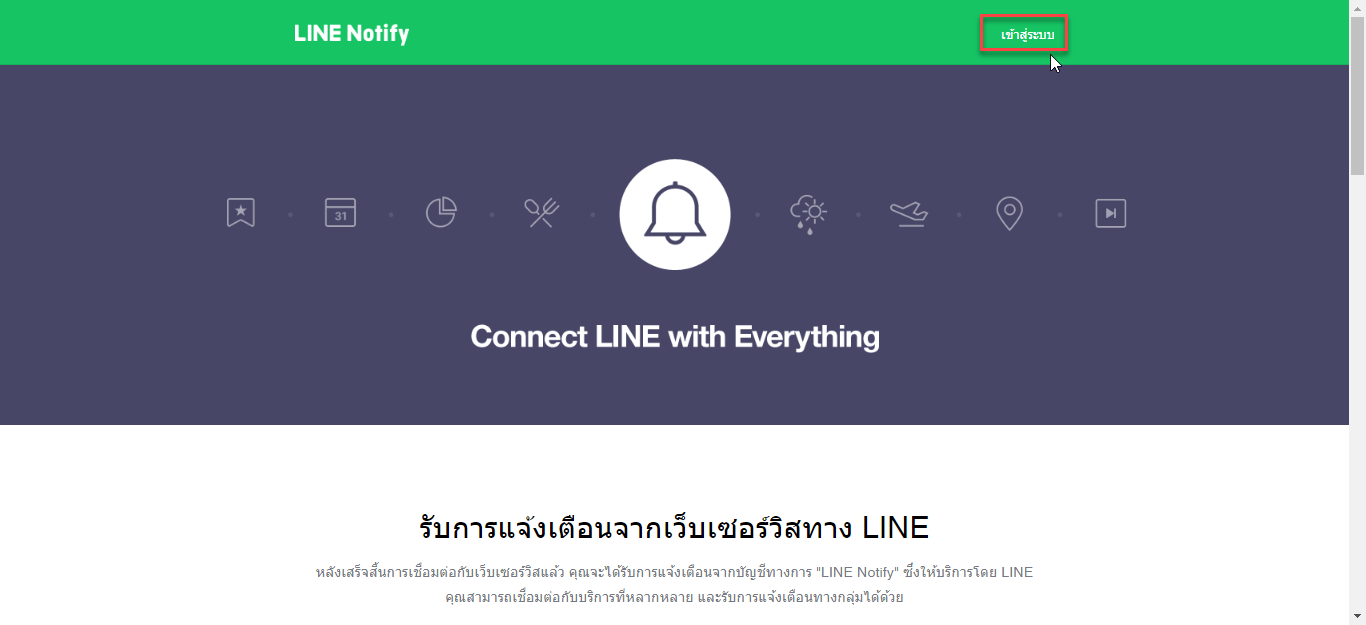
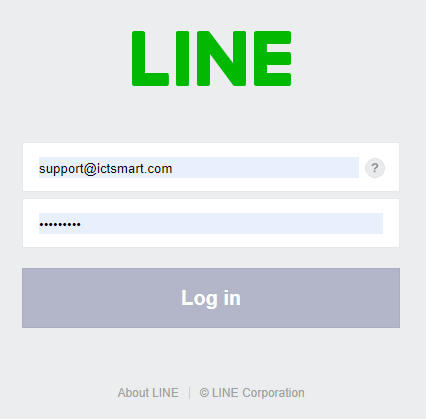
4. Click to log in using Line ID
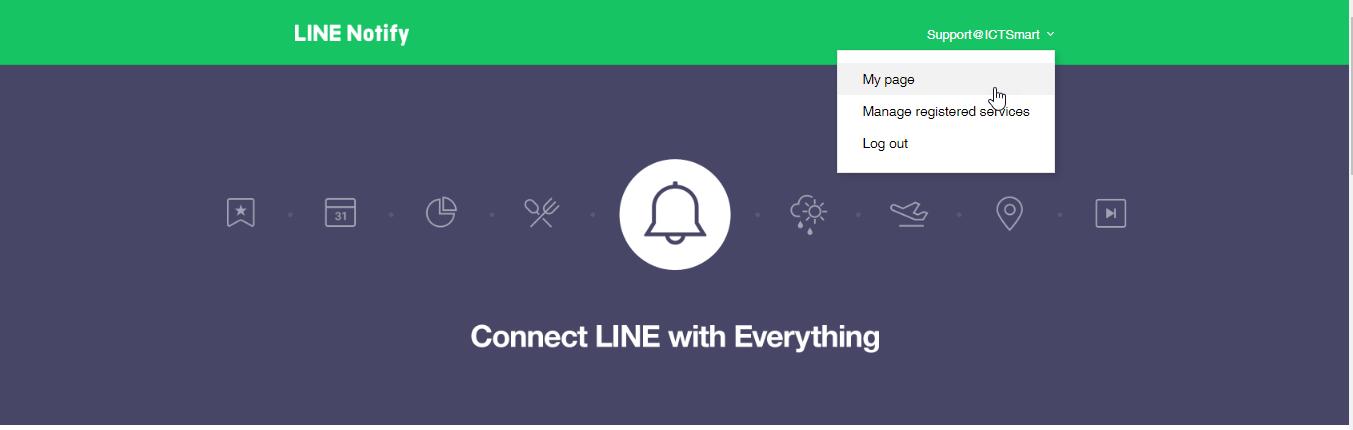
5. Click on Line ID and select My Page
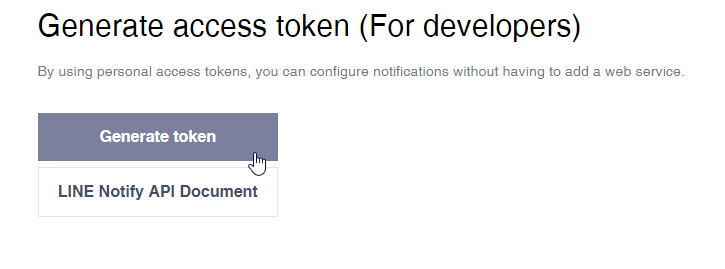
6. Scroll down and click Generate Token
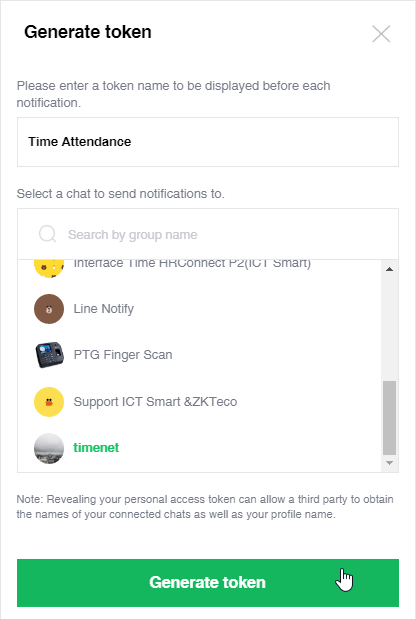
7. In the first field, enter the desired message, for example Time attendance, then select the group created in step 1
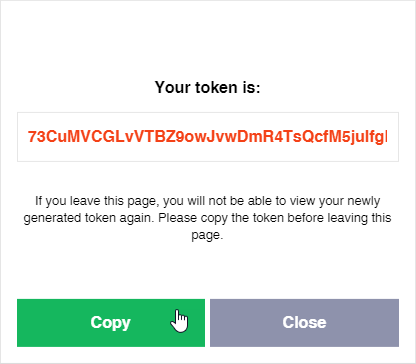
8. Copy the Line token to enter into the ZKtime Net program
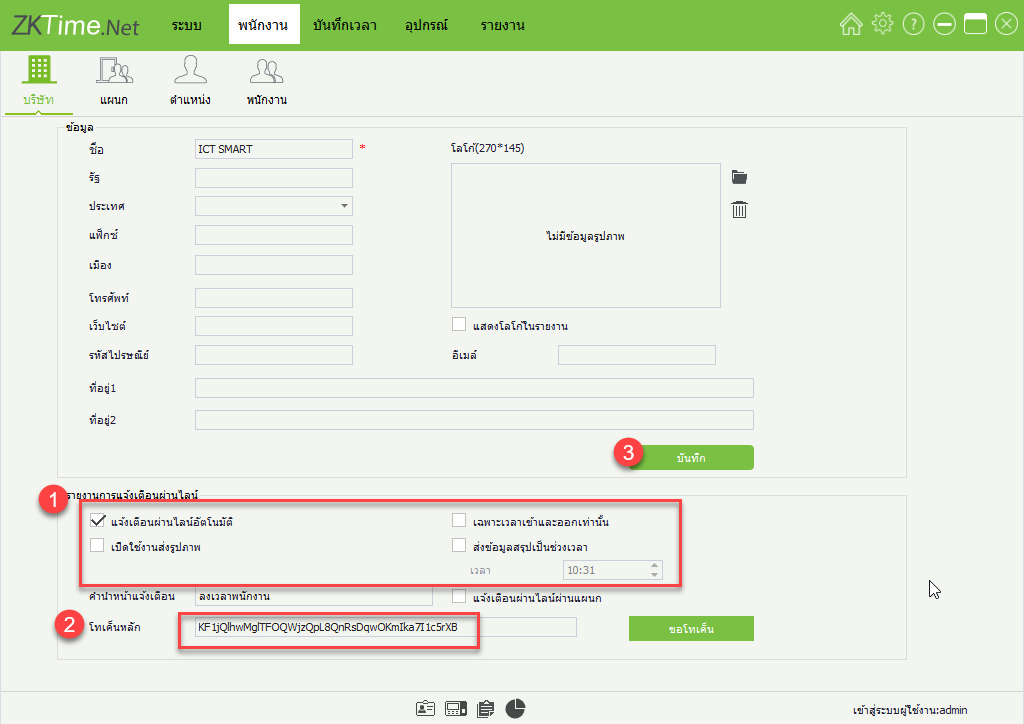
9. Open the ZKtime Net program, go to the menu Employee > Company to enter the Line token
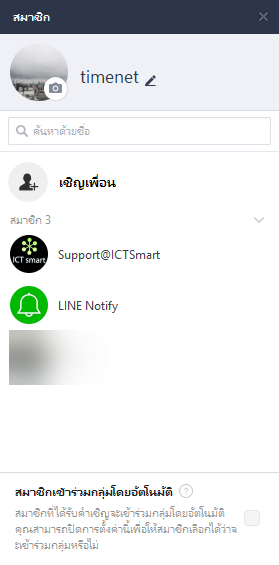
10. Open the Line program, go to the group created and add Line Notify to the group
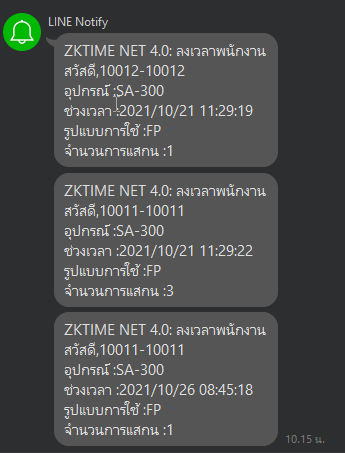
11. Notification screen via Line
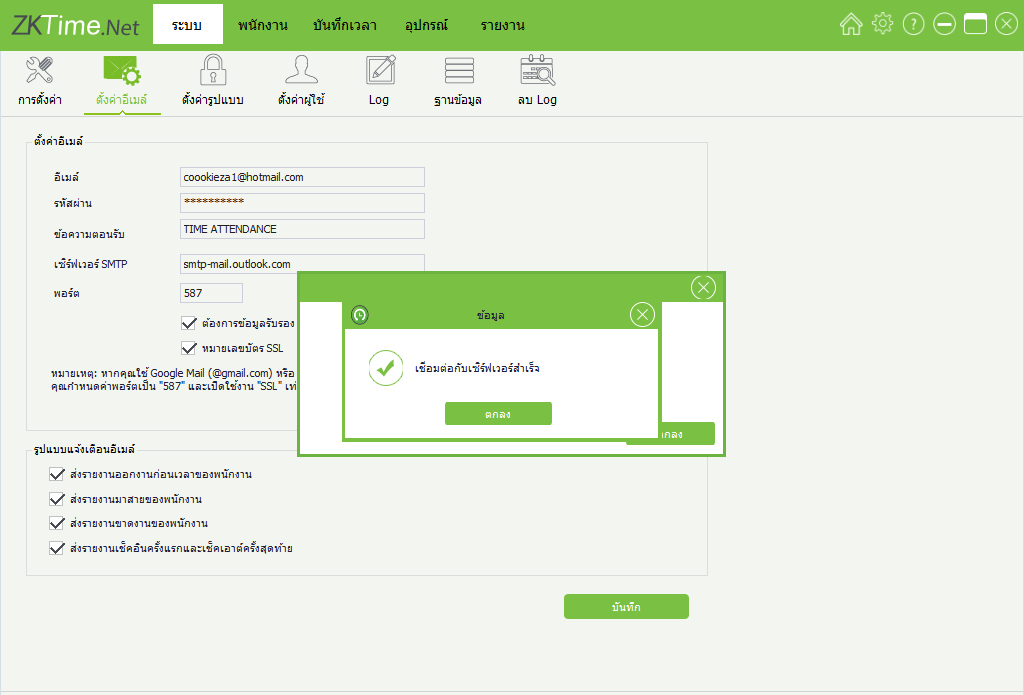
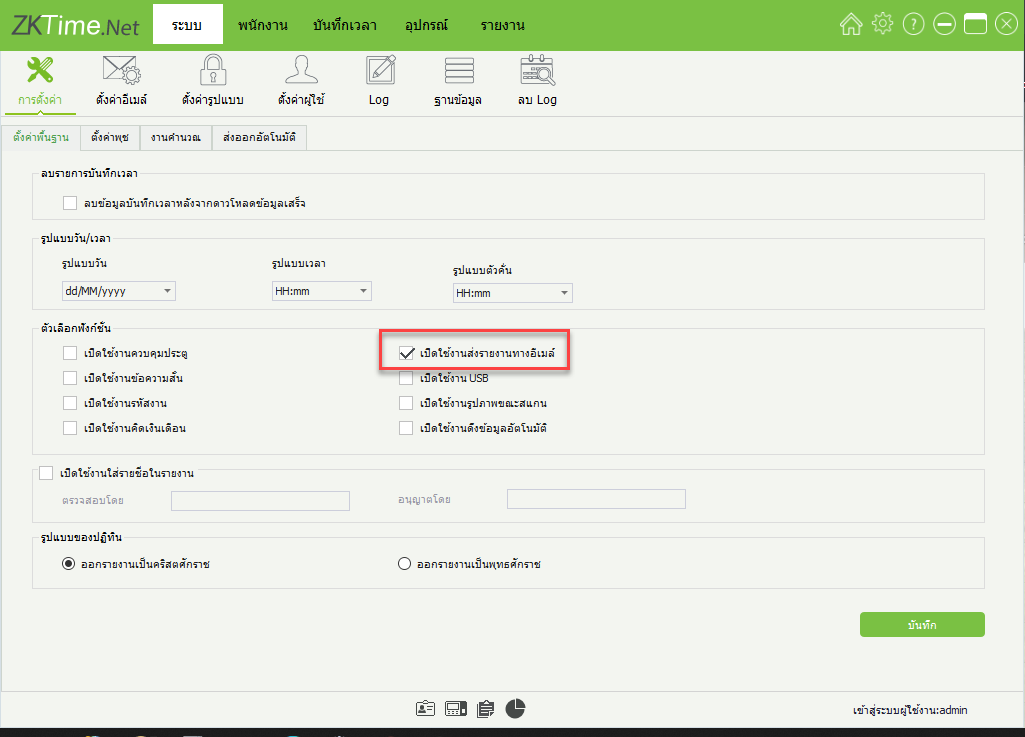
1.Click on the System menu > Enable email report sending
2.Click on the Email Settings menu, enter the email details, password, and click Test Connection
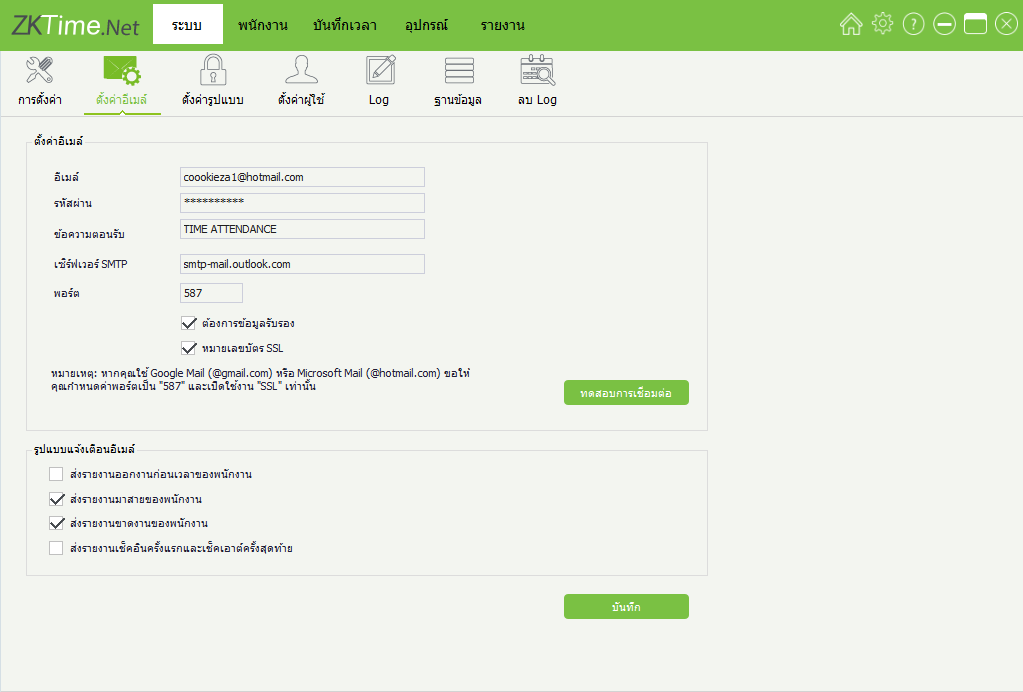
3.Email connection successful